Patch News – June 2026
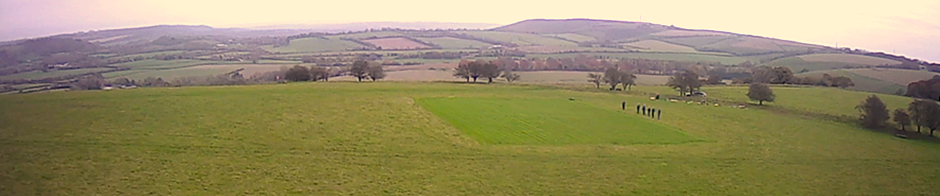
Utterly bonkers! No, not the club members, this time I’m talking about the June weather. As I begin writing this edition of Patch News it’s mid-morning on June 25th and the temperature in the shade is 31 degrees and climbing. We called off our usual Wednesday morning flying session on 24th June as it was just too hot, dangerously so for us oldies, but Friday was a little cooler so a few of us flew. The last Sunday of the month was still hot but much more pleasant because there was a really blustery wind blowing. Utterly bonkers! 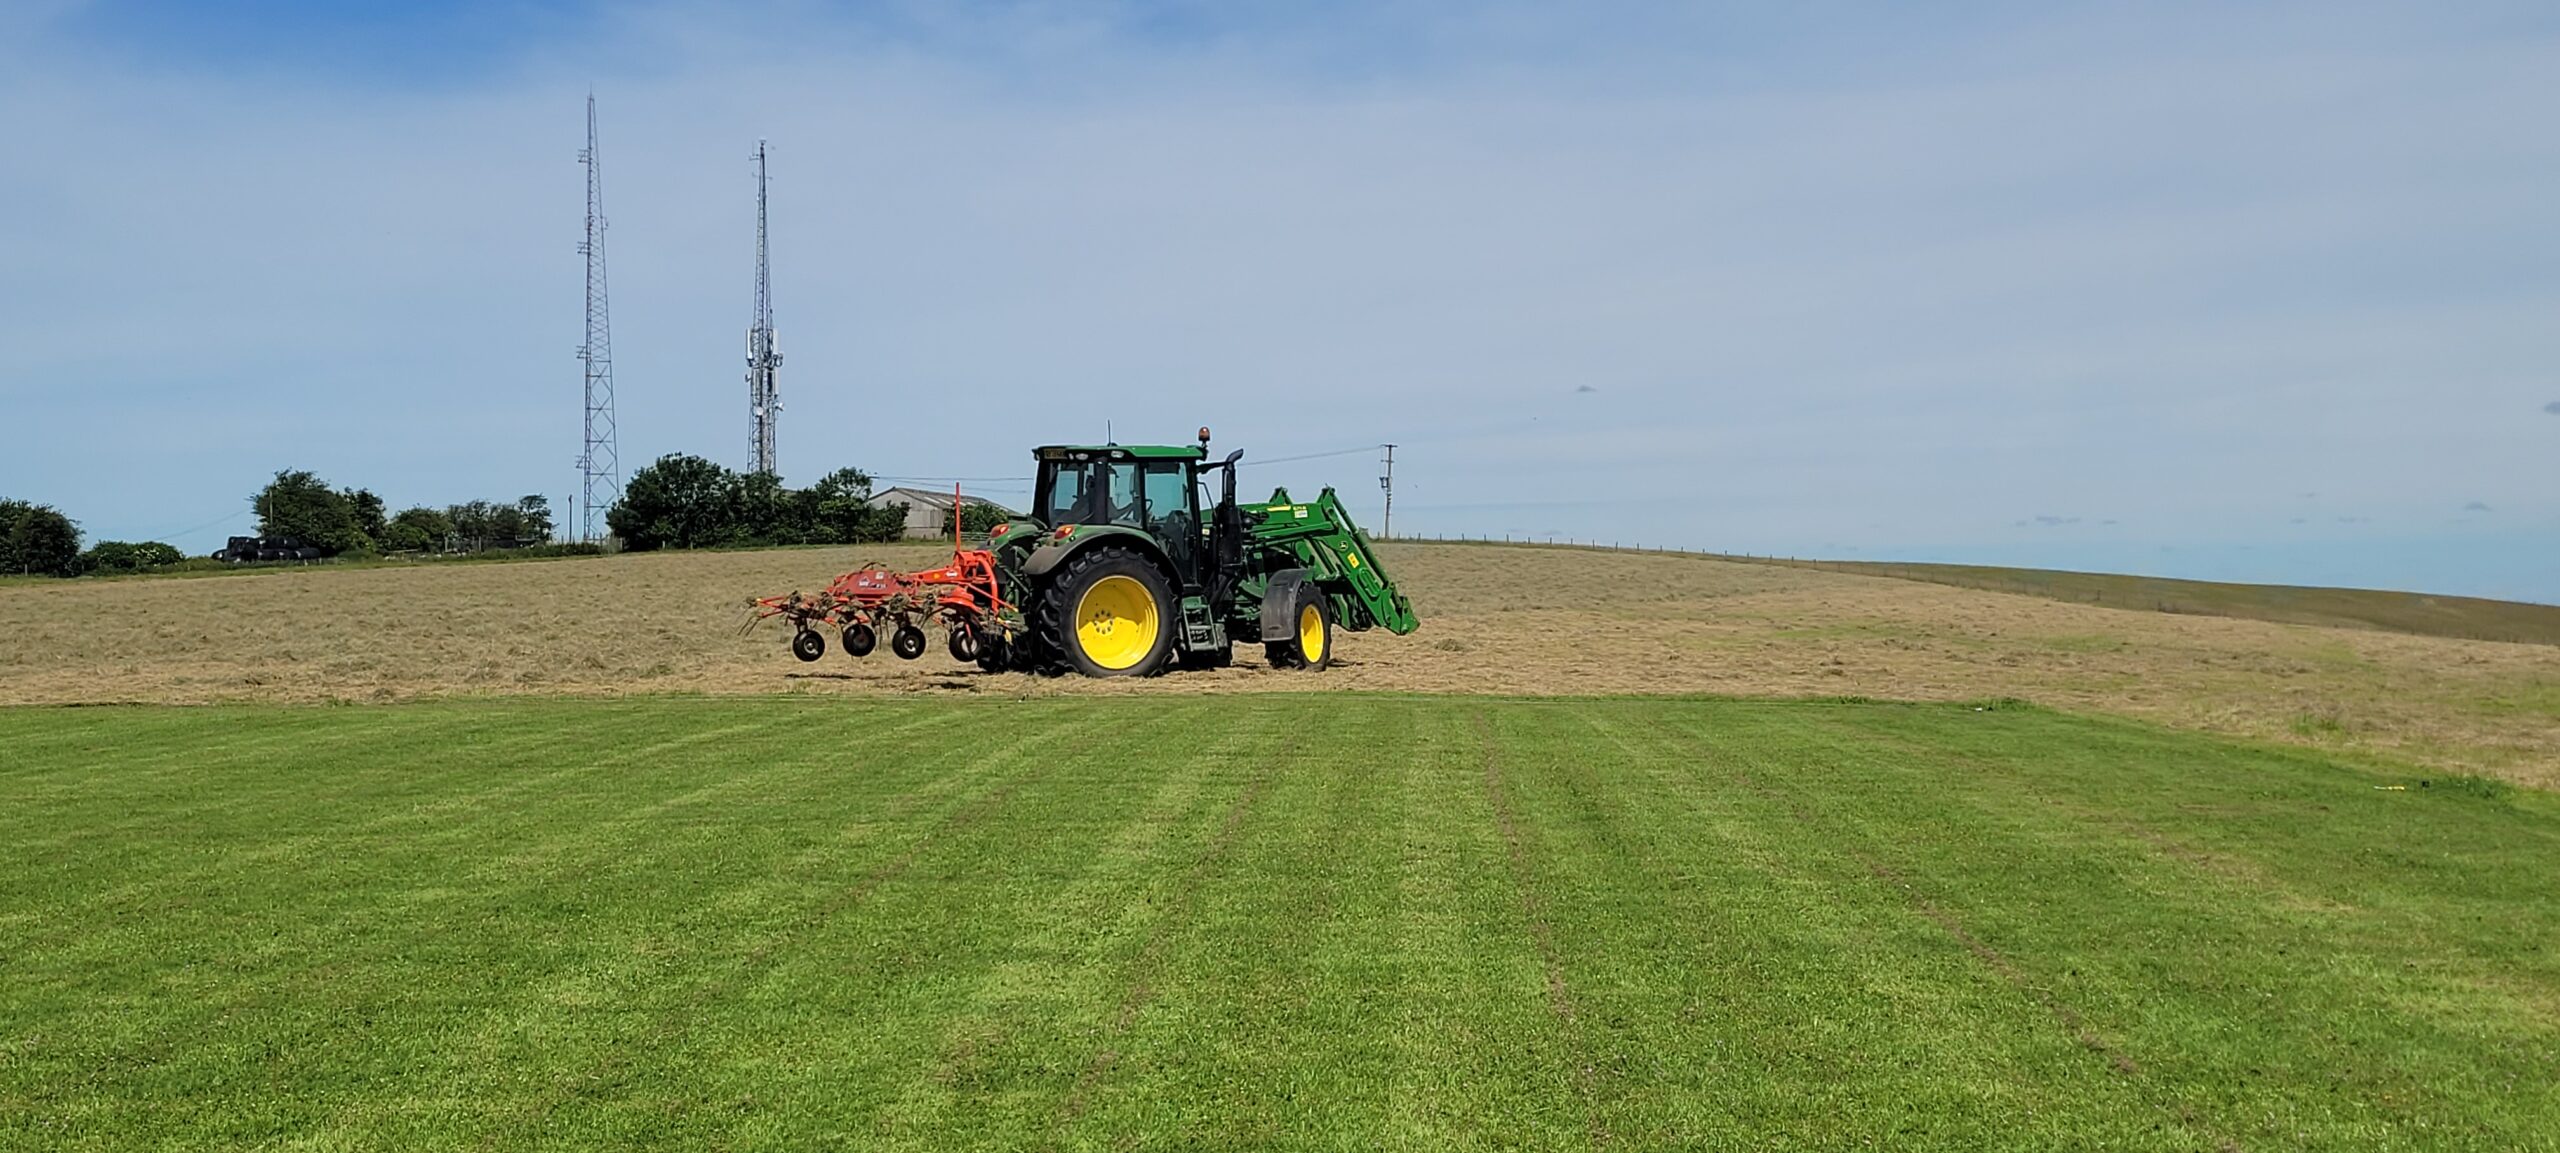 Earlier in the month we had more normal weather so we flew a lot and in the pleasant sunny period before the heatwave hit the farmers cut the whole field (leaving our patch of course, and a 5metre border all around to encourage wildlife) and were able to get the grass turned and then baled before the rain came along. We are fortunate to have a great relationship with our farmers, George, Oliver, and Will of Meonside Farm, (click the link for more information) and they do a lot for the good of the countryside and local people.
 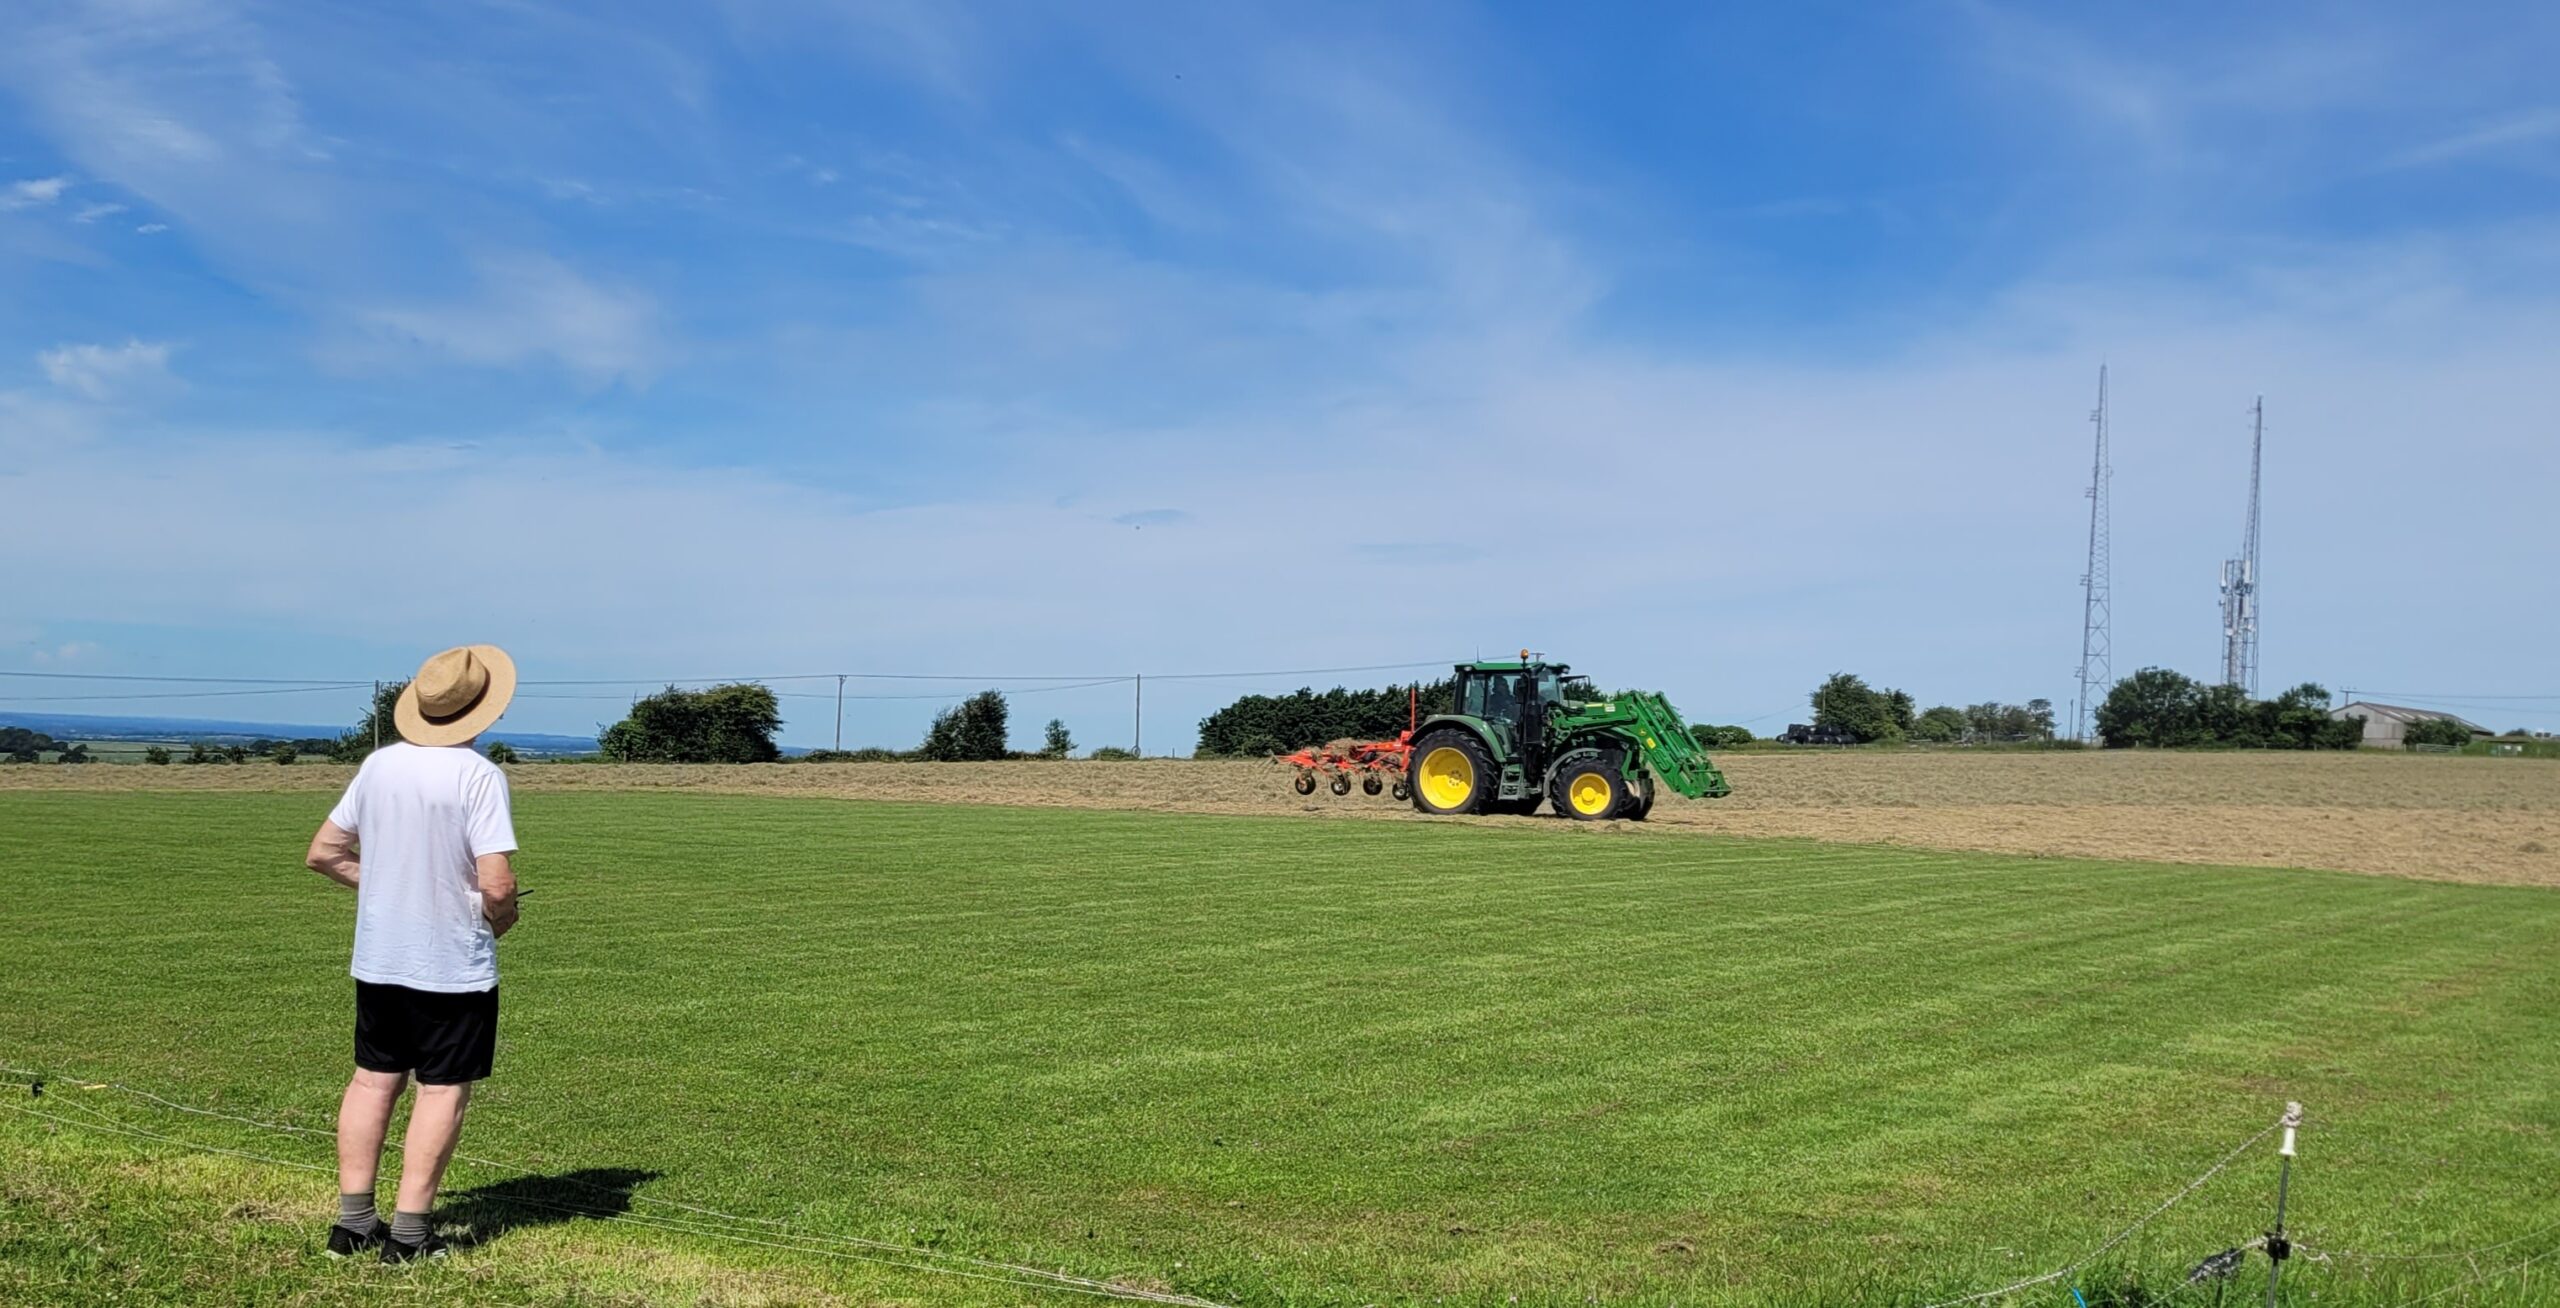 As well as allowing Petersfield Aero Modellers to fly on their land they also have MVSA (Meon Valley Soaring Association) flying slope soarers and the Sky Surfing Club who fly hang gliders and paragliders from Wether Down when the wind direction is suitable.
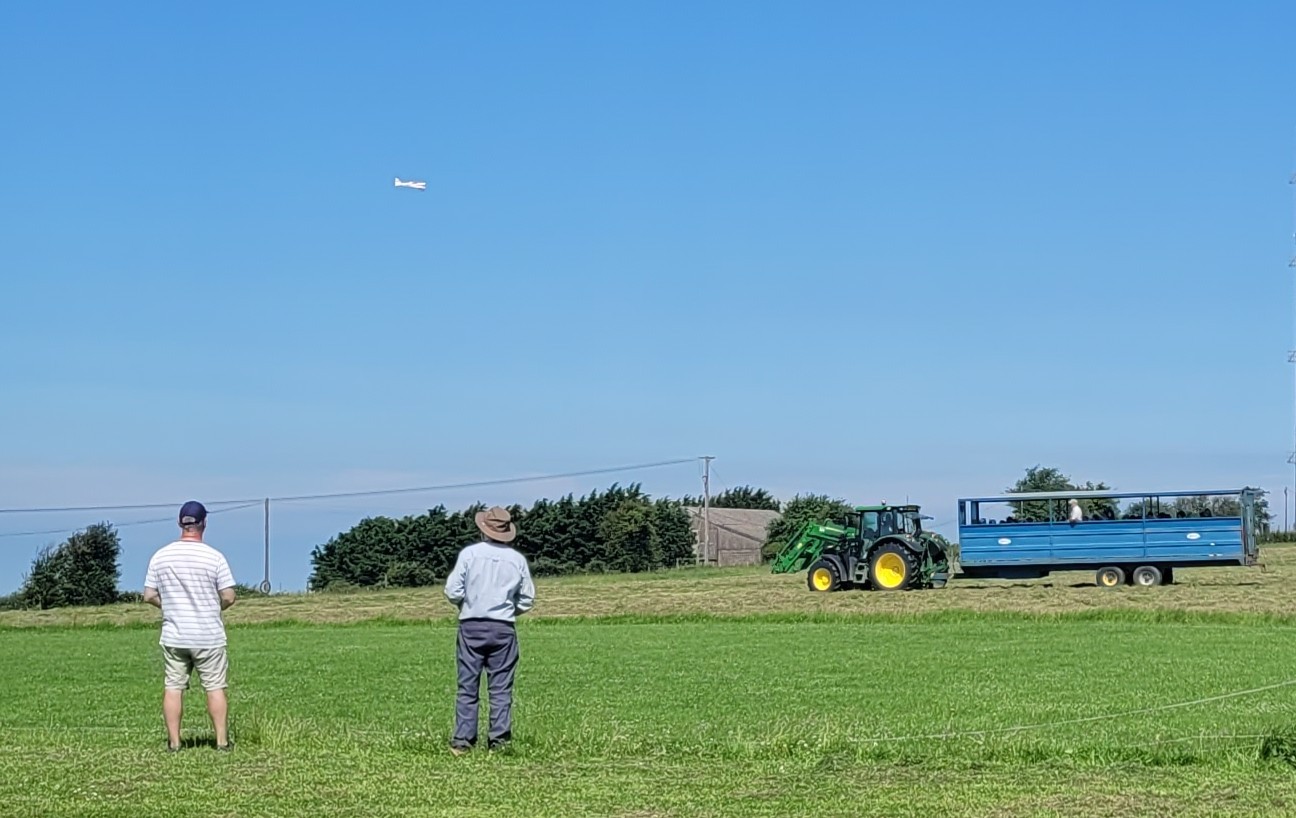 As part of their diversification efforts they do regular educational trips for local school children, exploring the farm in a tractor towed trailer and explaining about the various aspects of farming. The trailer often stops at the top of ‘our’ field where there is a great view over lots of their farmland while George tells the kids all about farming, and then he’ll do a slow drive-by near our patch so they can see a little of our flying. The kids all seem to love it and who knows, we might even gain some young members from it!
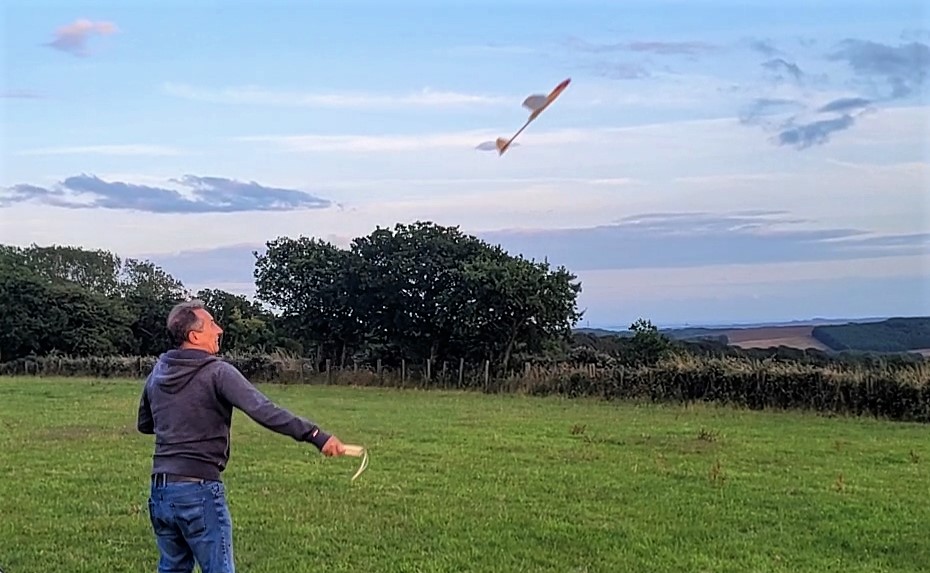
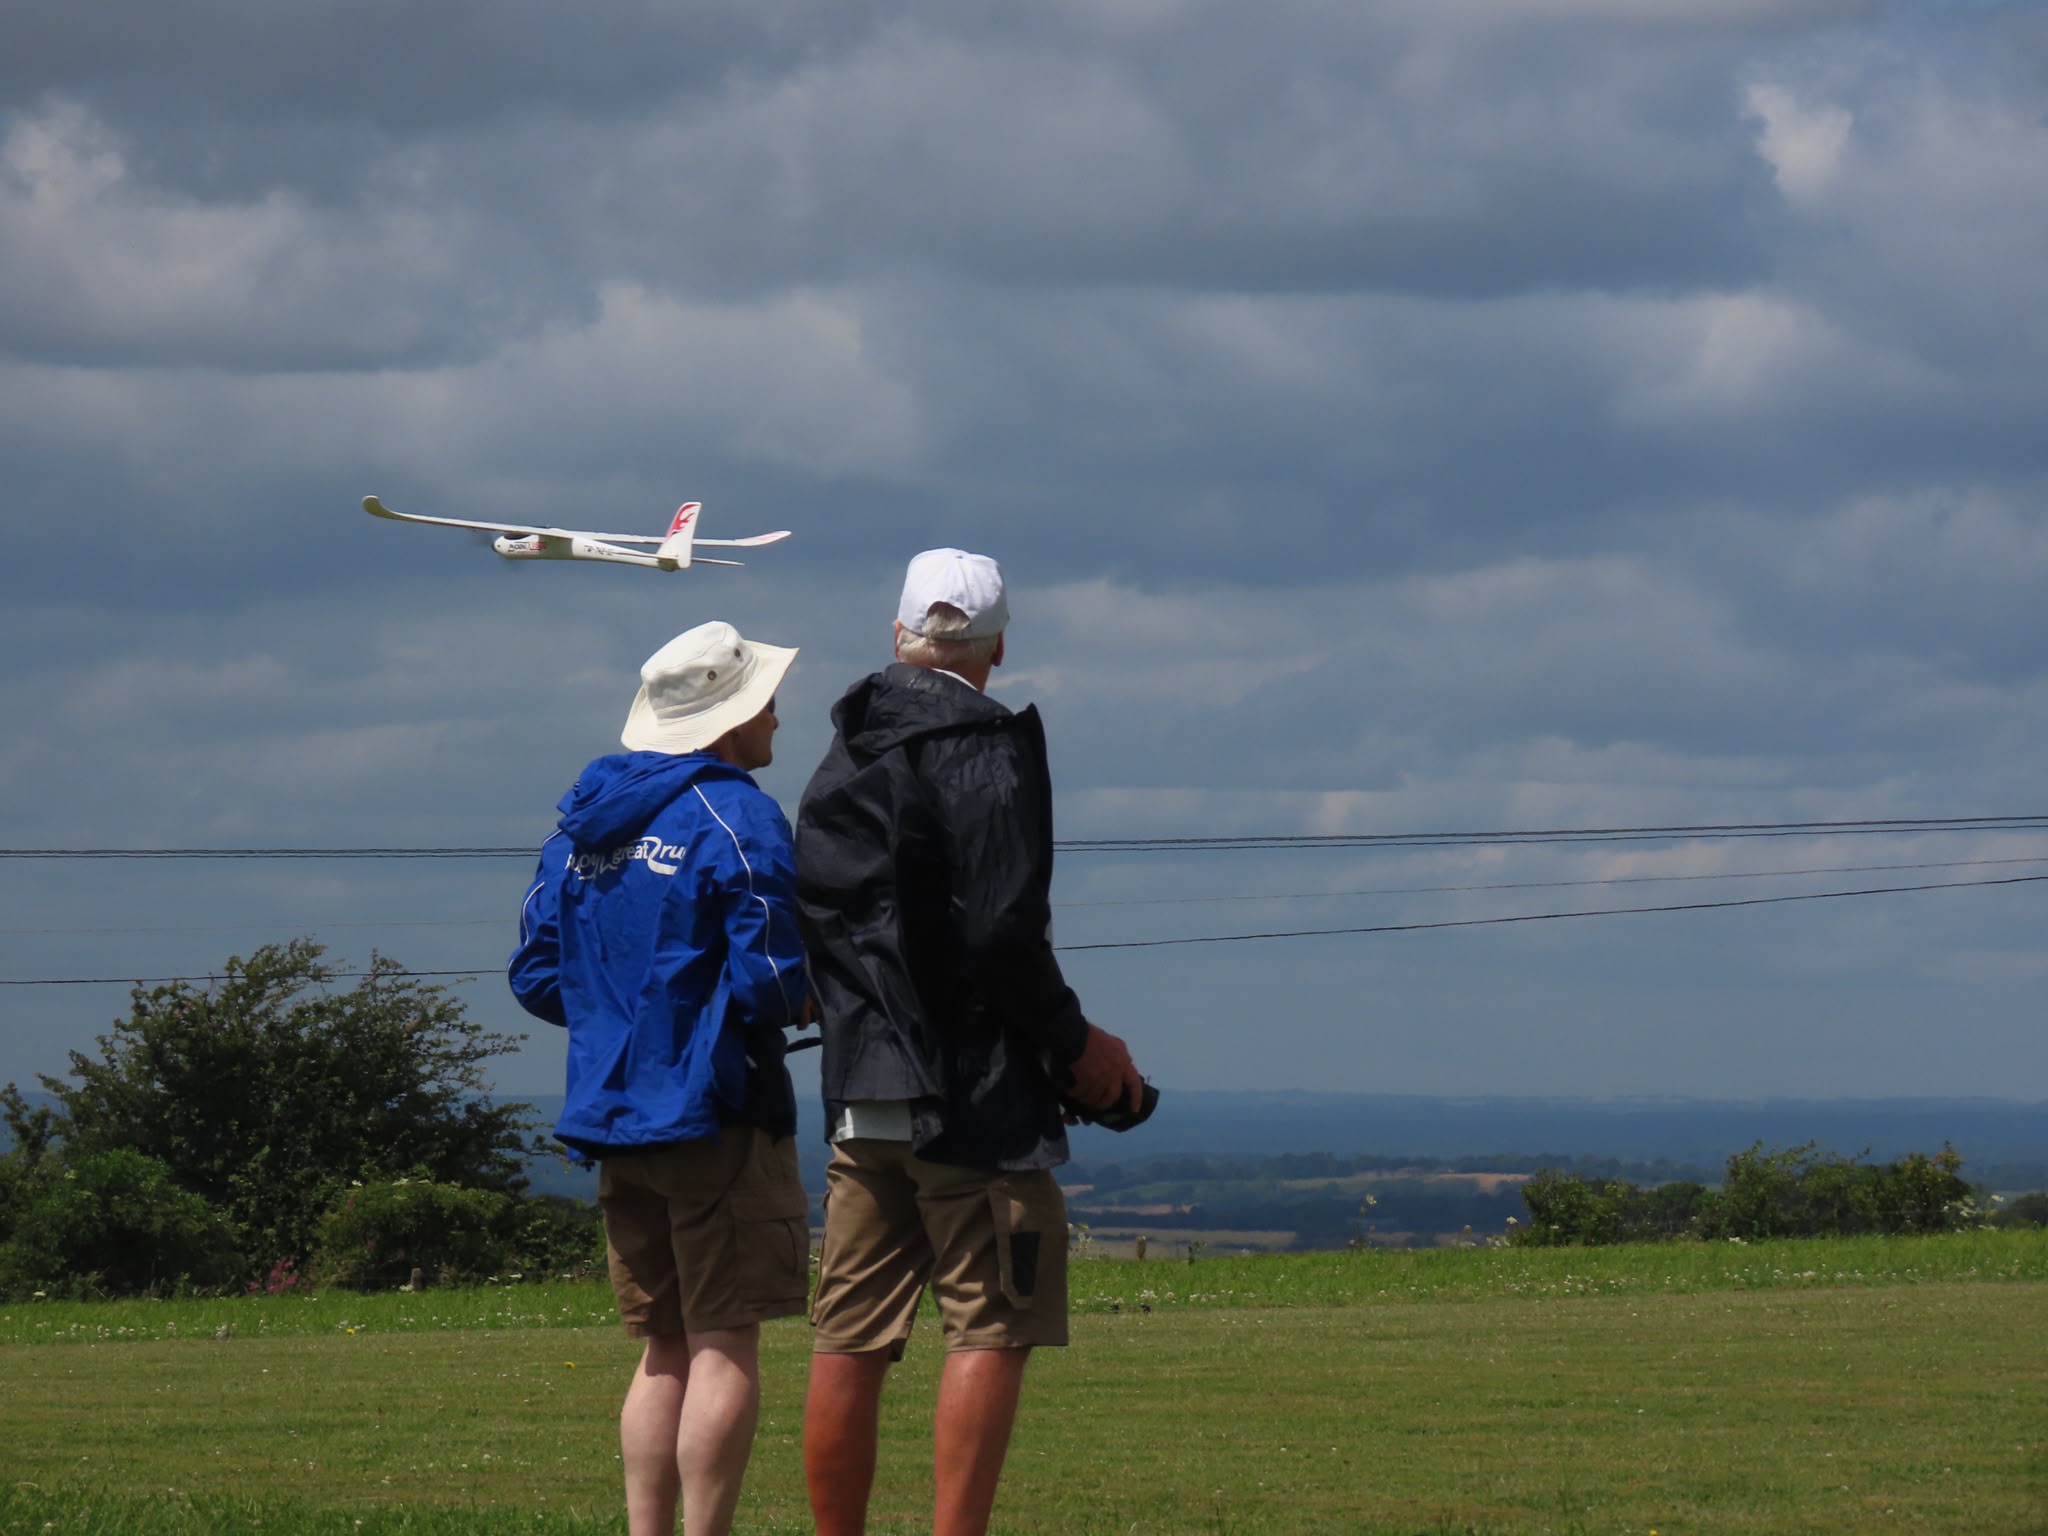
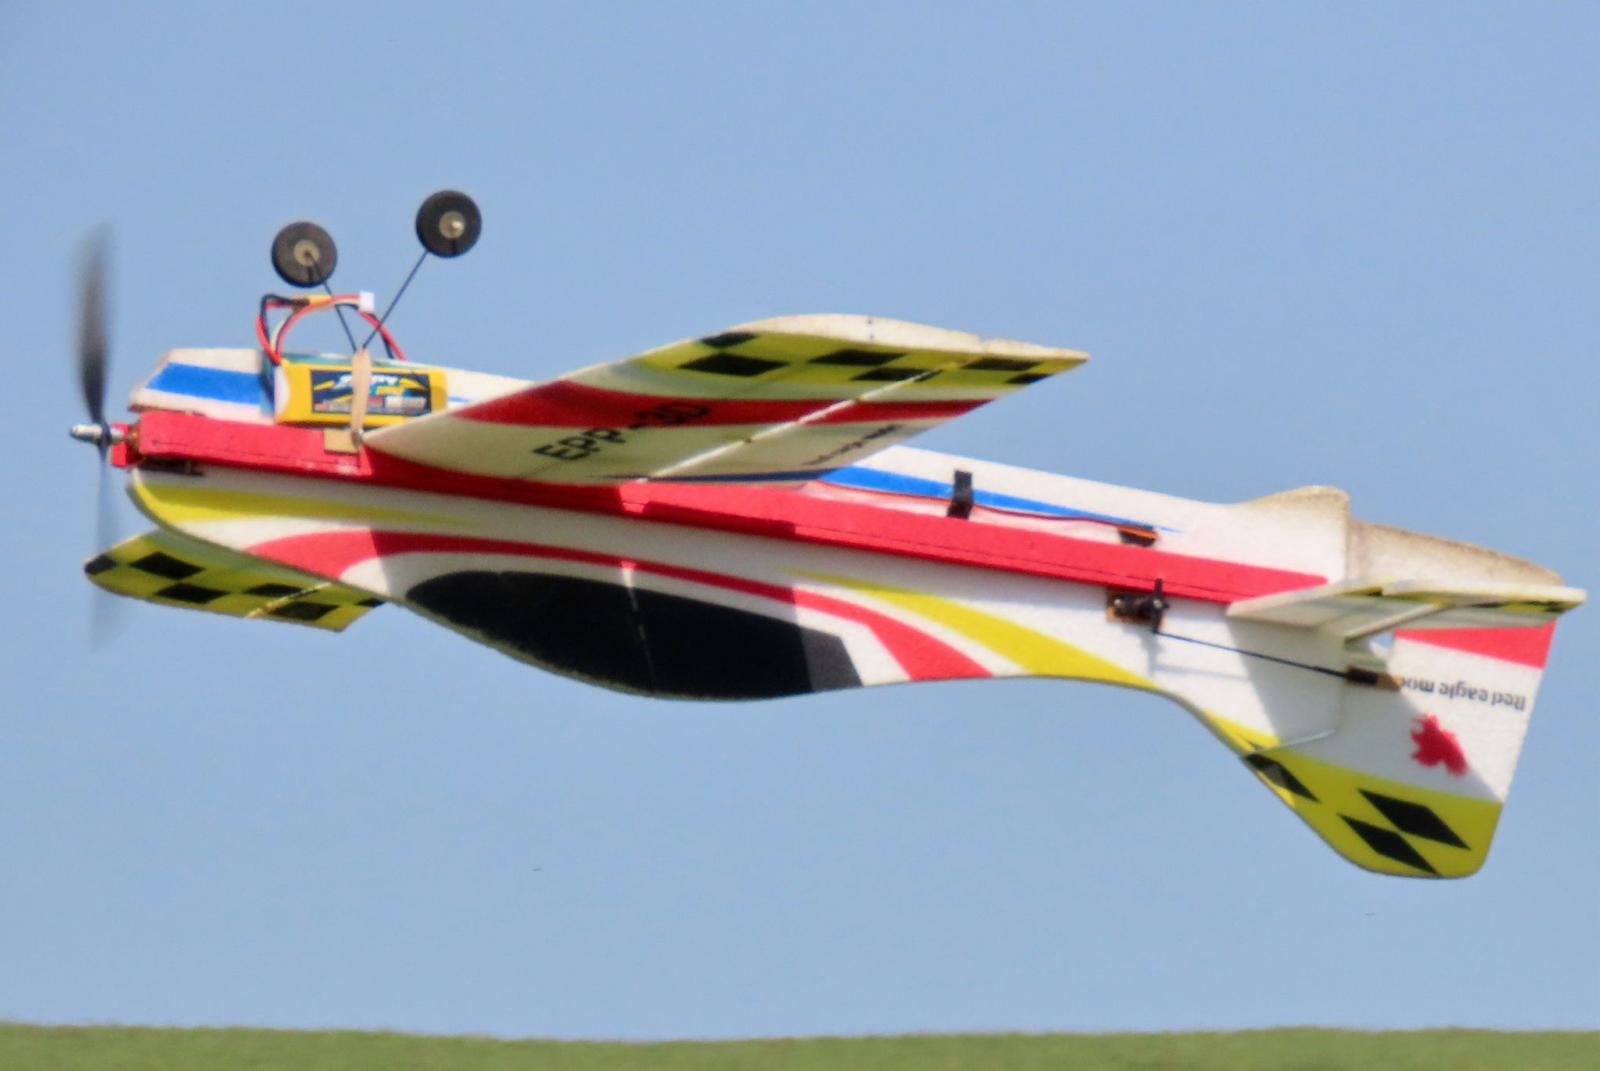
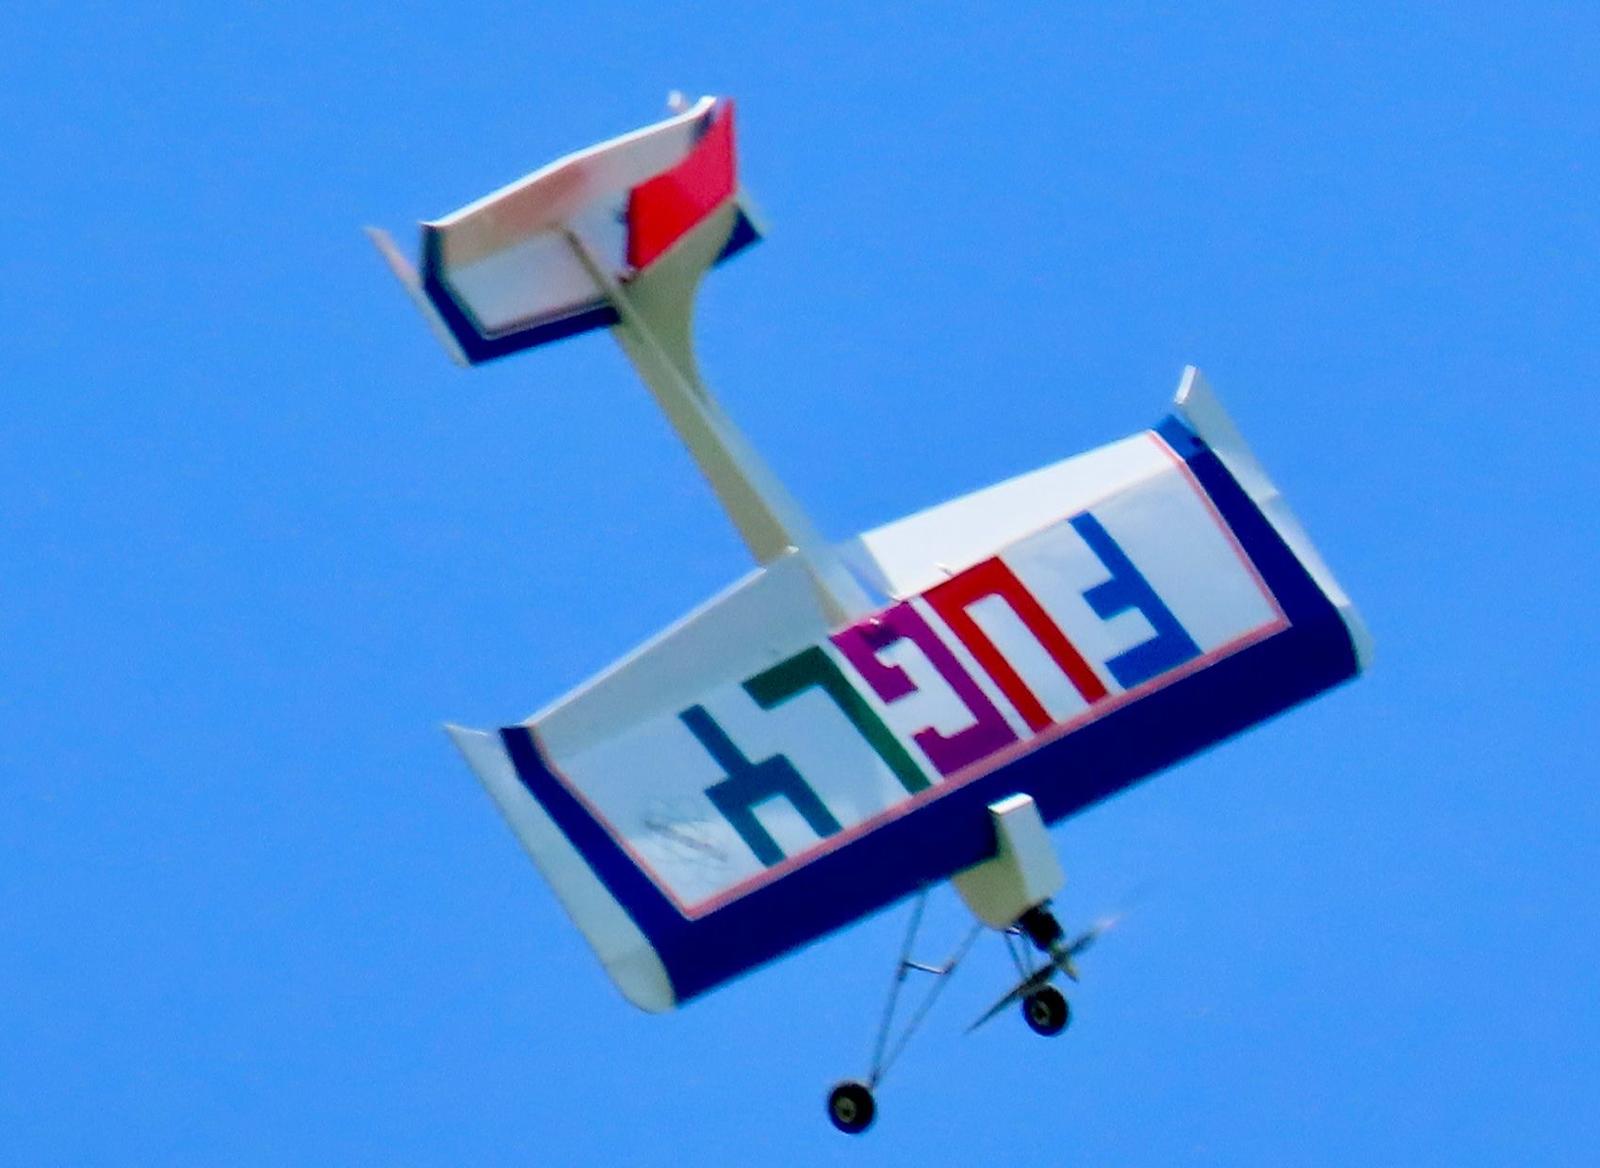
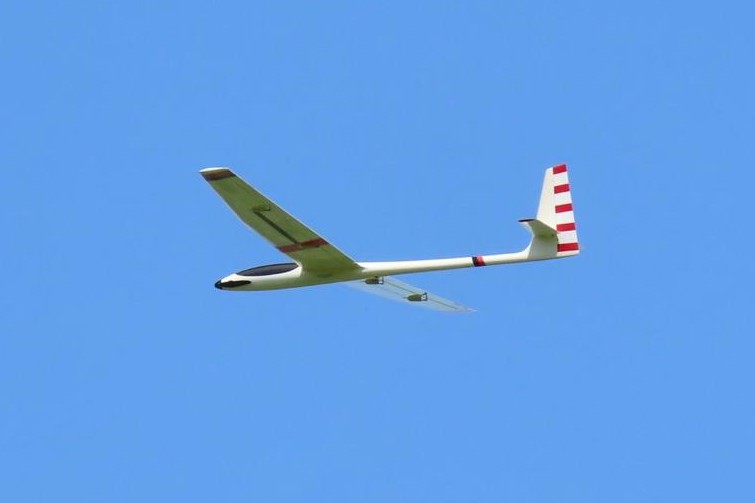
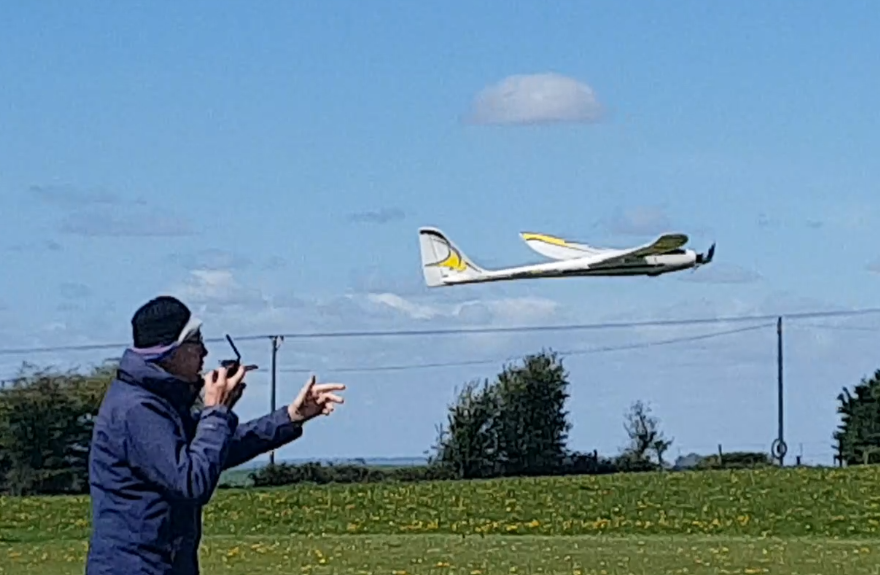
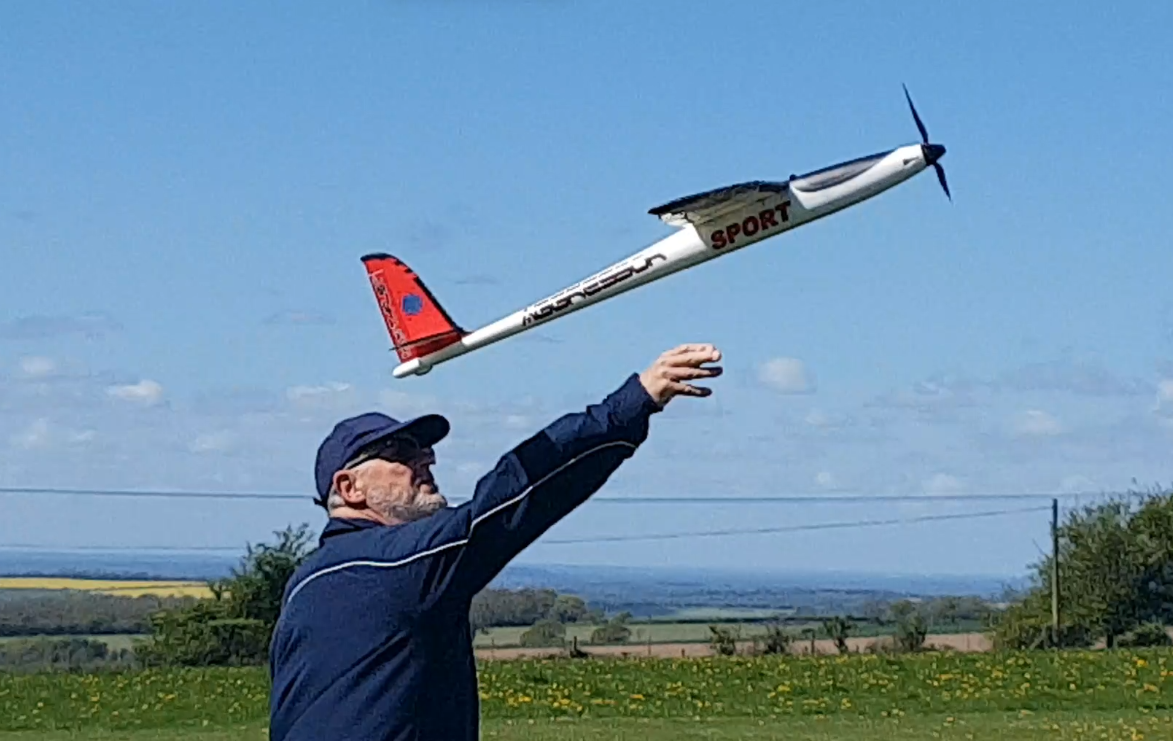
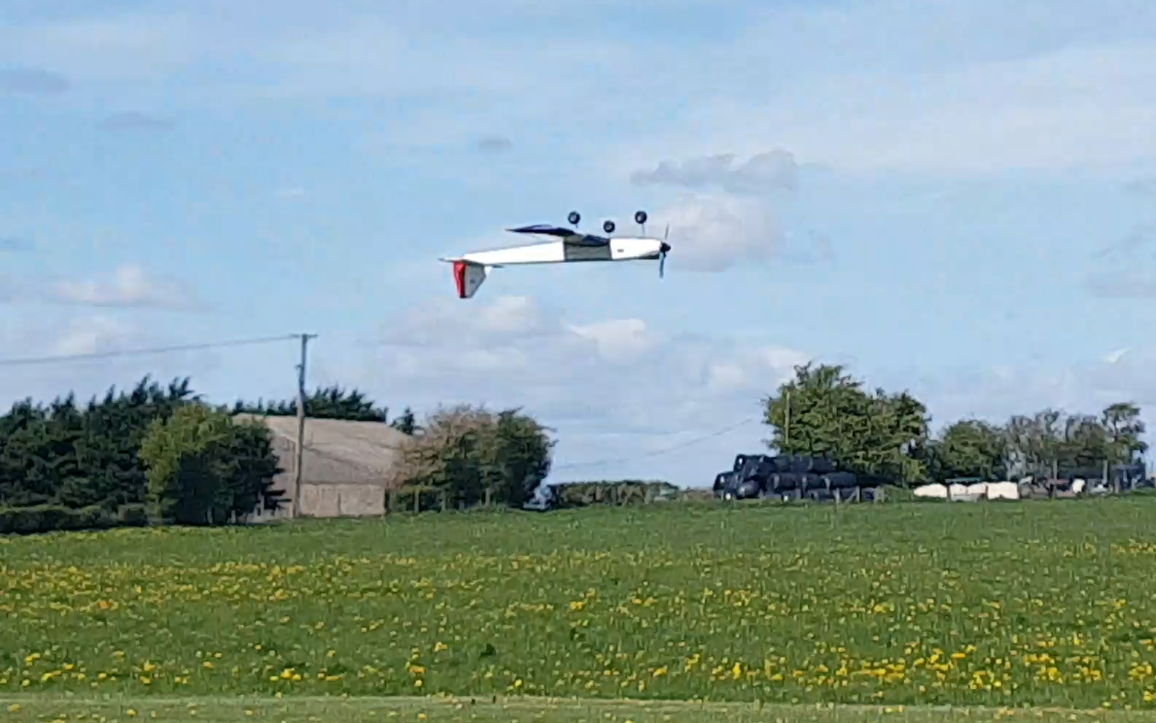
Several new models were flown in June, as well as some older planes that we hadn’t seen for a while, including Catapult King with his Wingnetic and his Sunbird electric glider.
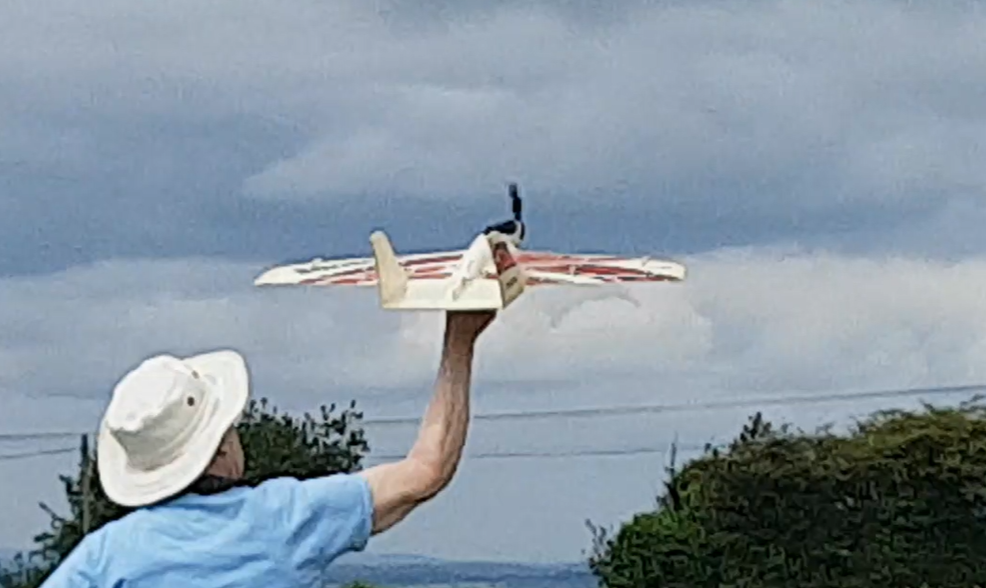 Lots of PAM members had Wingnetics several years ago so it was good to see one in the air again. I’ve still got one of those tucked away somewhere, I really must dig it out and fly it!
Both Catapult’s Wingnetic and Sunbird can be seen flying in this month’s video.
Lots of PAM members had Wingnetics several years ago so it was good to see one in the air again. I’ve still got one of those tucked away somewhere, I really must dig it out and fly it!
Both Catapult’s Wingnetic and Sunbird can be seen flying in this month’s video.
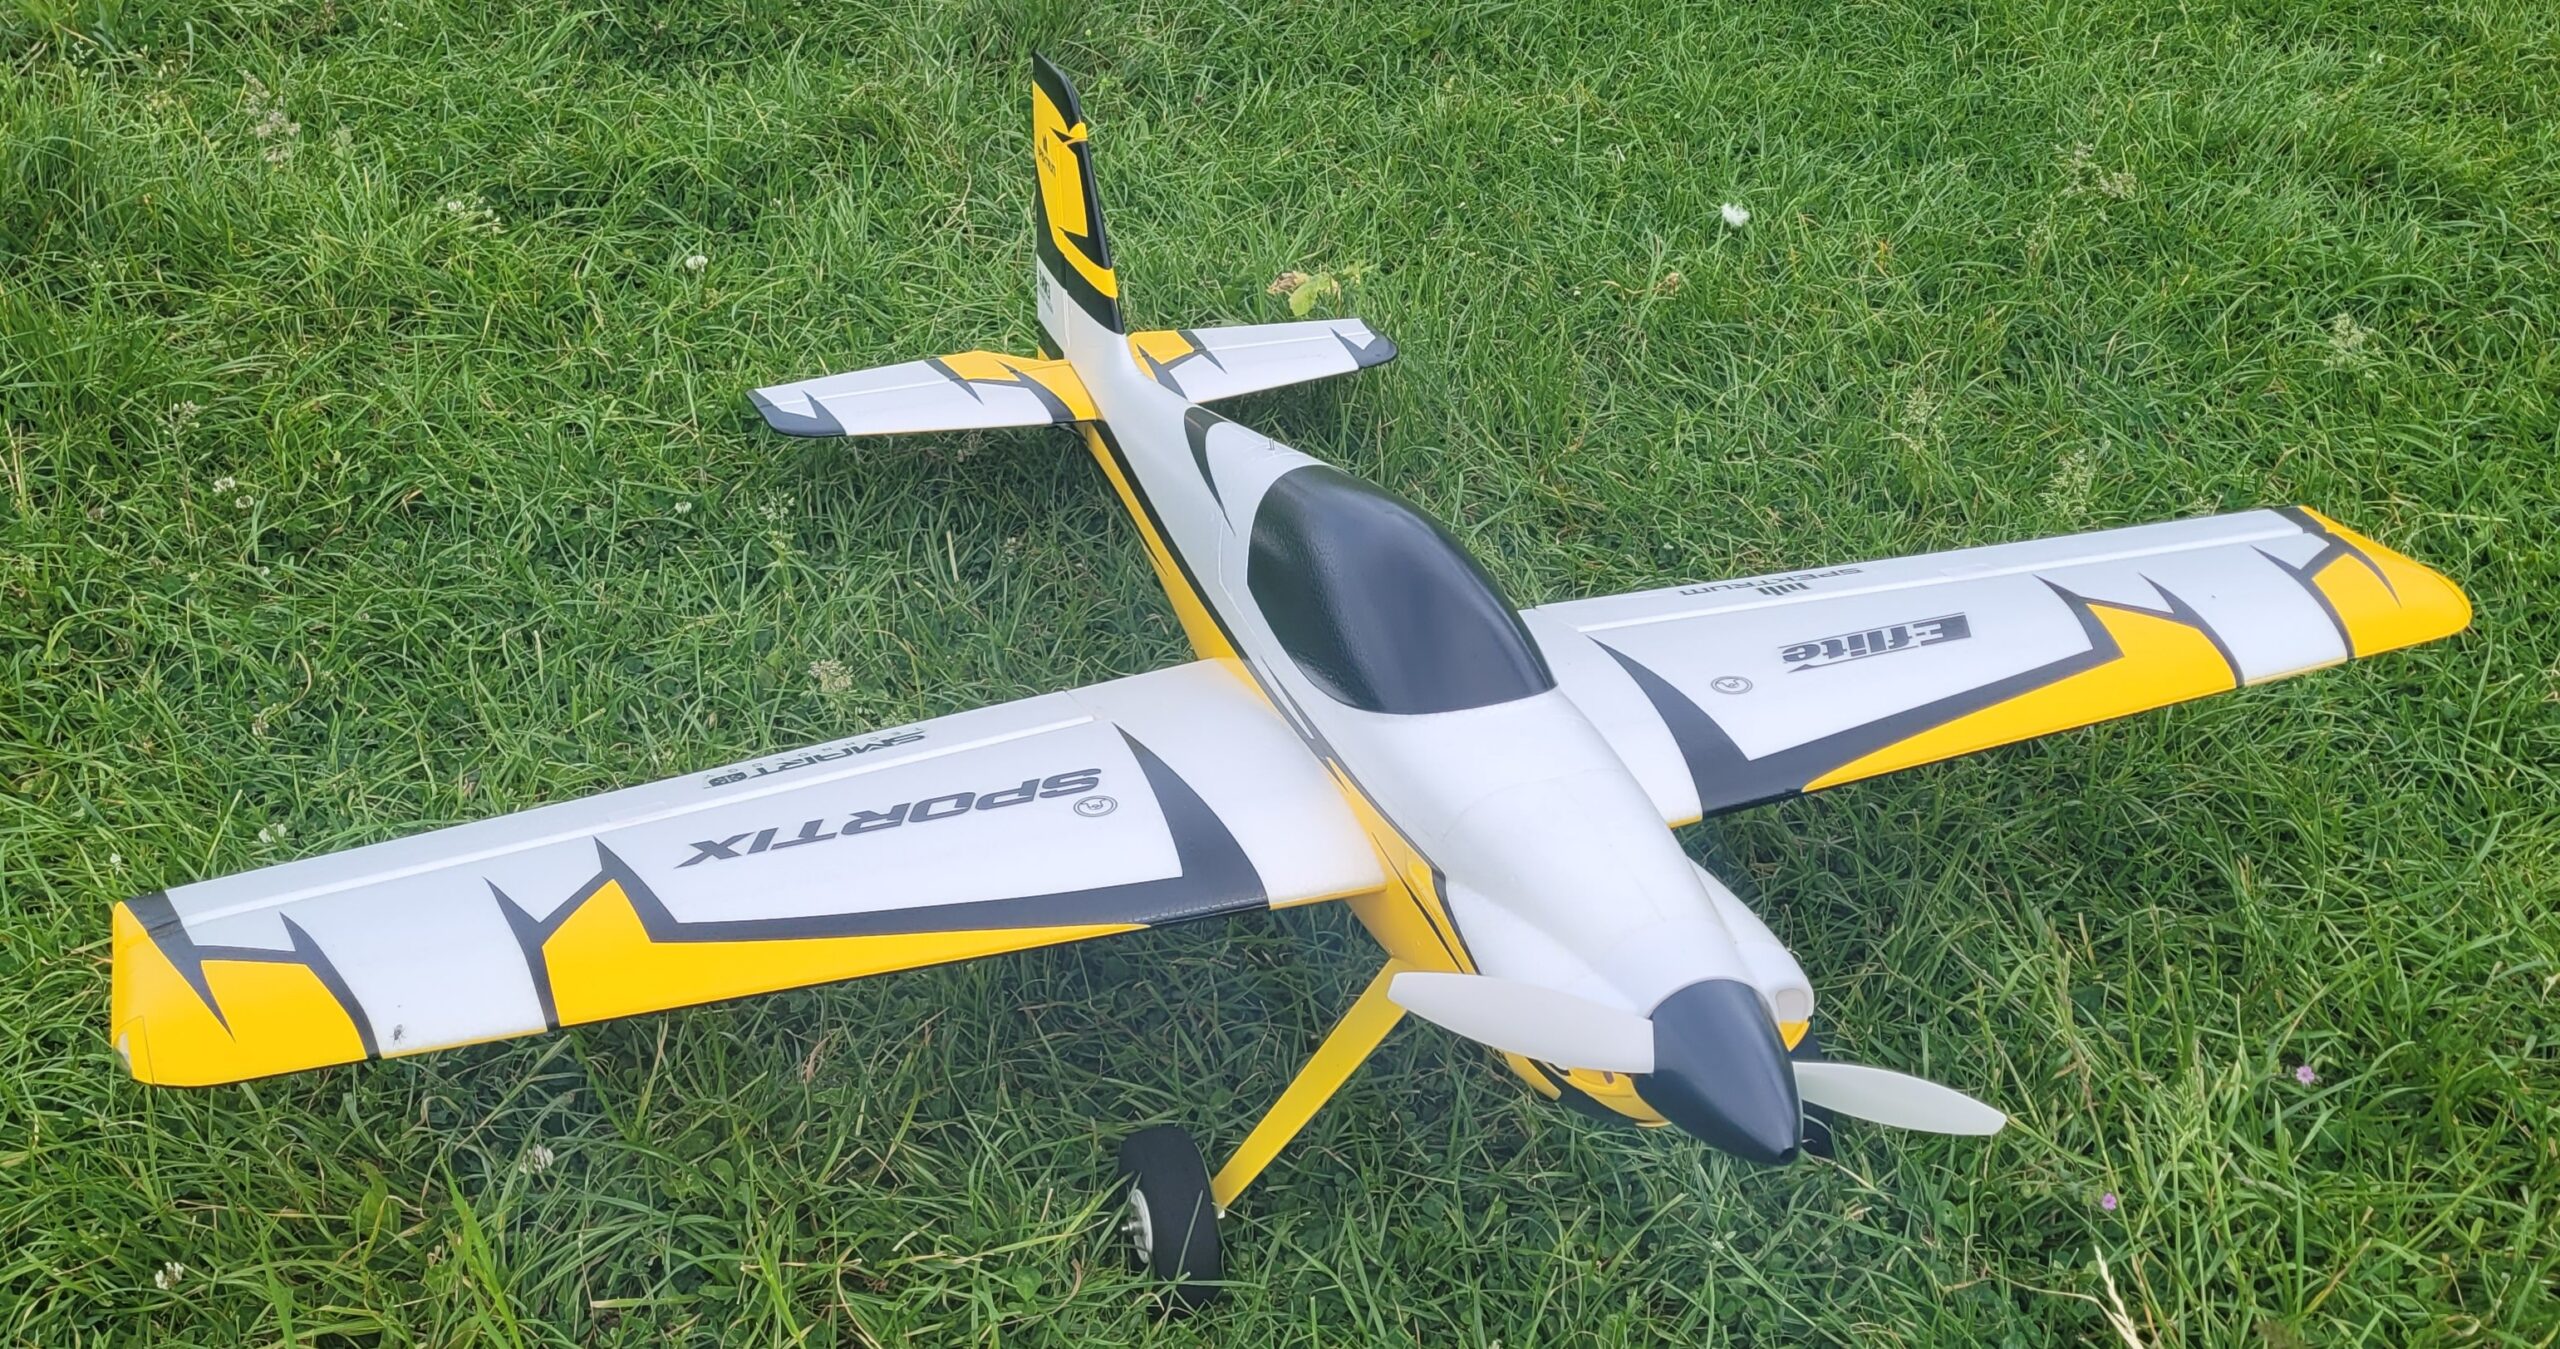
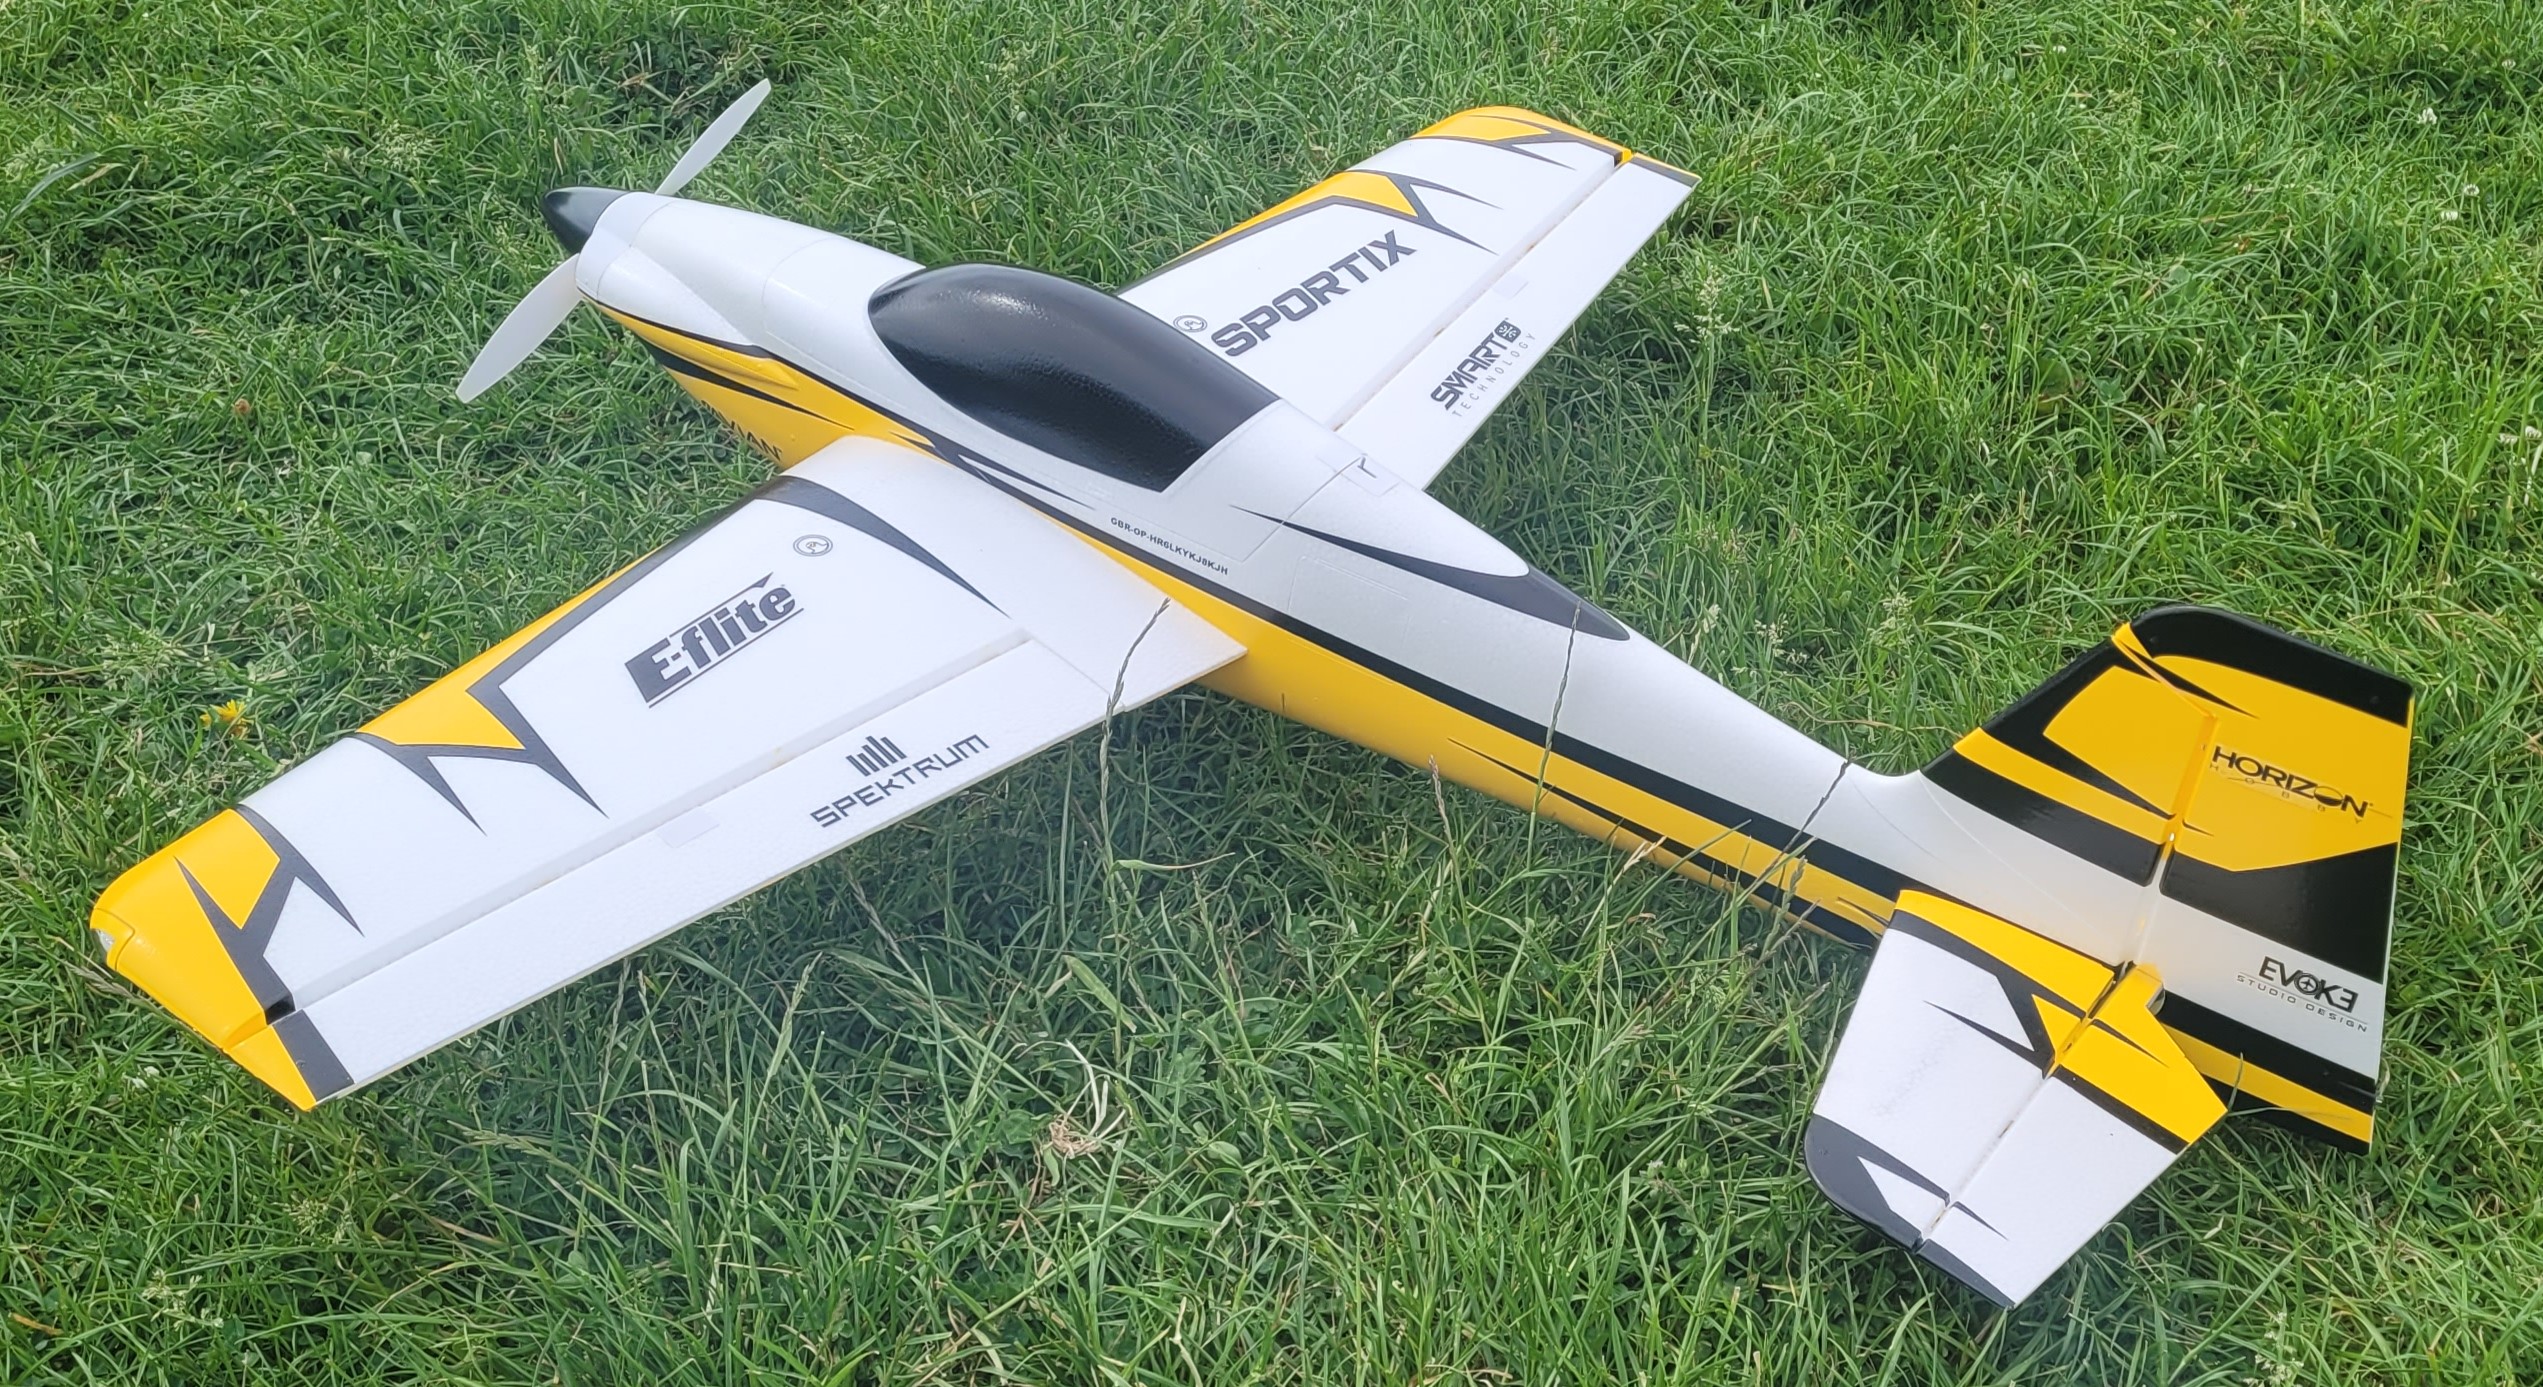
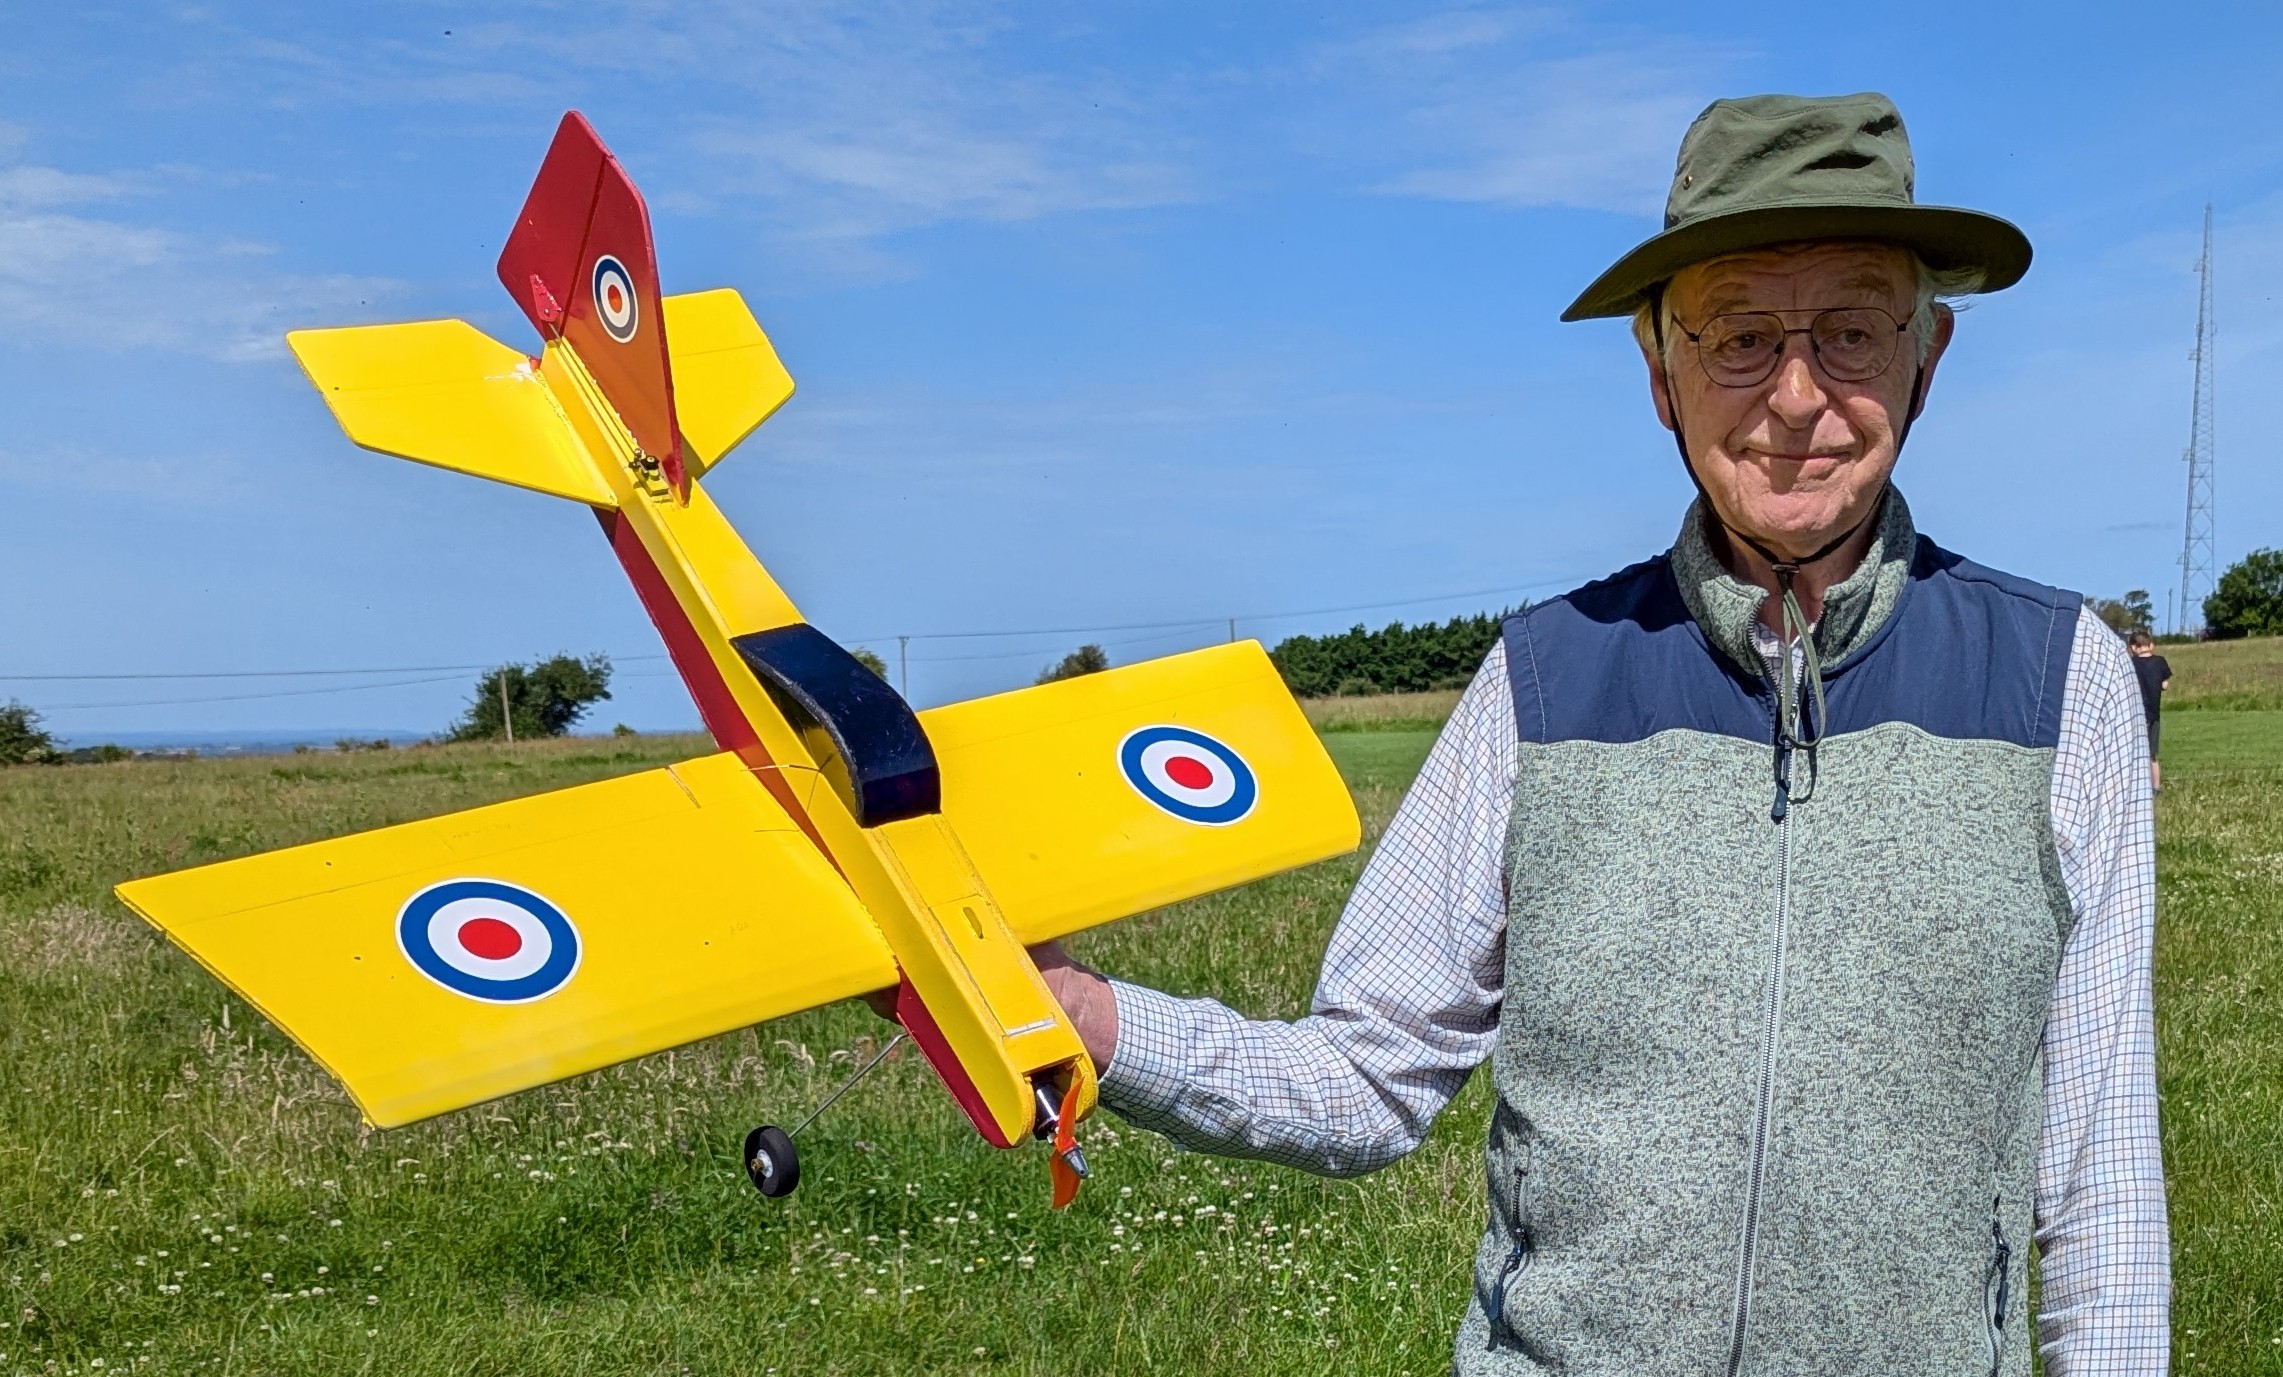
First up of the genuinely new models was MacFly with his rather lovely E-flite Sportix.
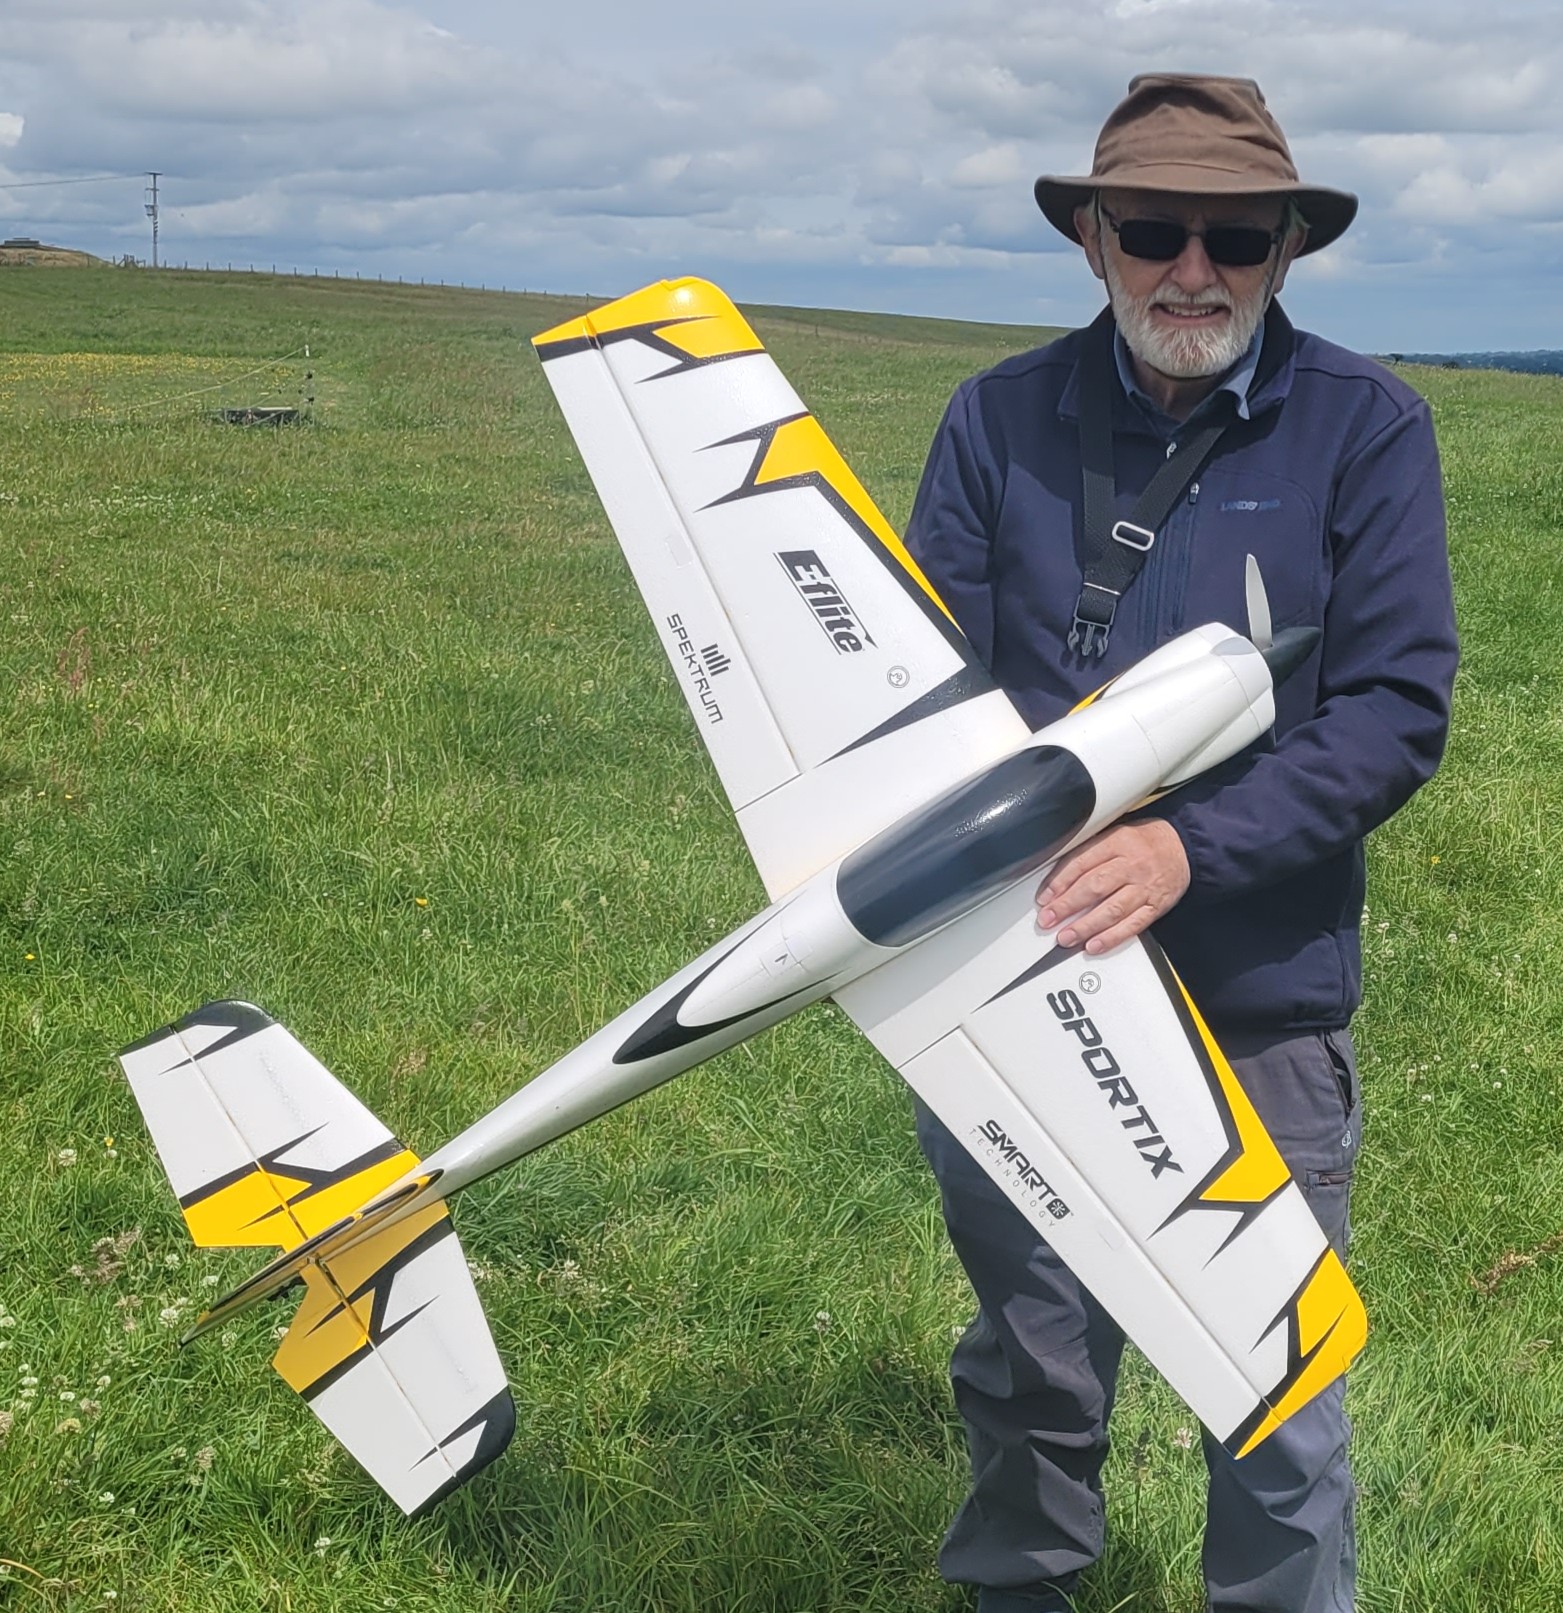 The Sportix was a new one to me and I must say I rather like it. Here’s what the Wheelspin Models website says about it: The E-flite Sportix 1.1m PNP (EFL10775) is a modern sport aeroplane designed to be the ideal next step after a trainer and a no‑hassle everyday aerobat for experienced pilots. With a 1100 mm wingspan, it remains compact for transport and storage yet large enough for excellent visibility and confident handling in typical flying conditions. A factory‑installed brushless power system, four digital metal‑geared servos and a Spektrum Avian 45A Smart Lite ESC deliver precise control and strong performance on both 3S and 4S LiPo batteries. Assembly is fast and straightforward thanks to a snap‑plus‑bolt design requiring no glue or special tools. A two‑piece wing with hands‑free servo connections simplifies field setup, while the top‑mounted hatch offers easy battery access. Functional LED navigation lights enhance visibility and orientation, and durable aluminium landing gear with wheel pants completes the clean, modern look. MacFly got a good deal on his PNP E-flite Sportix from Wheelspin Models and everything went together as it should, with no problems.
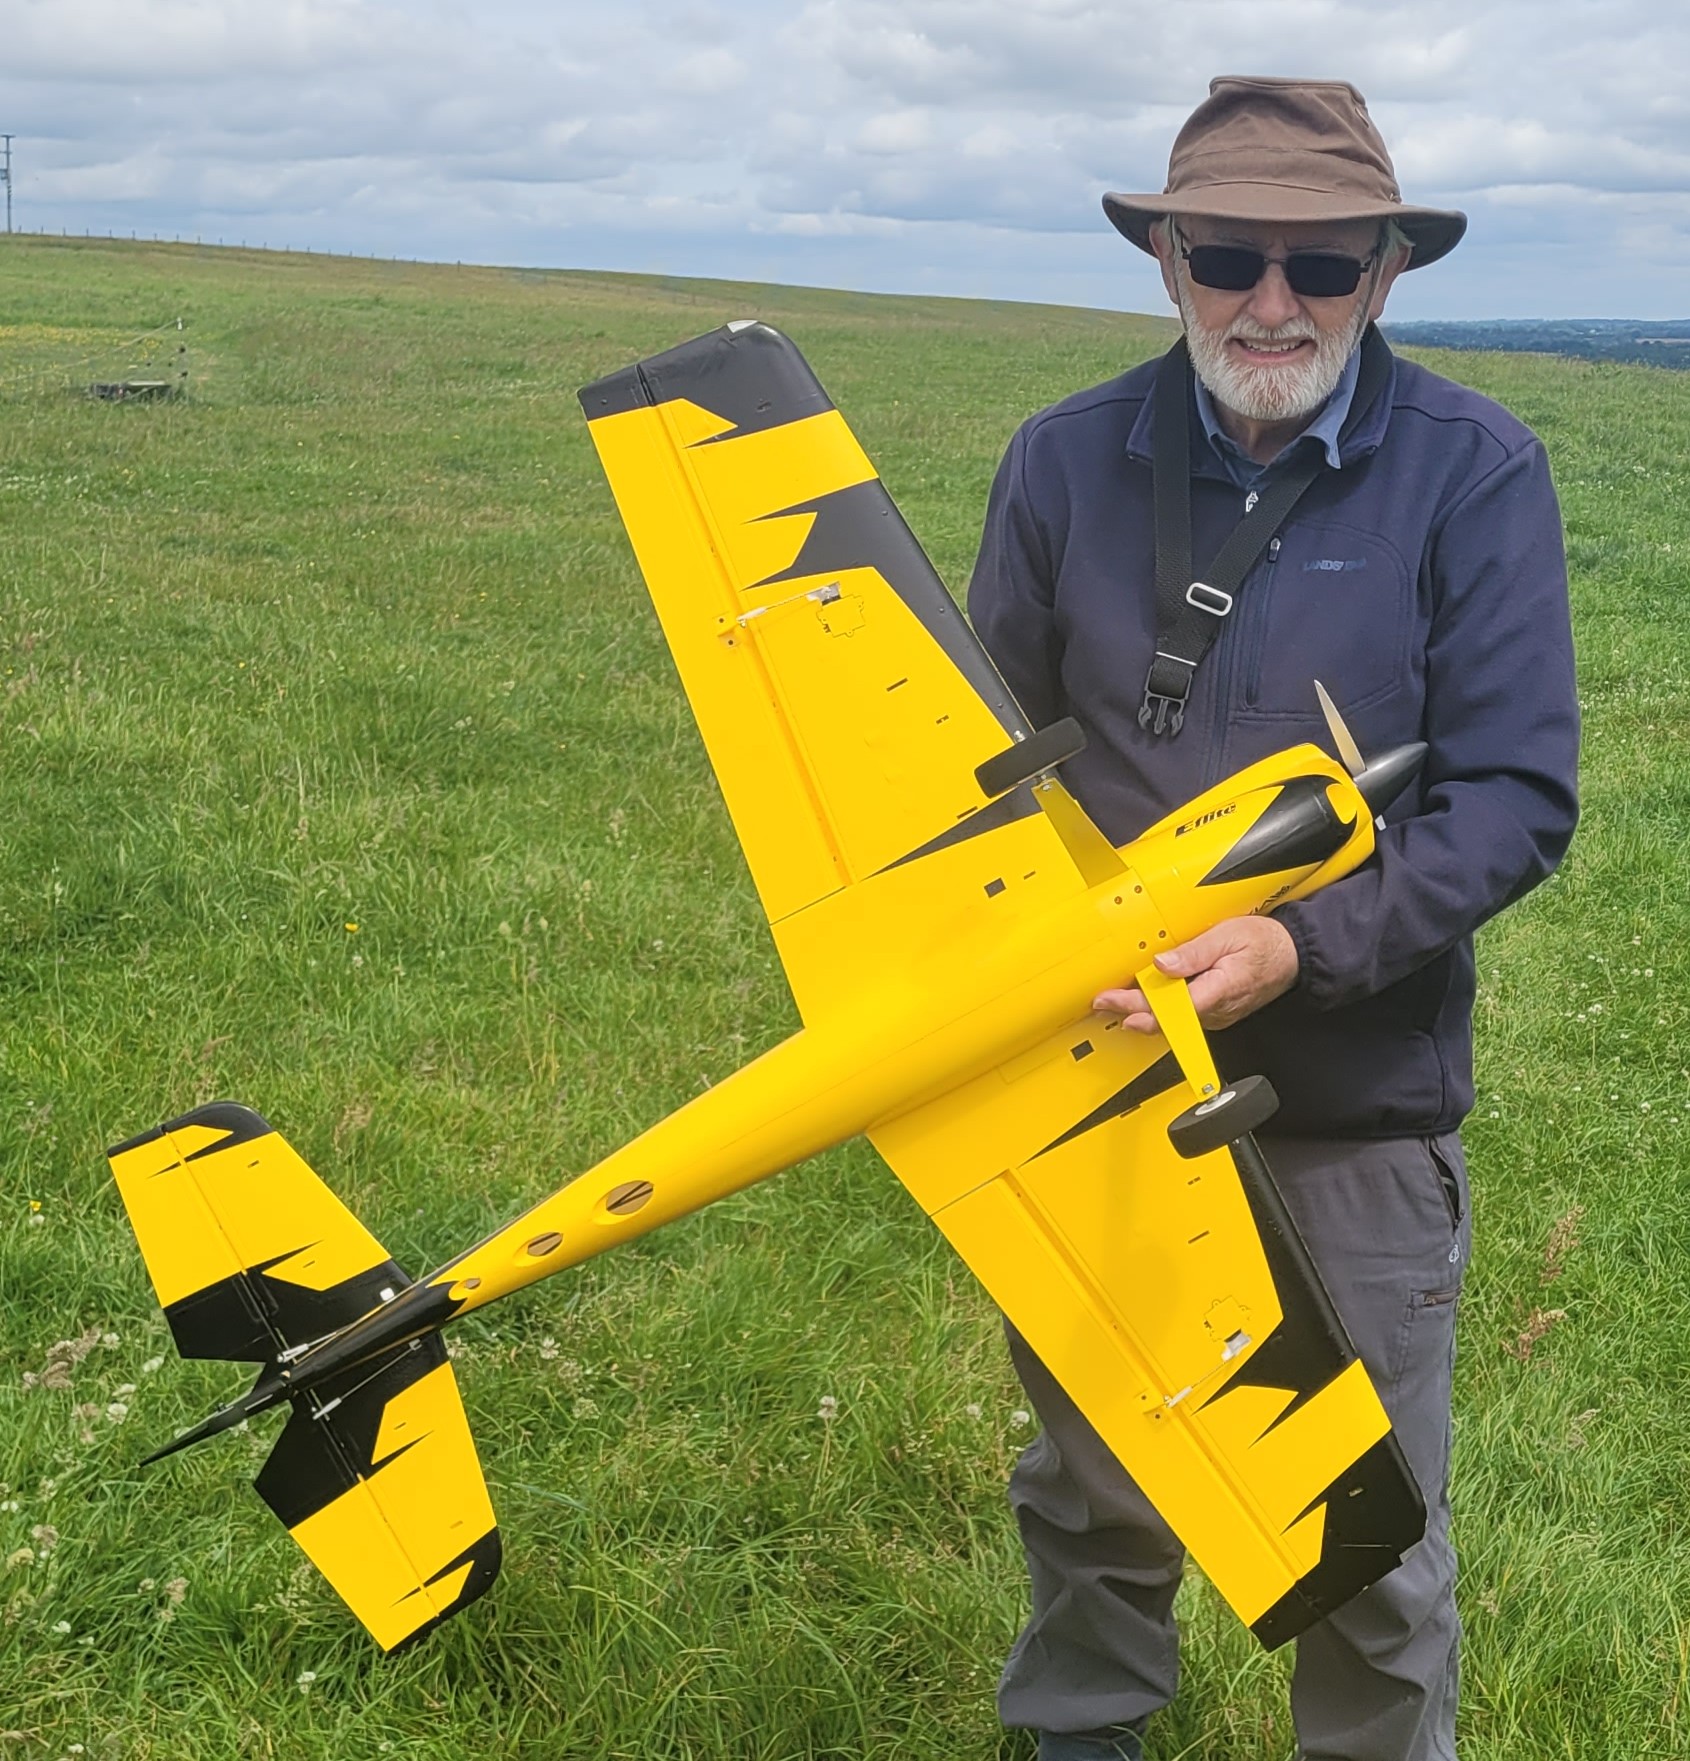 The only change he made was to ditch the spats and fit larger wheels that are more suited to our grass patch. I did the trimming flight which went perfectly with virtually no trim changes required so MacFly has been happily getting used to flying the Sportix himself.
 The plane flies beautifully but MacFly has had one problem, I’ll let him explain: After the first morning of flying, I tried to set up the brake on the motor to lessen the chance to damage the prop on take-off and landing, when tipping forward. But being a Spektrum ESC it needed the Spektrum ESC programmer device to alter the settings and after purchasing this unit I found that it did not work. When connecting the plane’s battery, it went into manual set up mode with all the bleeping sounds and it would not stop.
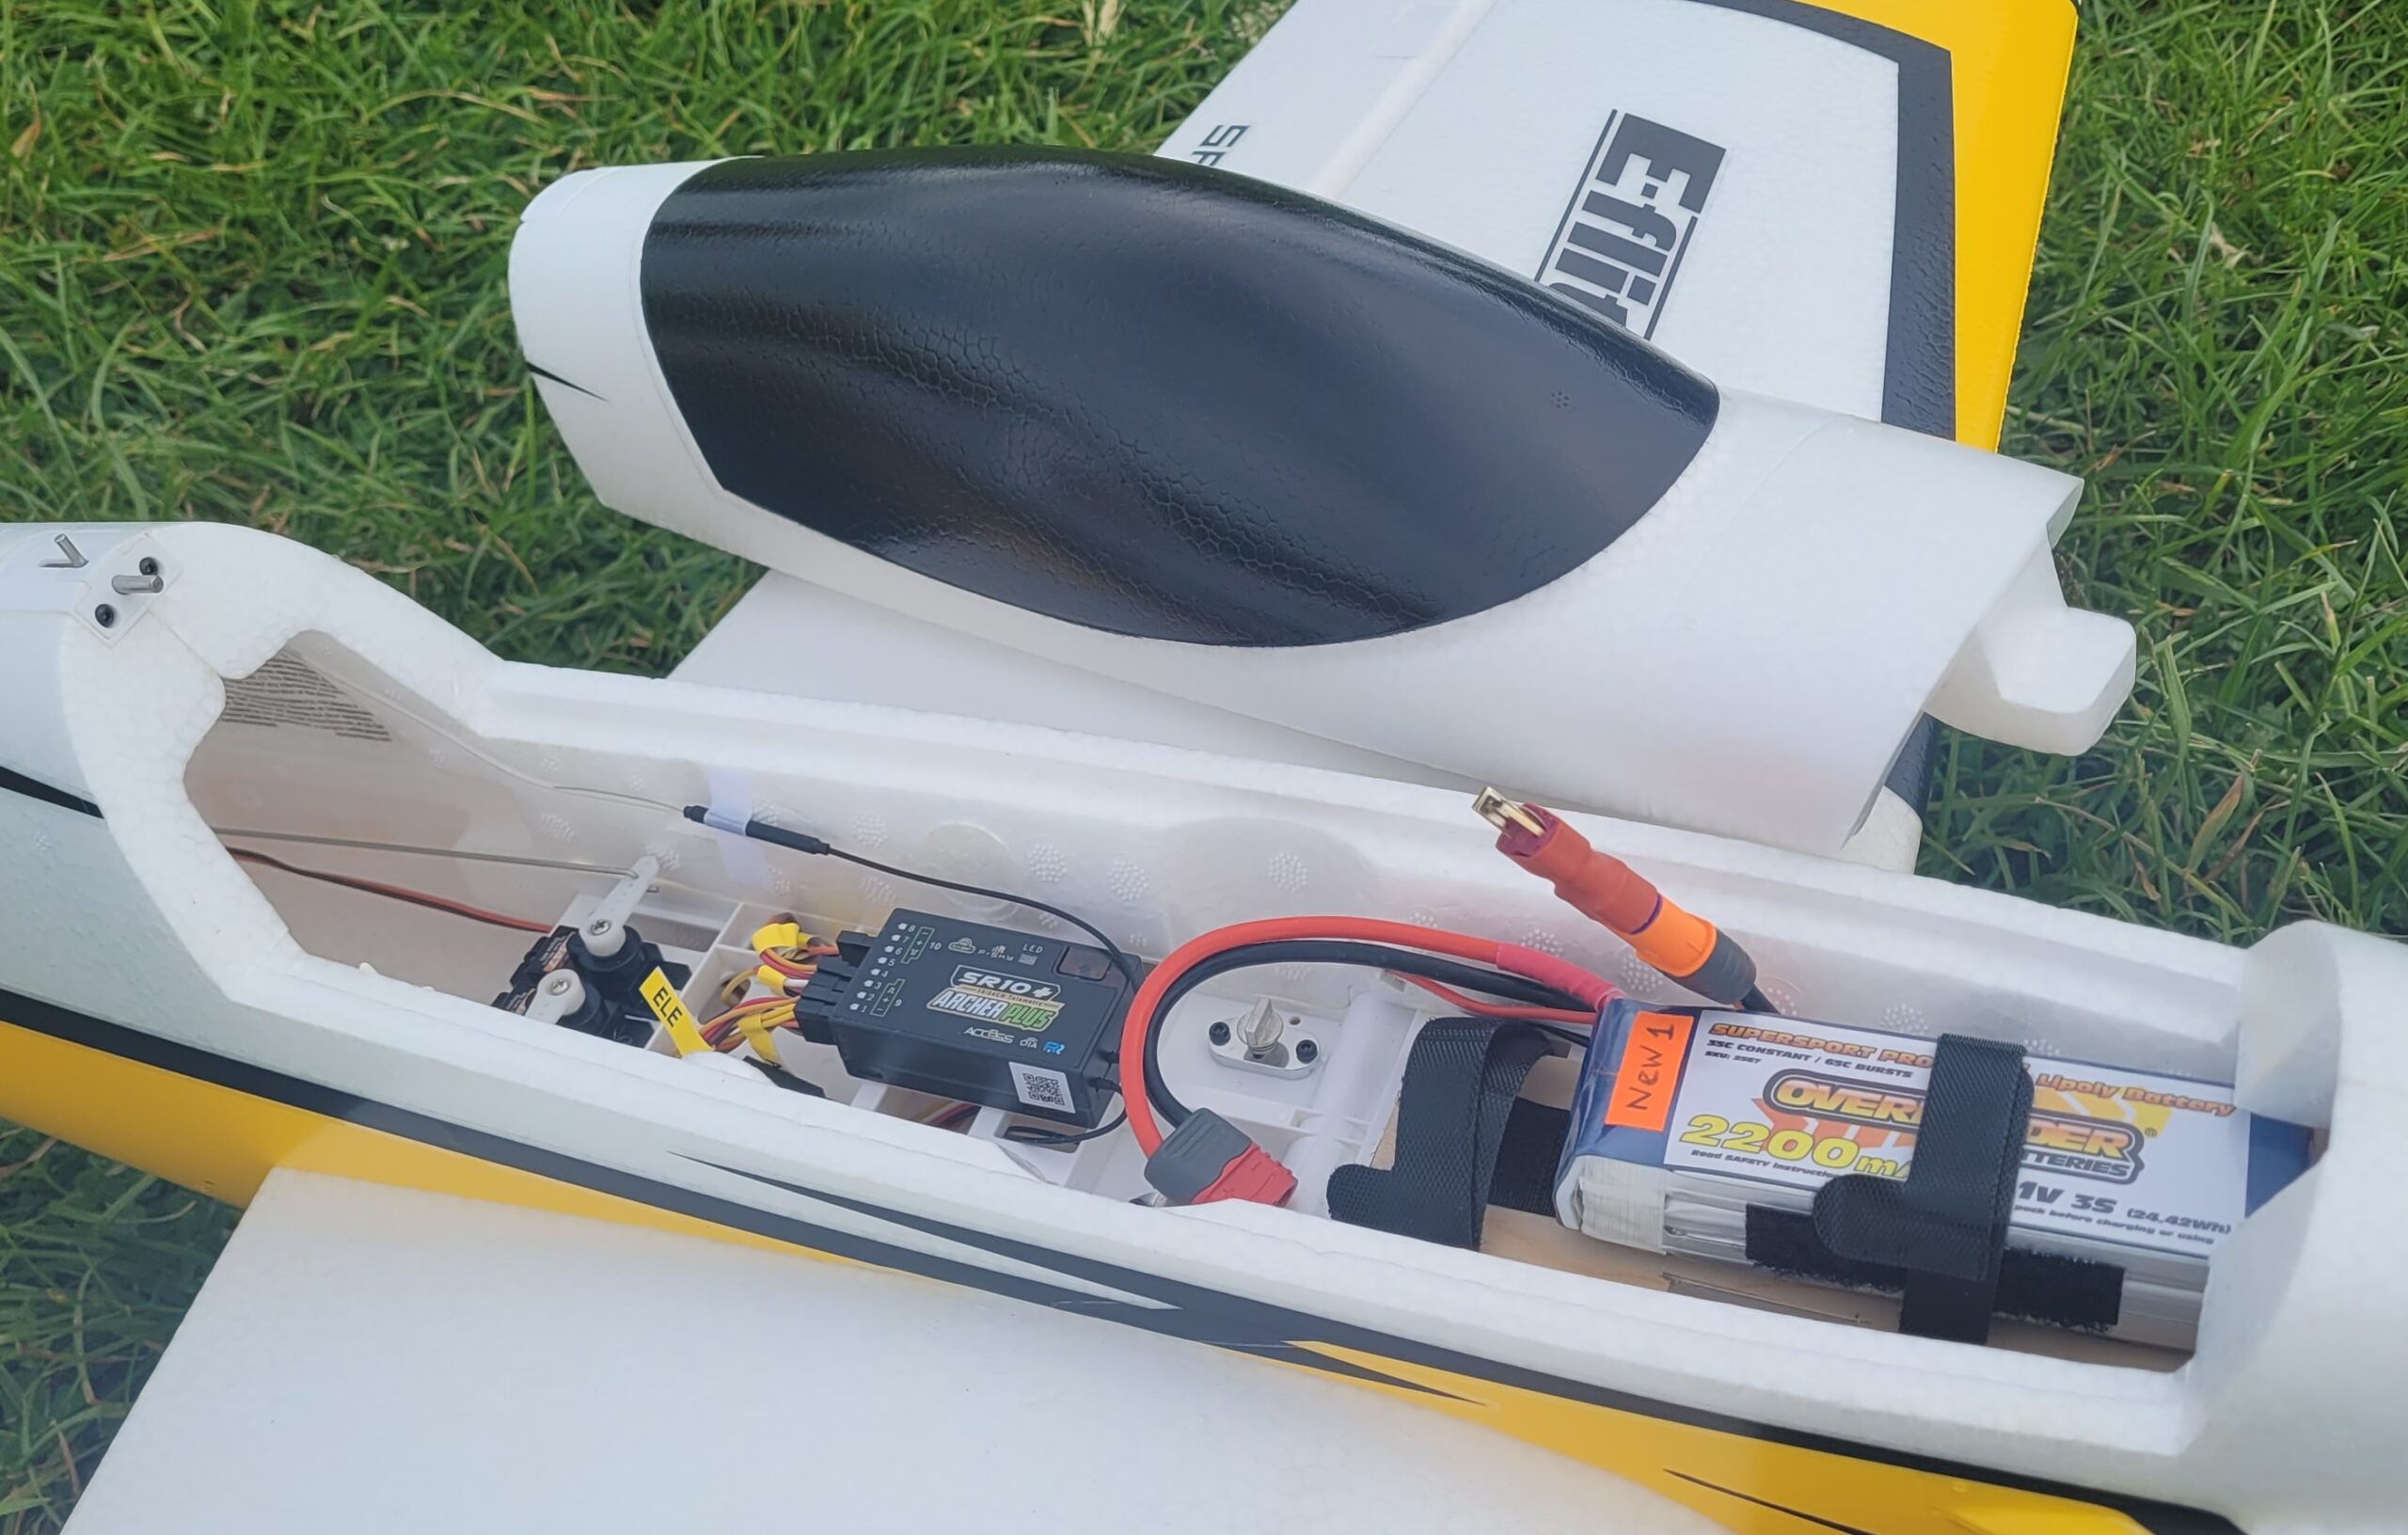 I was unable to find the manual method for programming online for this Spektrum ESC. Following the process of elimination, the system would work correctly again after changing the ESC and the receiver. I changed the ESC to the Ripmax Quantum which brakes fine at home, but not when flying! Very strange MacFly, I can’t imagine why both the ESC and the receiver had to be changed but Spektrum does have a few oddities sometimes. Anyway, you can all see the Sportix performing in this month’s video.
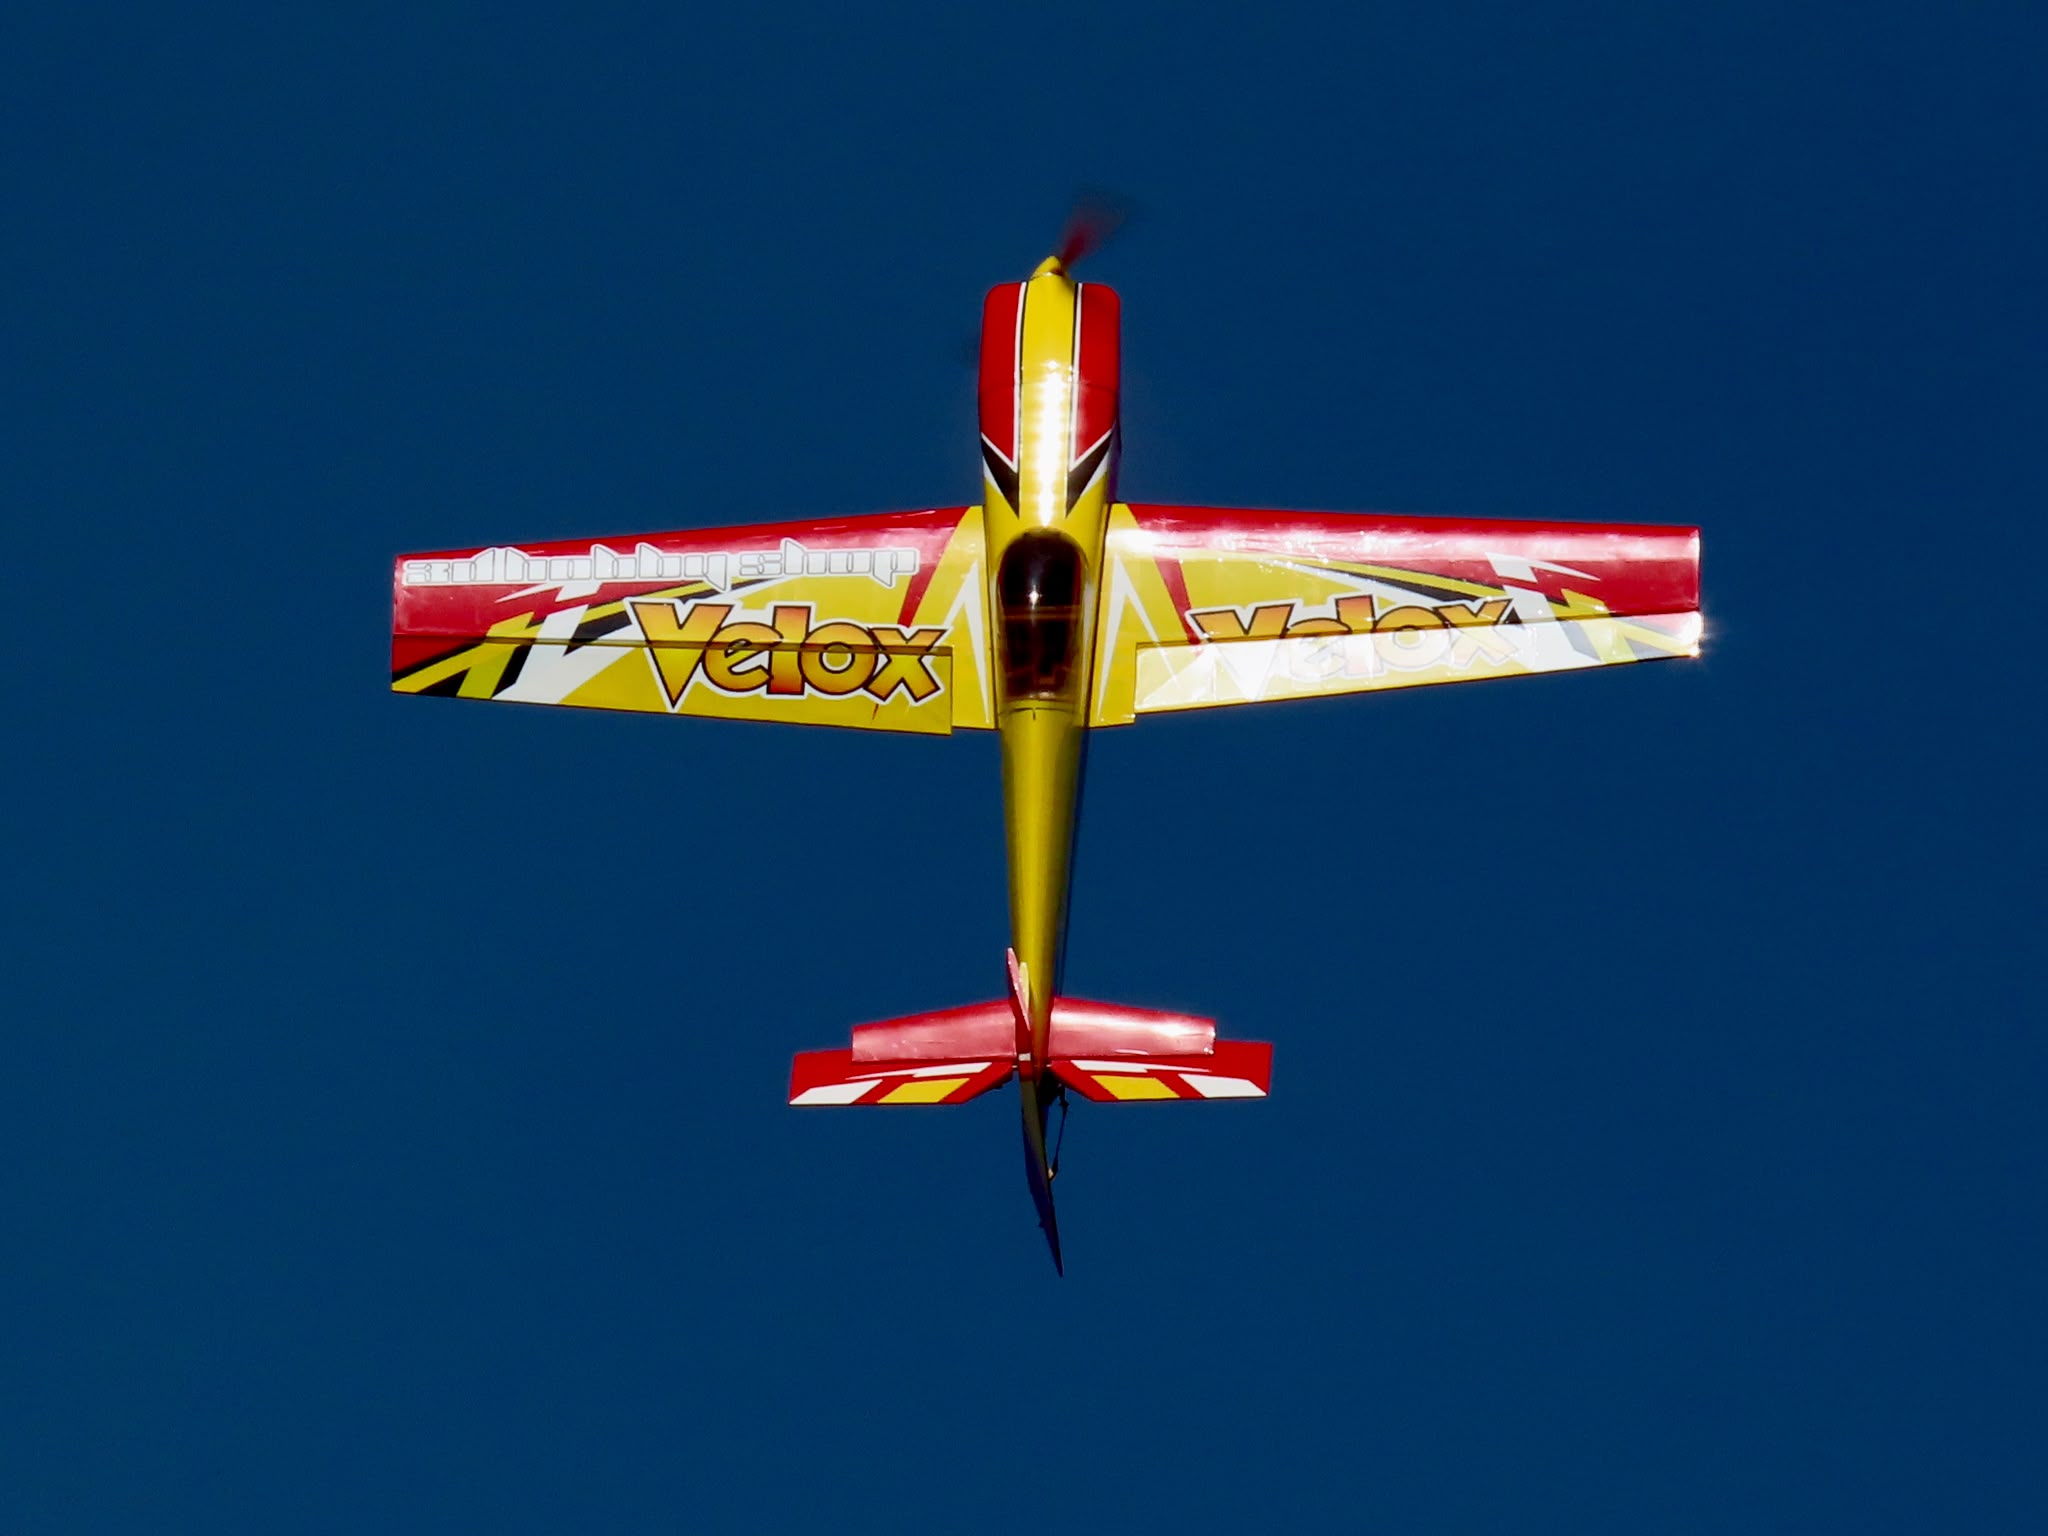
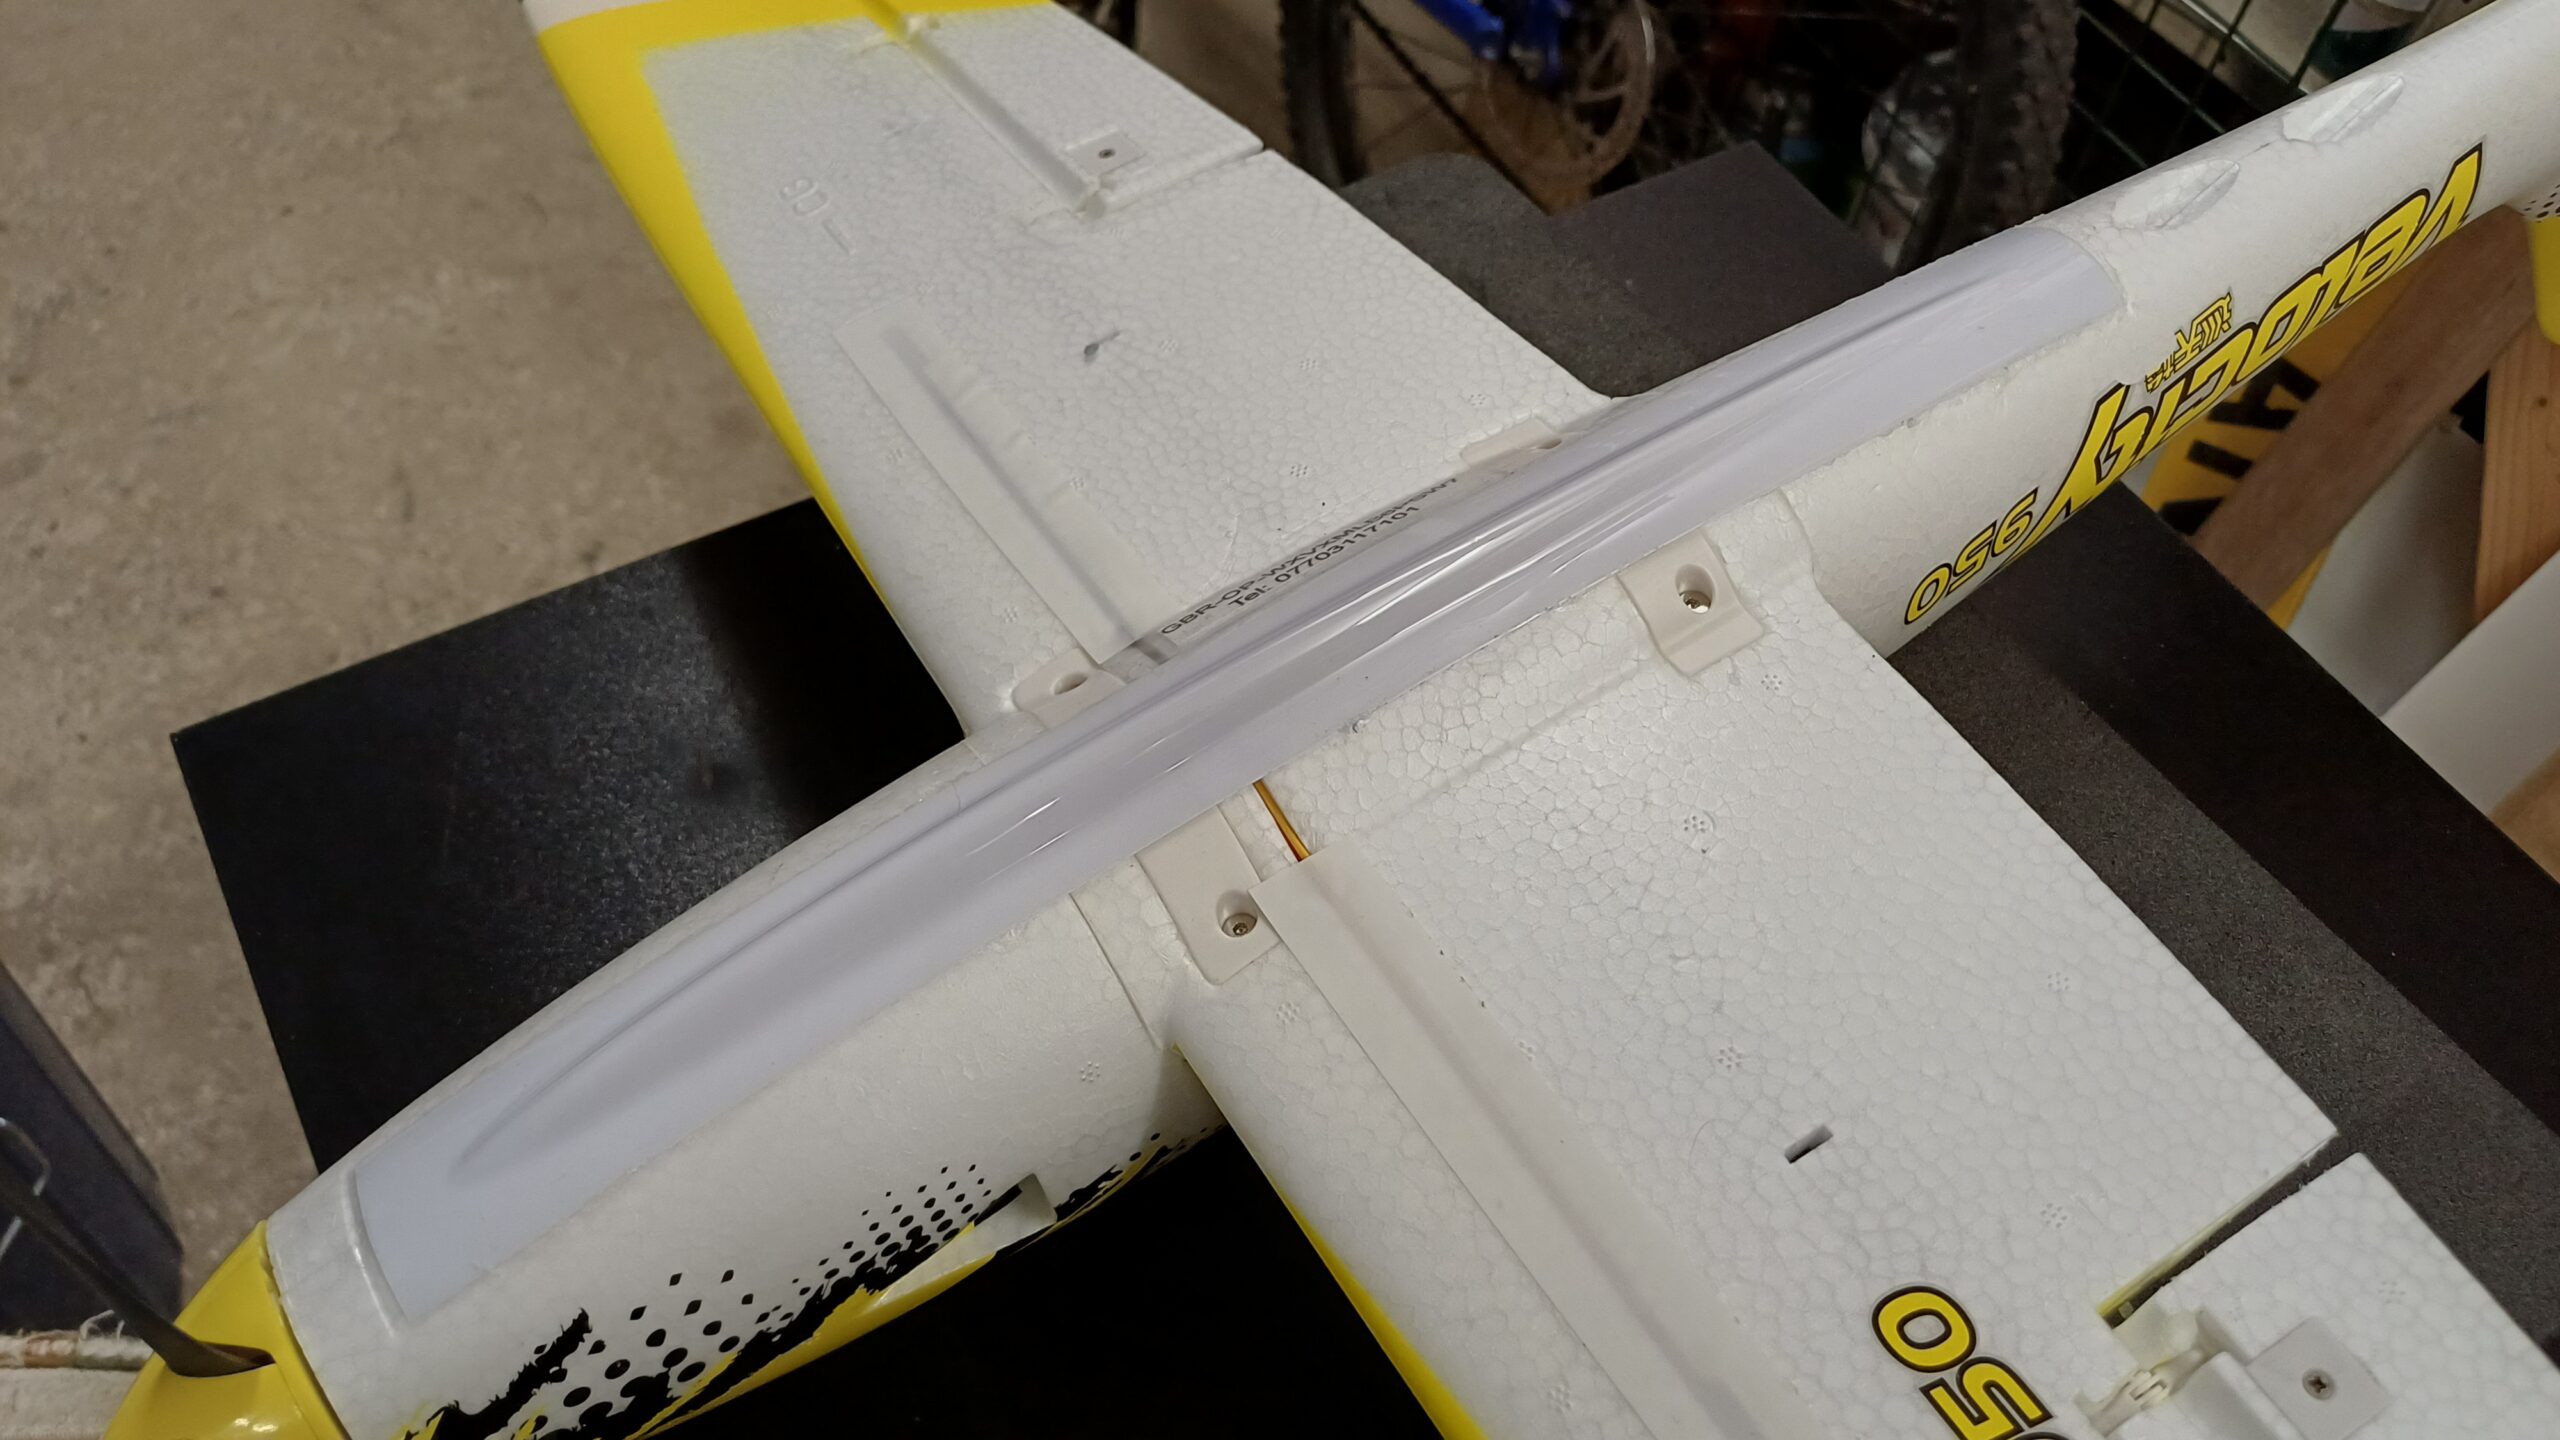
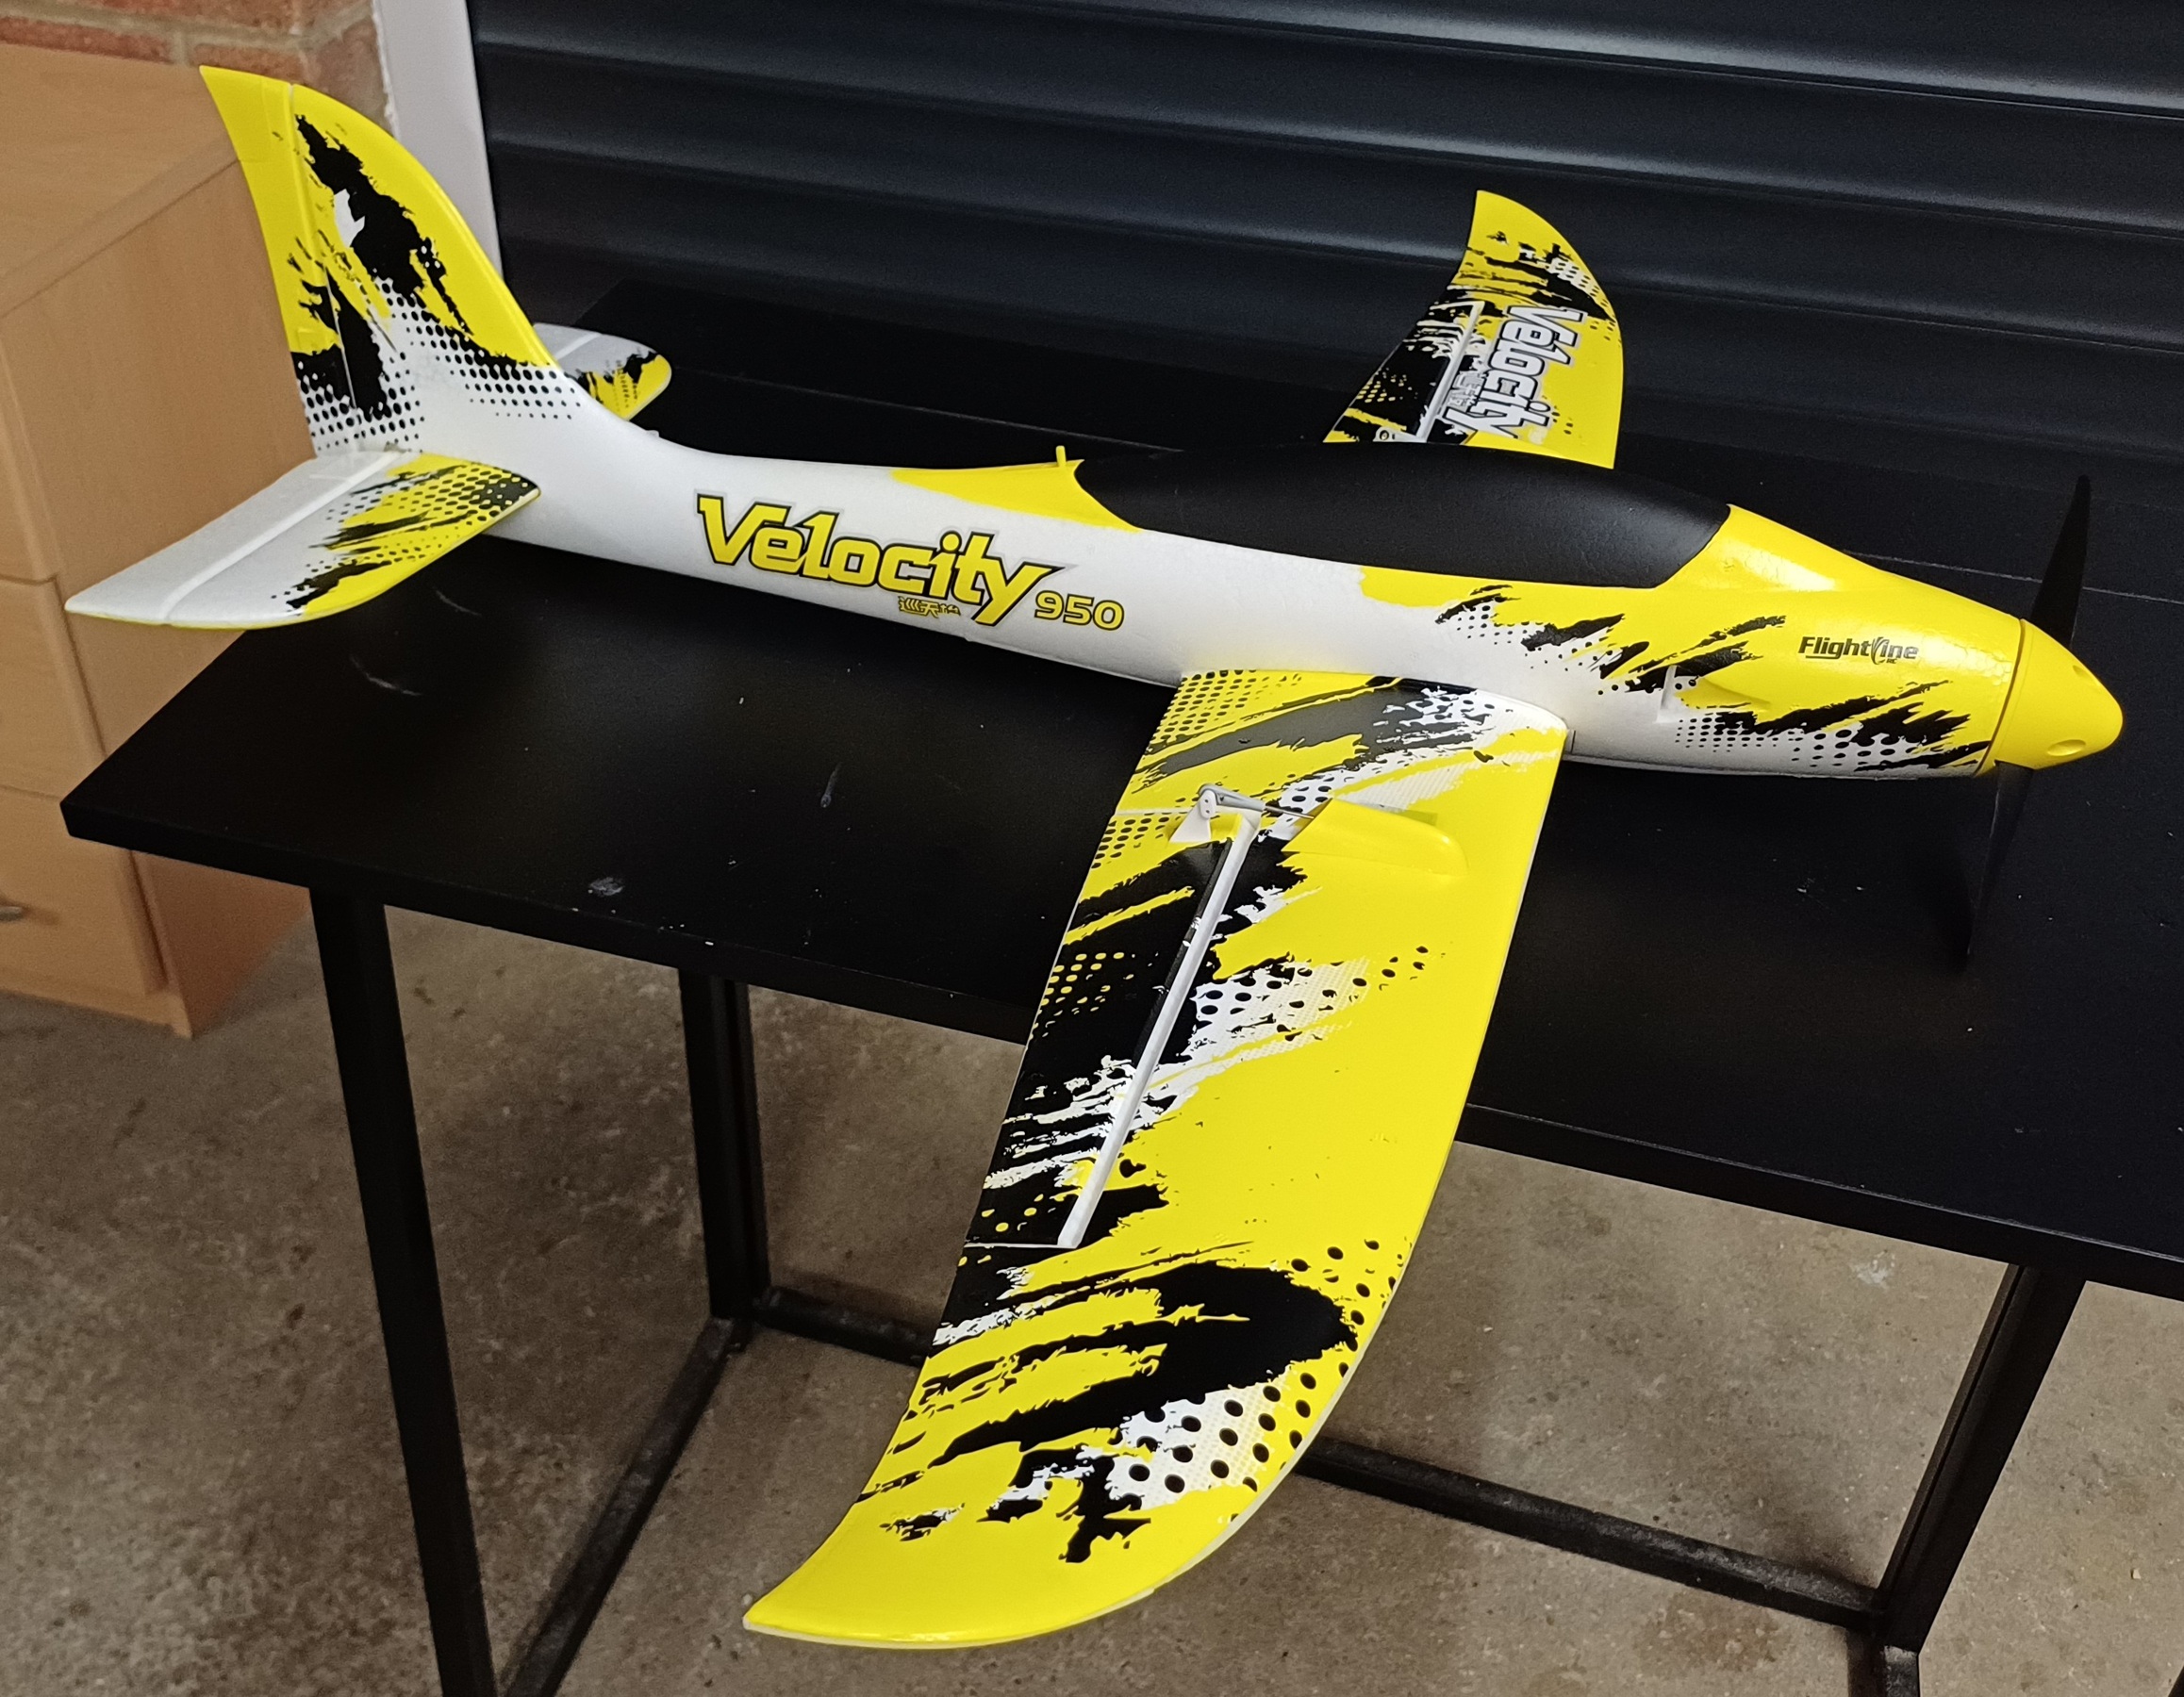
Last month I included some photos and information about Dougal Entendre’s latest model, a Freewing Flightline Velocity. At the time Dougal hadn’t had a chance to fly the model but he brought it to the field in June and it’s now had lots of very successful flights.
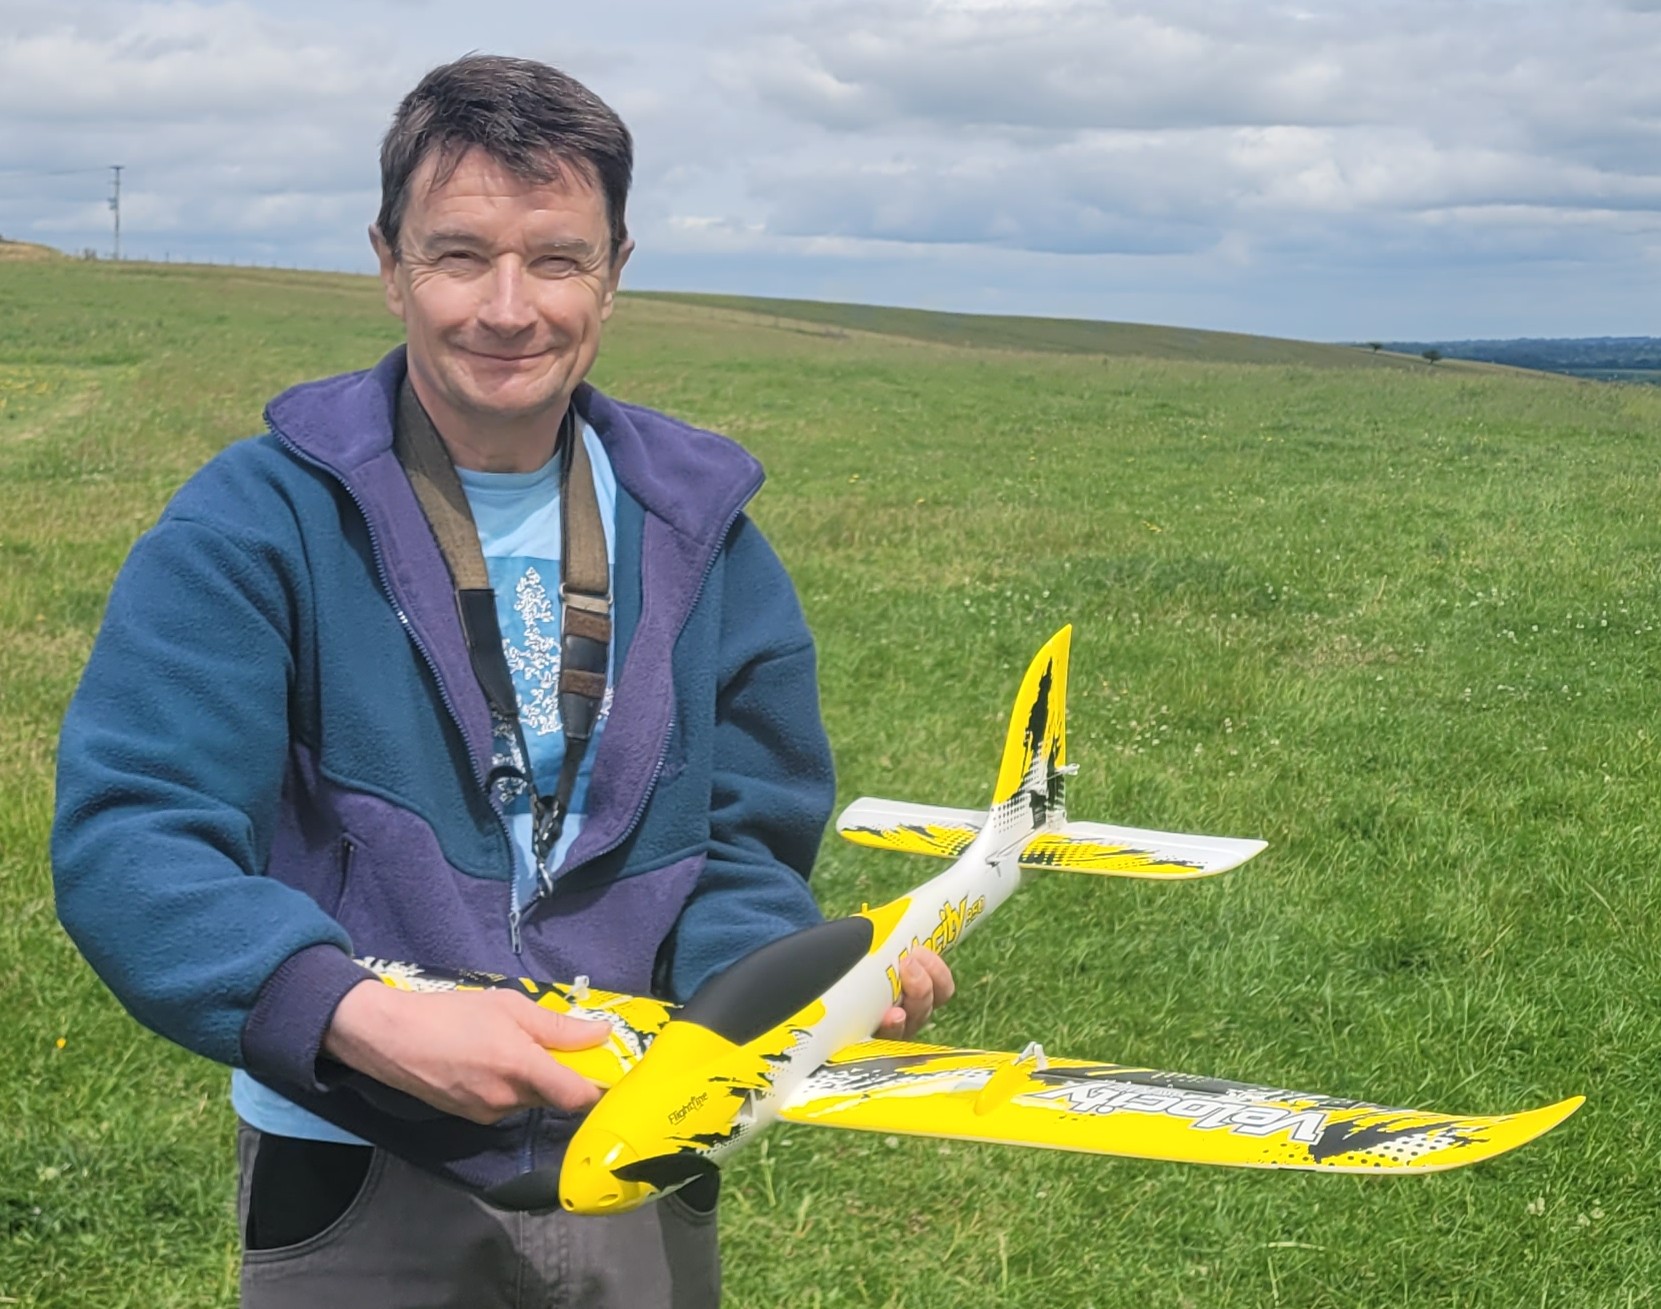 This is what Dougal told me: A few thoughts on the Velocity, now that I’ve flown it. First, my worries about torque on launch were completely unfounded – I can go off at full throttle without it rolling to the left. Second, it’s fast! (but I think we guessed it would be). Third, I can get a good 5 minutes duration and come down with at least 30% in the pack.
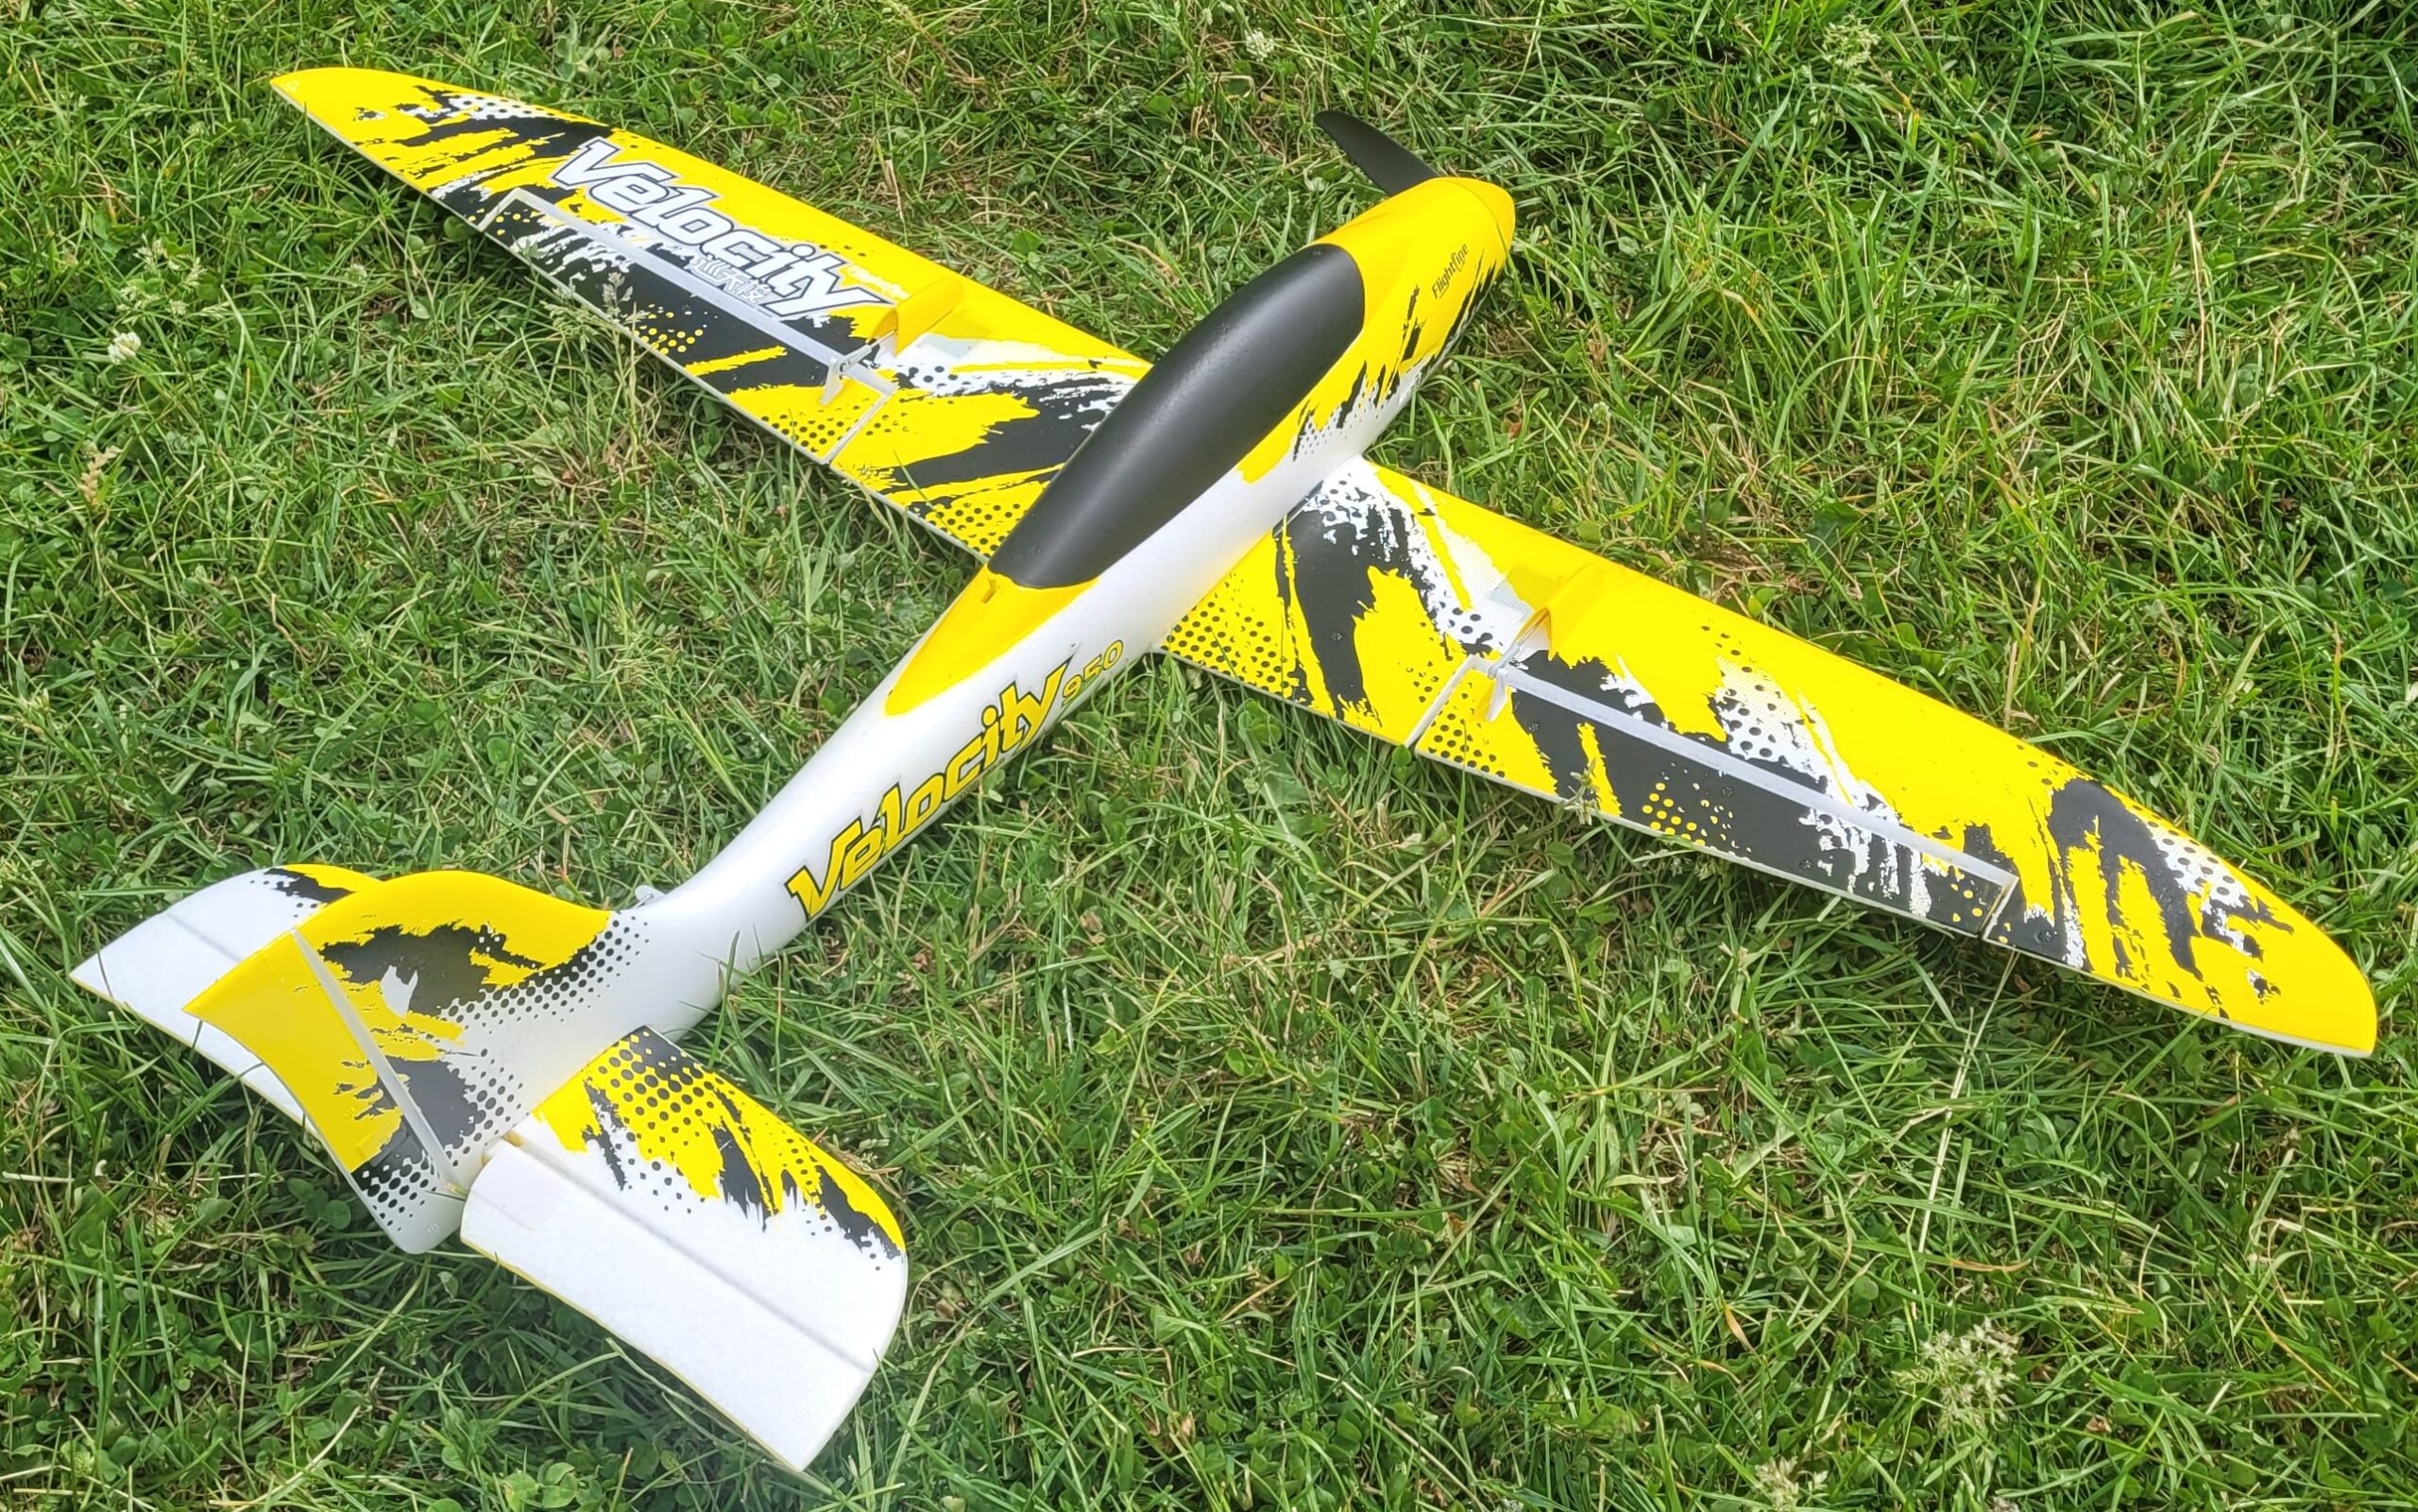 This is way better than the Rare Bear or my E2K racer, which only get 3 to 3-and-a-half minutes from the same packs. It’s pretty good at smooth aerobatics for a model of its size, but can do the flicky stuff as well. It normally comes out of inverted spins reasonably quickly, but not always, as I found out the other day! (fortunately I had enough height, and it stopped spinning when I put a bit of power on).

 The wings look like they flex a bit, particularly when doing a fast low pass in turbulent air, but they haven’t snapped yet. All in all I love it! Thanks Dougal, yes it flies really well, and yes, those wings certainly do flex a lot! It’s in this month’s video so take a look.
In the May Patch News I wrote that Comp Sec Dwayne Pipe had confirmed the Chuck Glider comp will take place at Buriton Recreation Ground on Wednesday 15th July at 7.30pm. There will be two classes, hand launched, and catapult launched (catapult provided). If the weather is bad it will be delayed to the following Wednesday, the 22nd.
 But what I hadn’t realised was that I’ll be away on 15th July…doh! So the comp will go ahead without me unless the weather is bad and it has to be postponed until the 22nd when I’ll be back. Guess who’ll be doing a rain dance on the evening of 15th July!
Of course Dwayne is also in charge of the various fun-fly tasks that are open to all PAM members and can be attempted at any time during normal flying sessions. Each task has two classes, one for BMFA ‘A’ certificate holders, the other for ‘B’ cert holders. The tasks include Spot Landing, Max Loops, Max Glide, and several others, all the info you need is on the club website. So please have a go at some or all of the tasks, it’s all just a bit of fun.
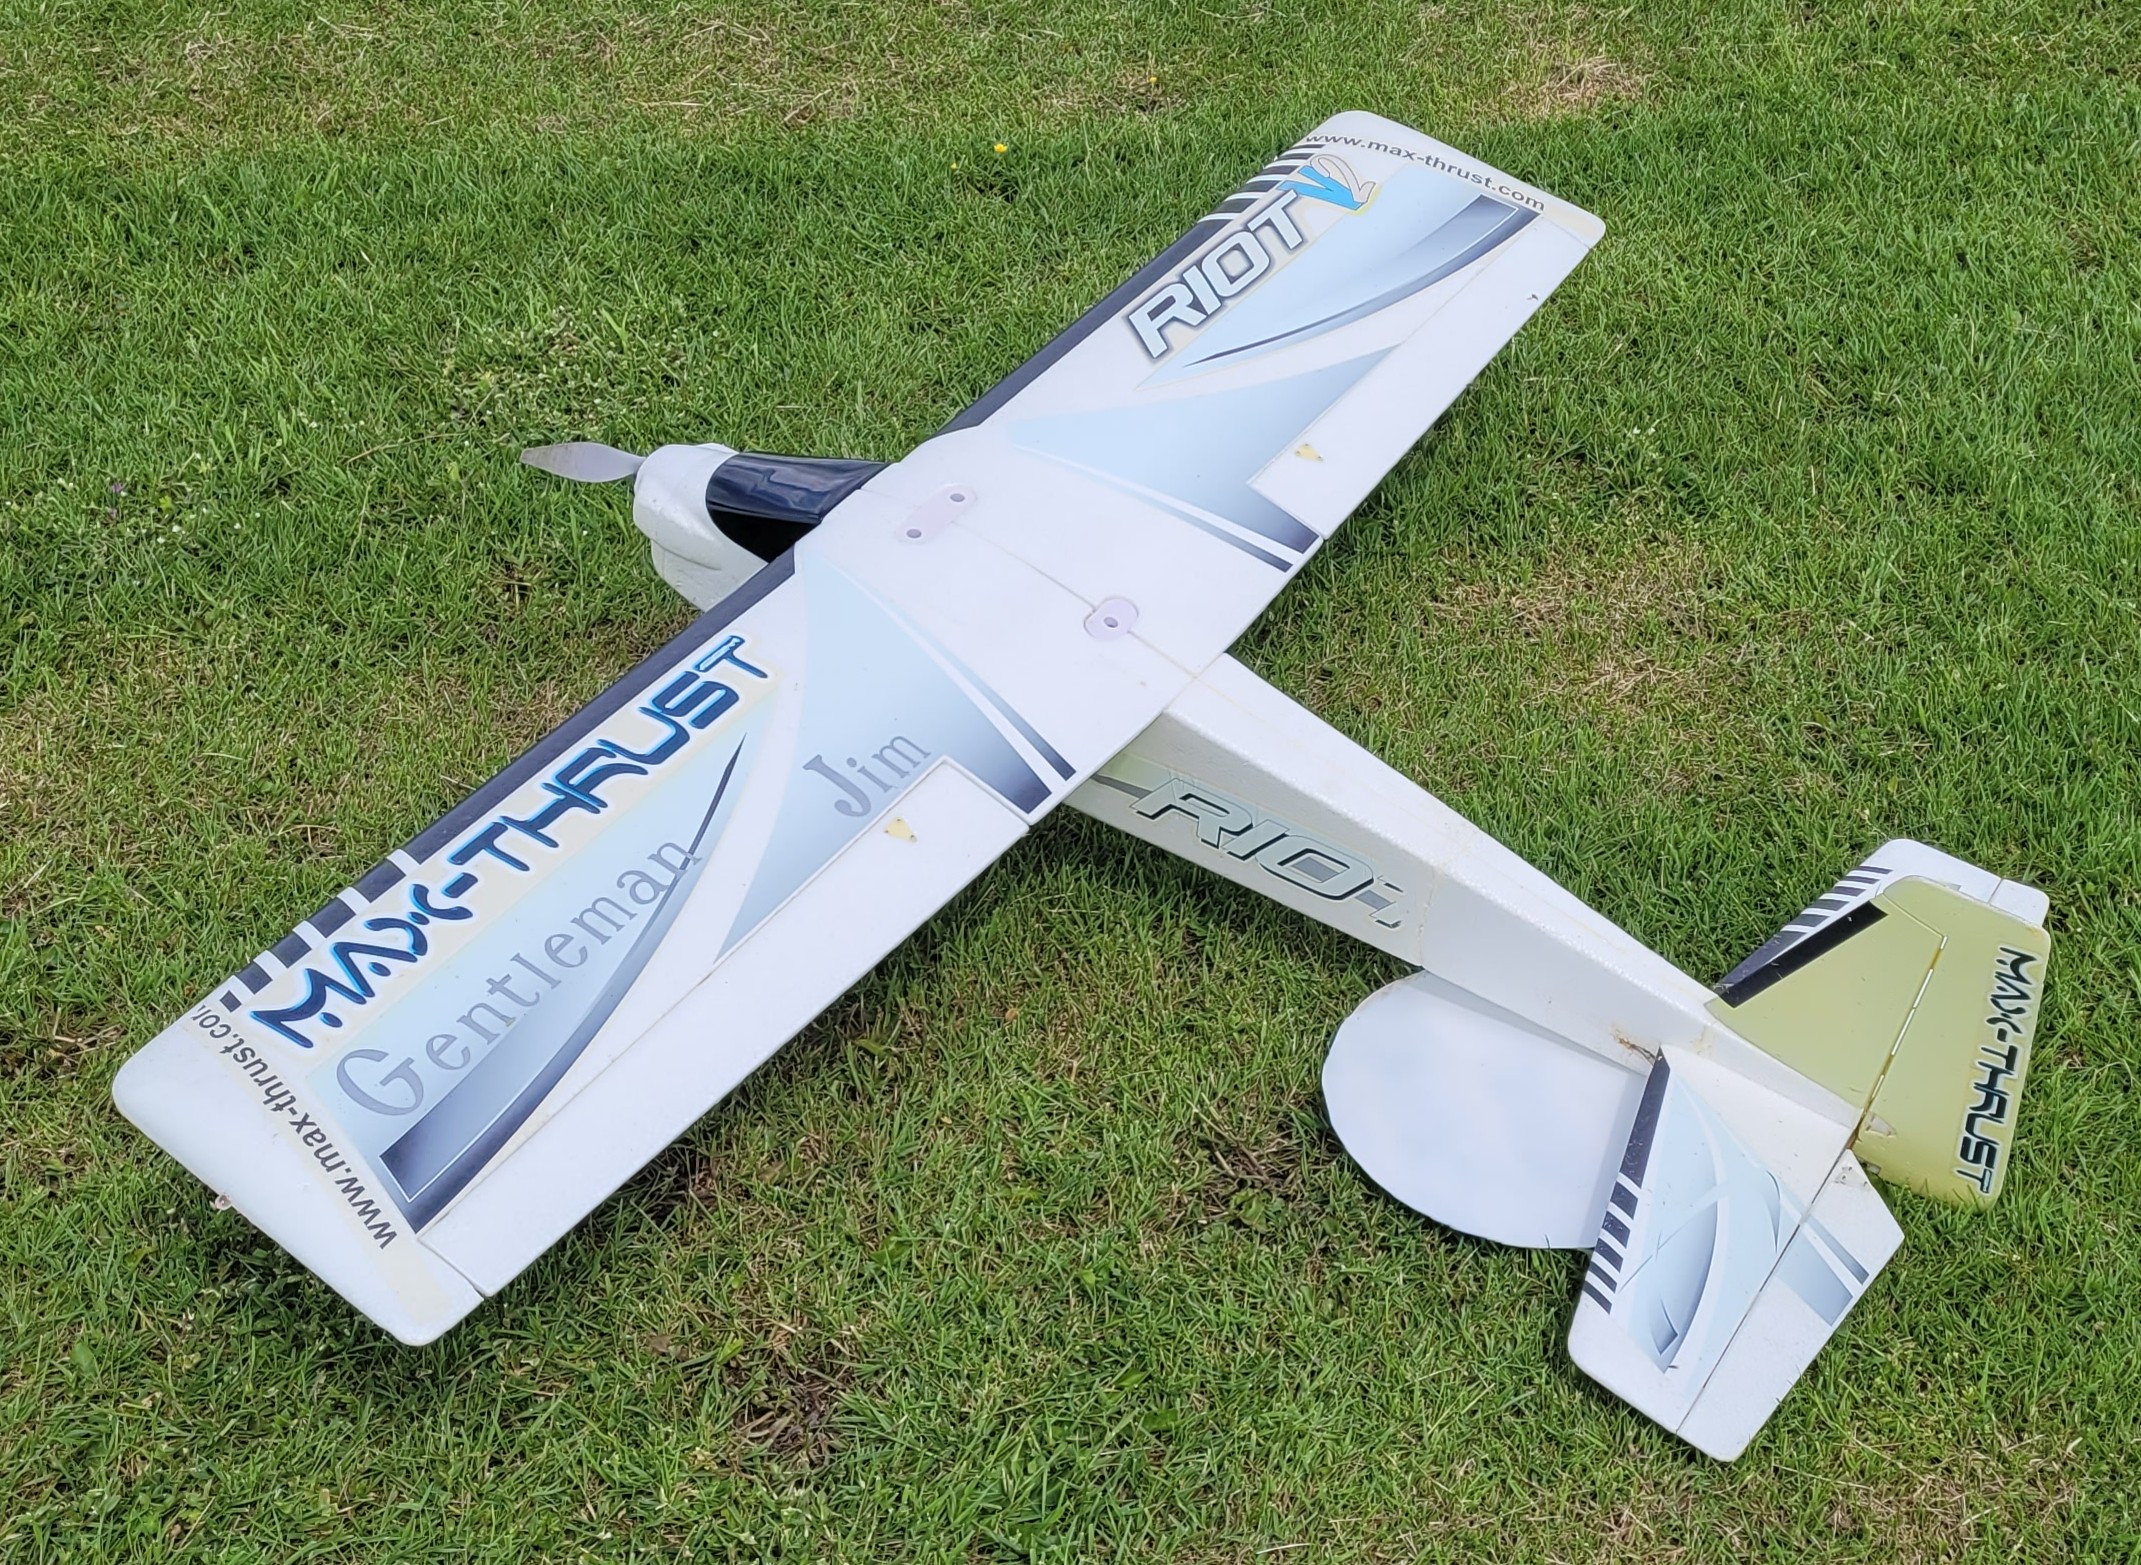 I managed to hit the spot with my Max Thrust Riot in June and at the moment that’s the only score that’s been recorded in any of the tasks! So have a go, just ask someone to witness/measure/time/count and let Dwayne know your score. Good luck to all.
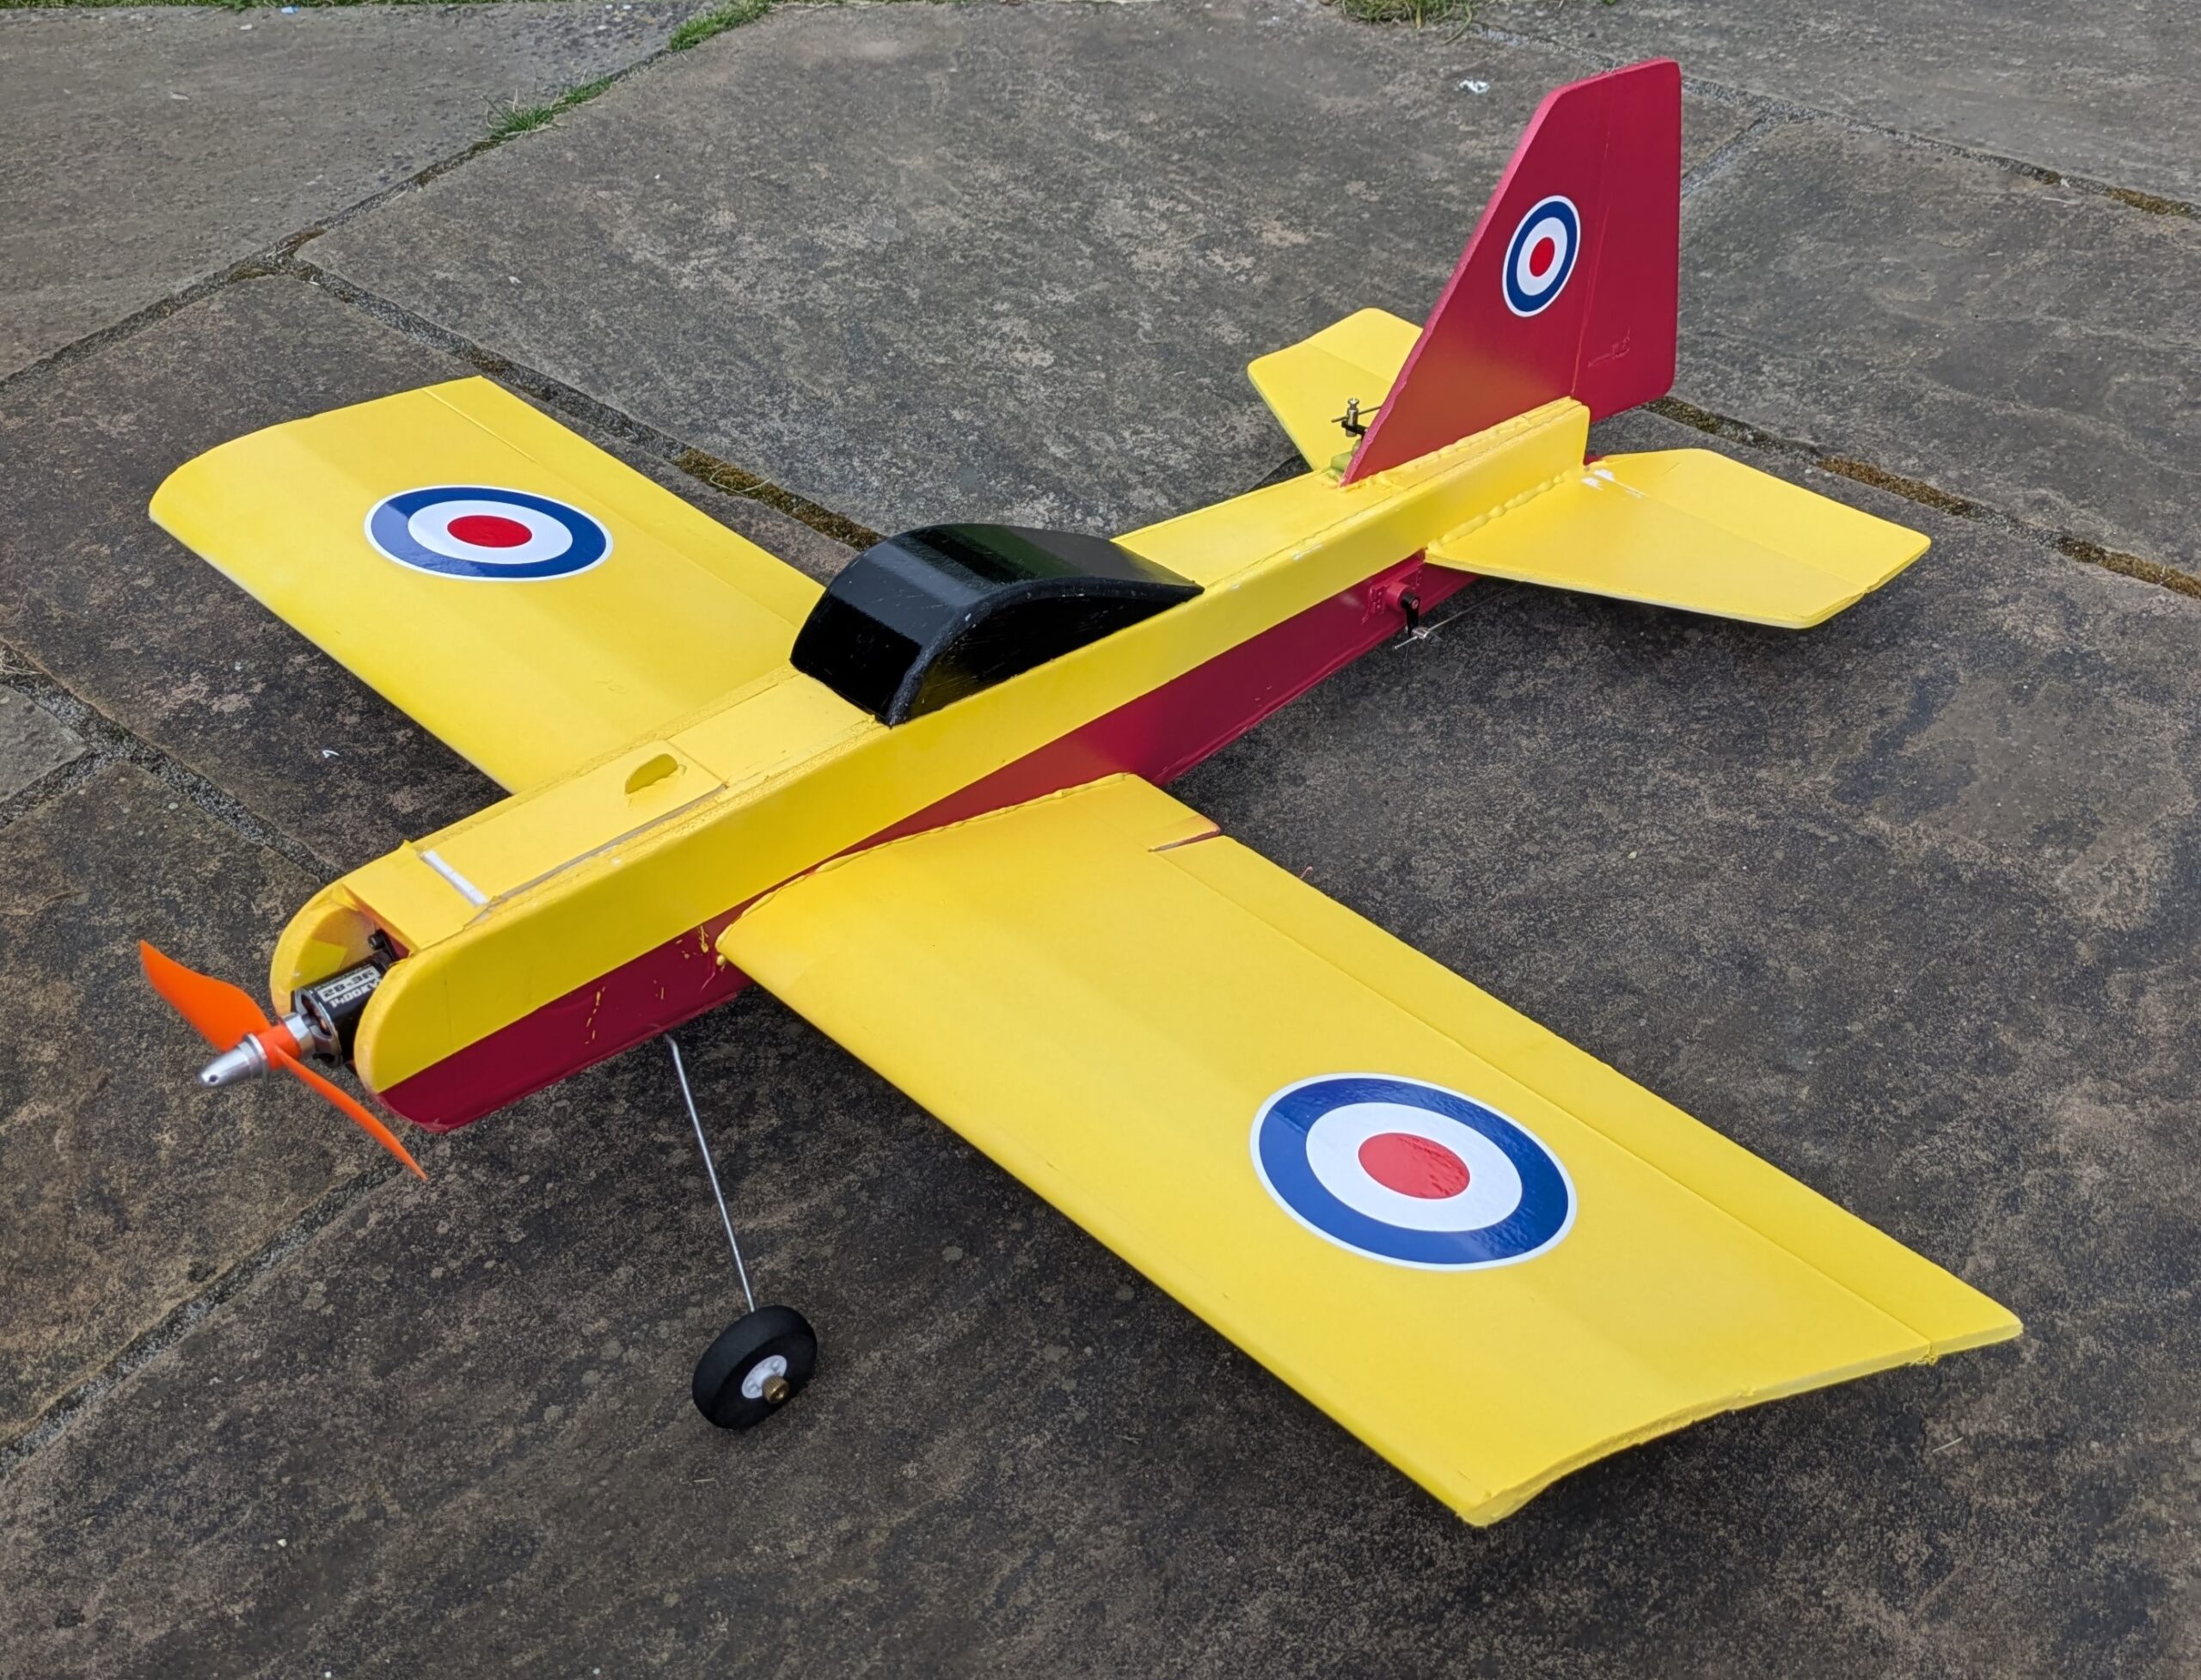
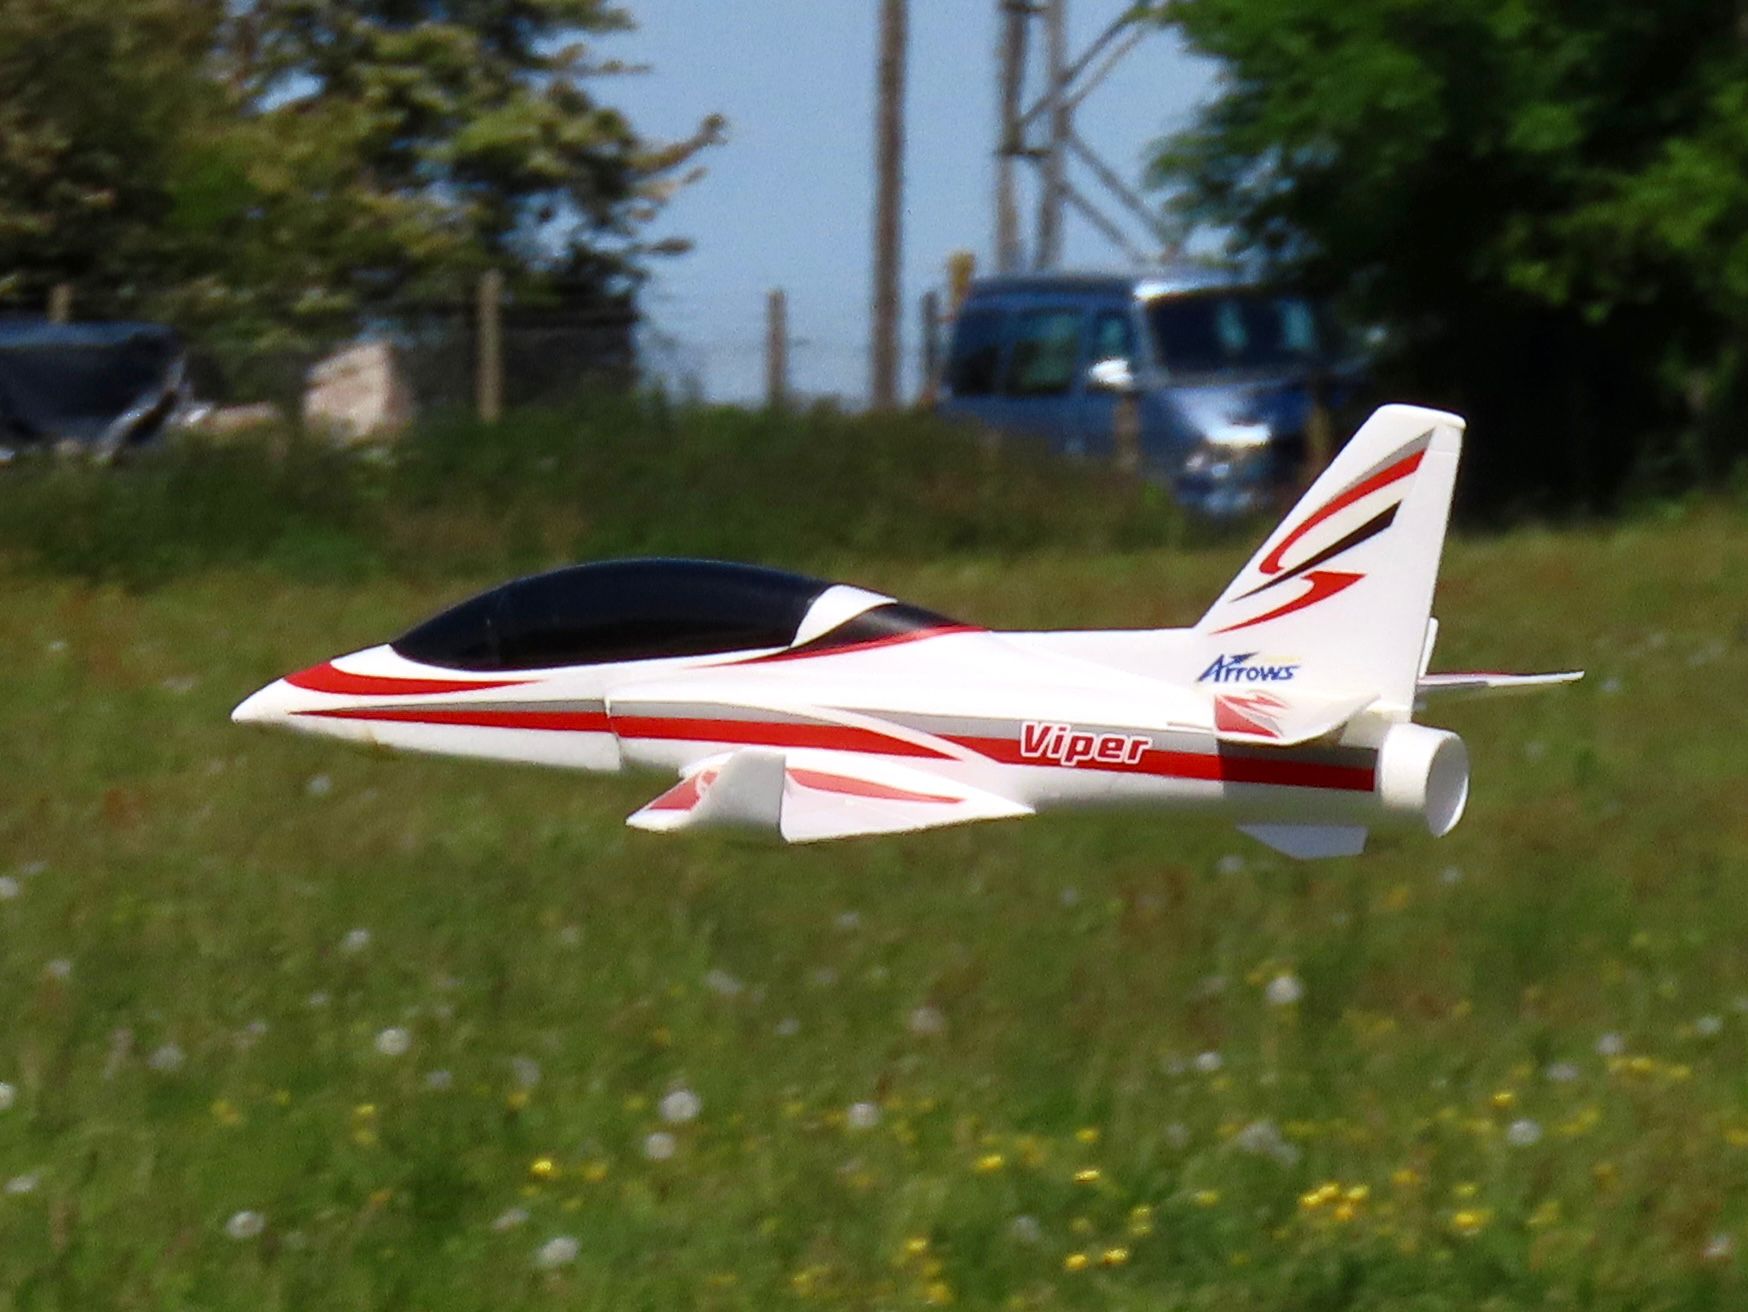
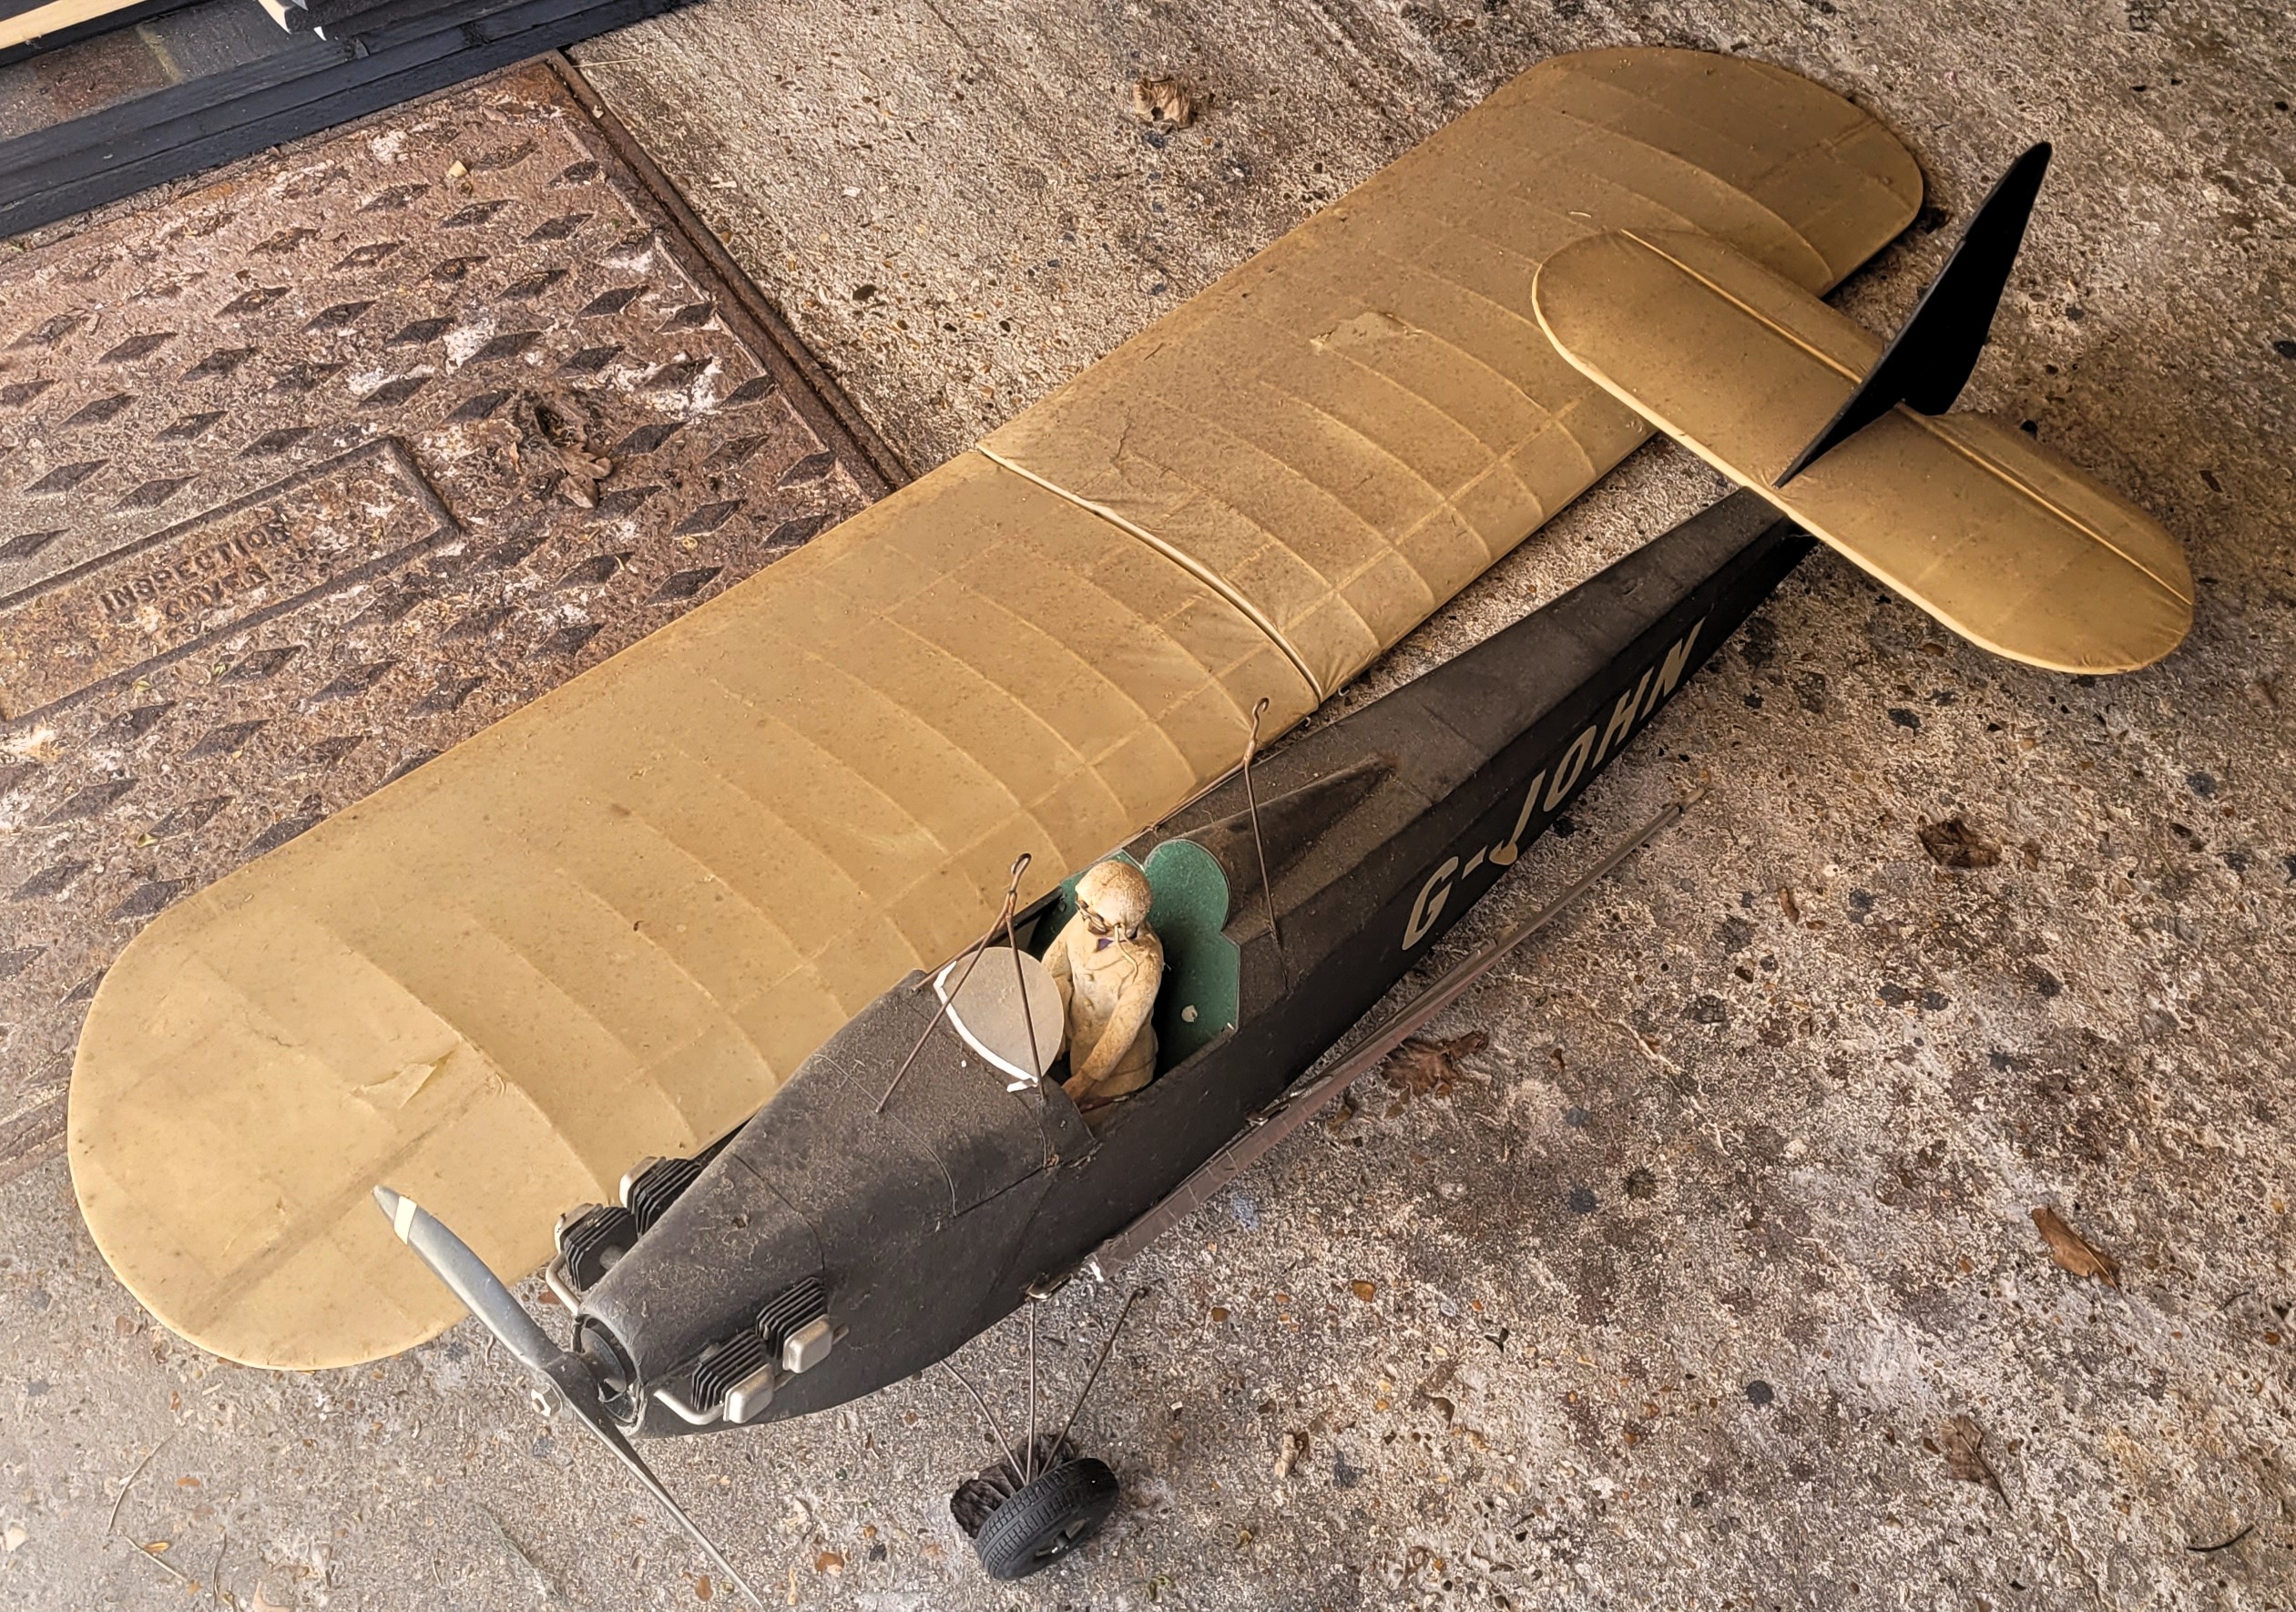
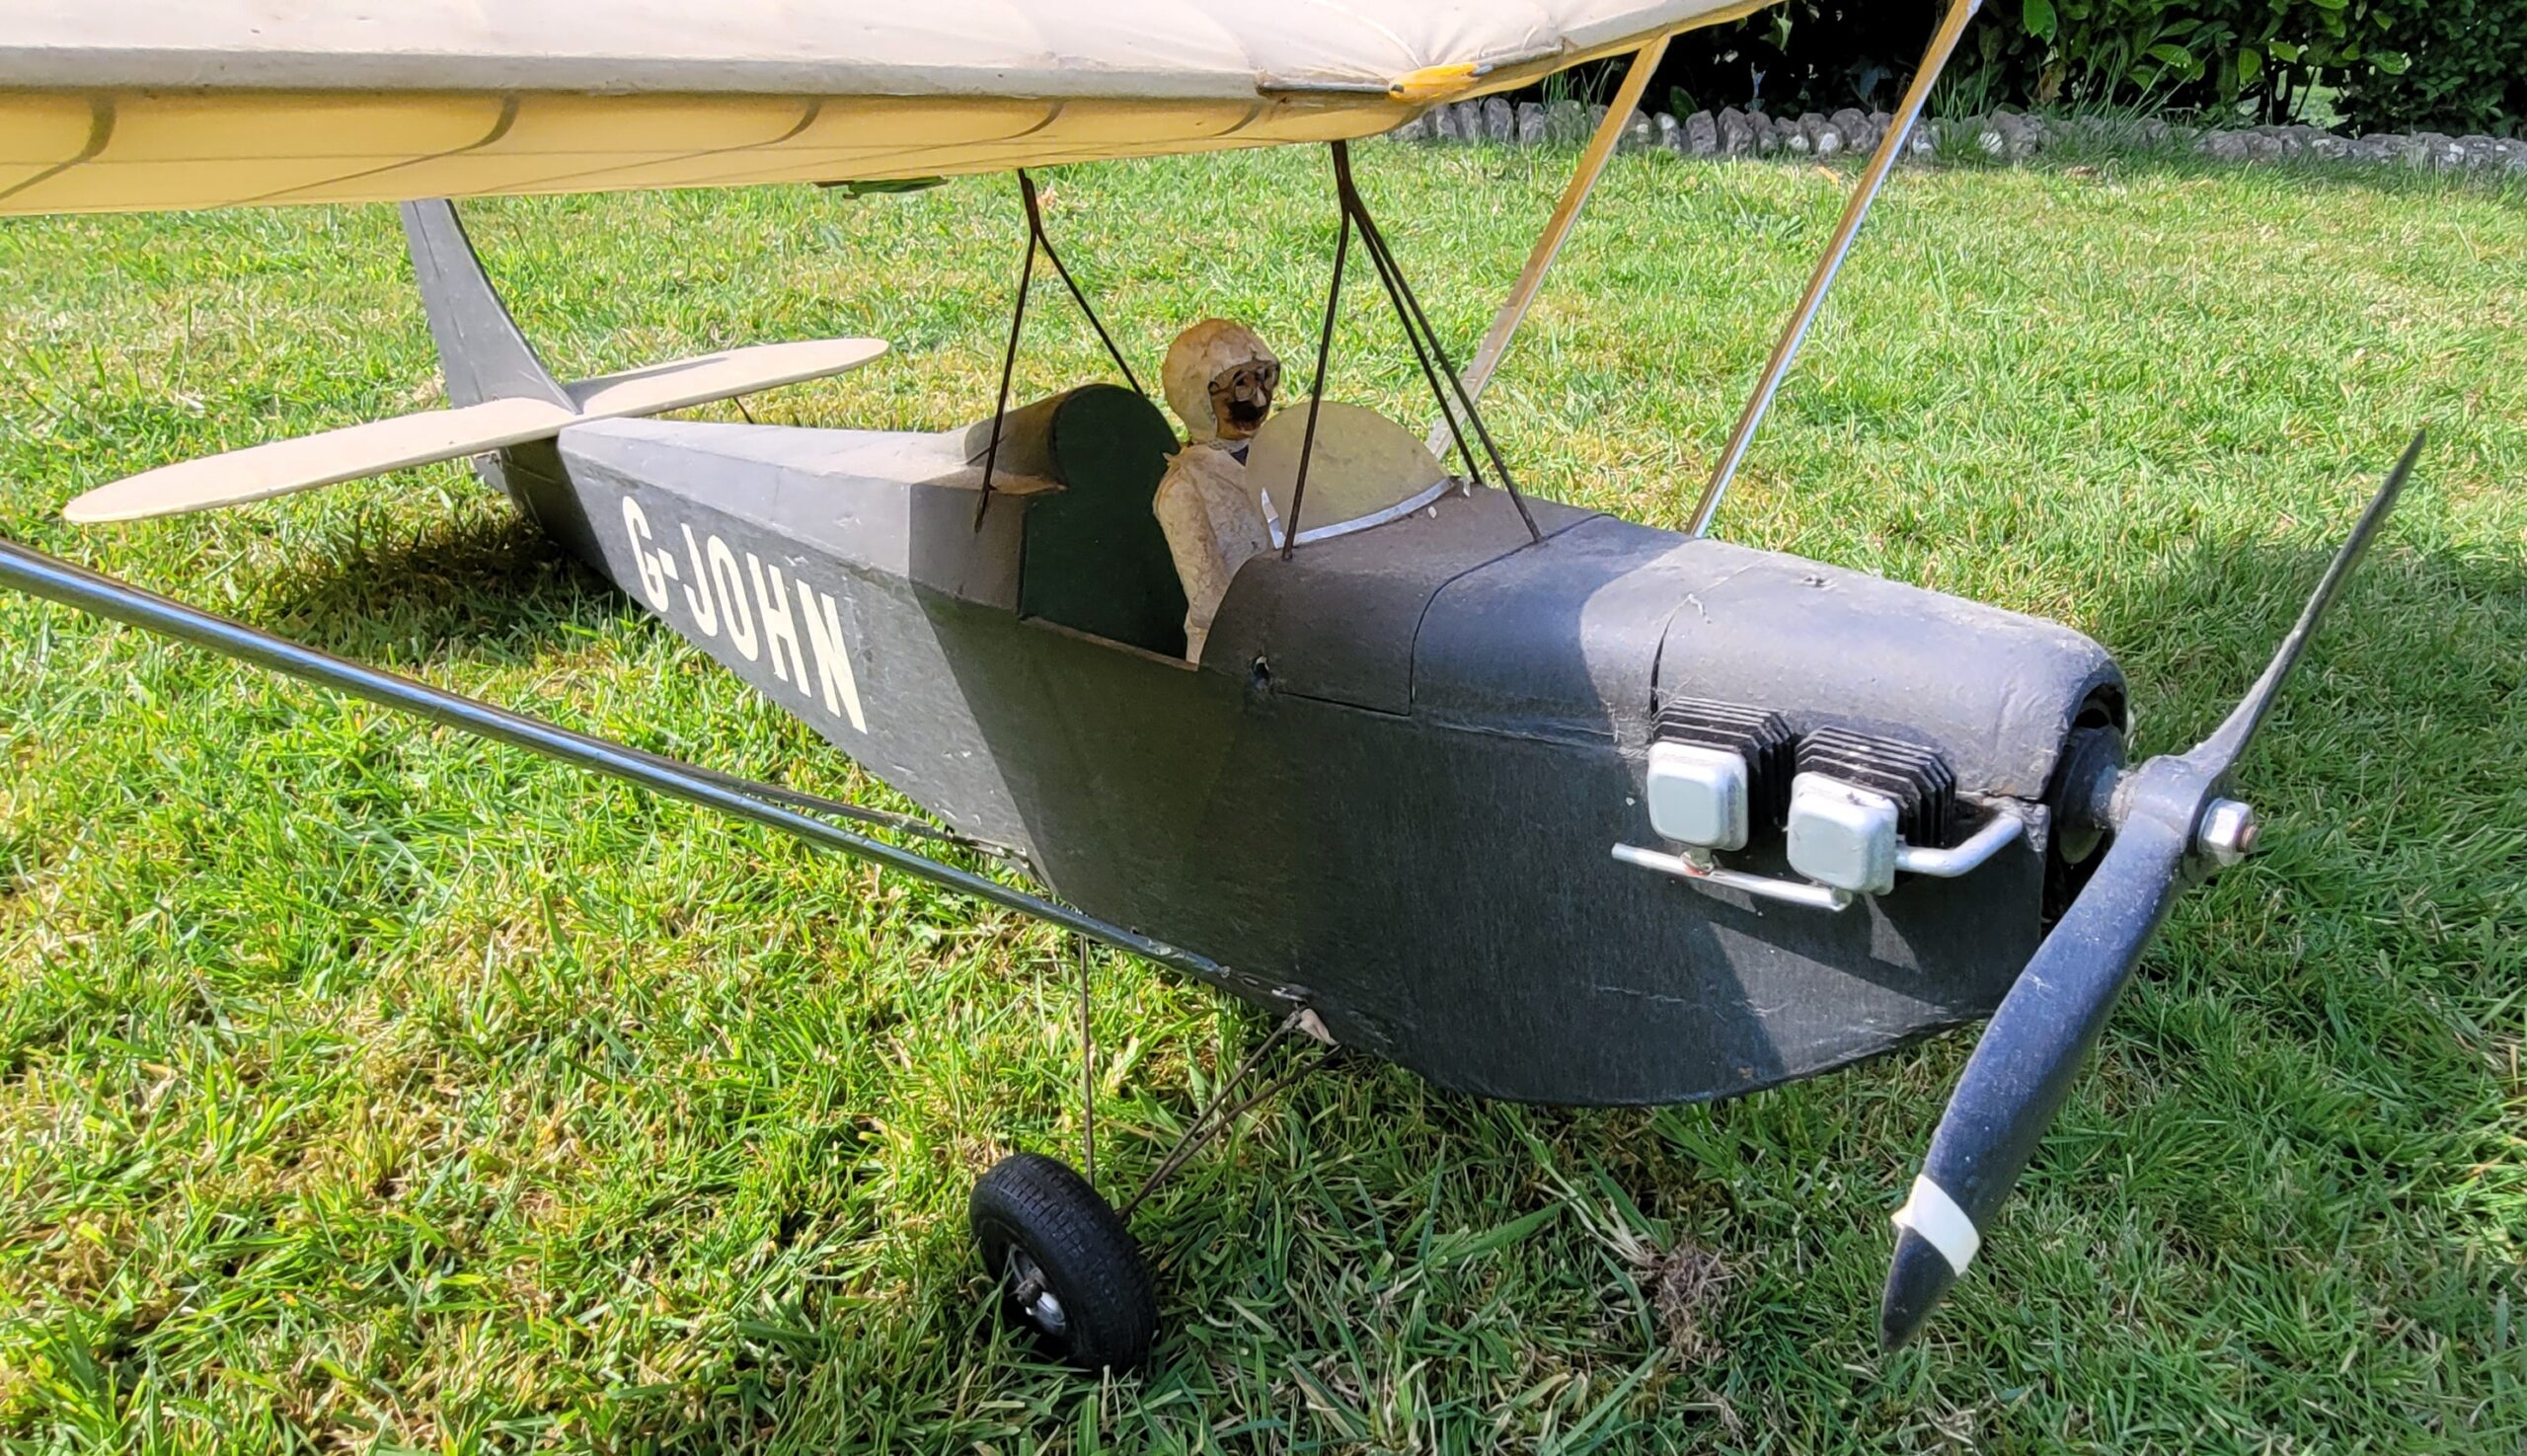
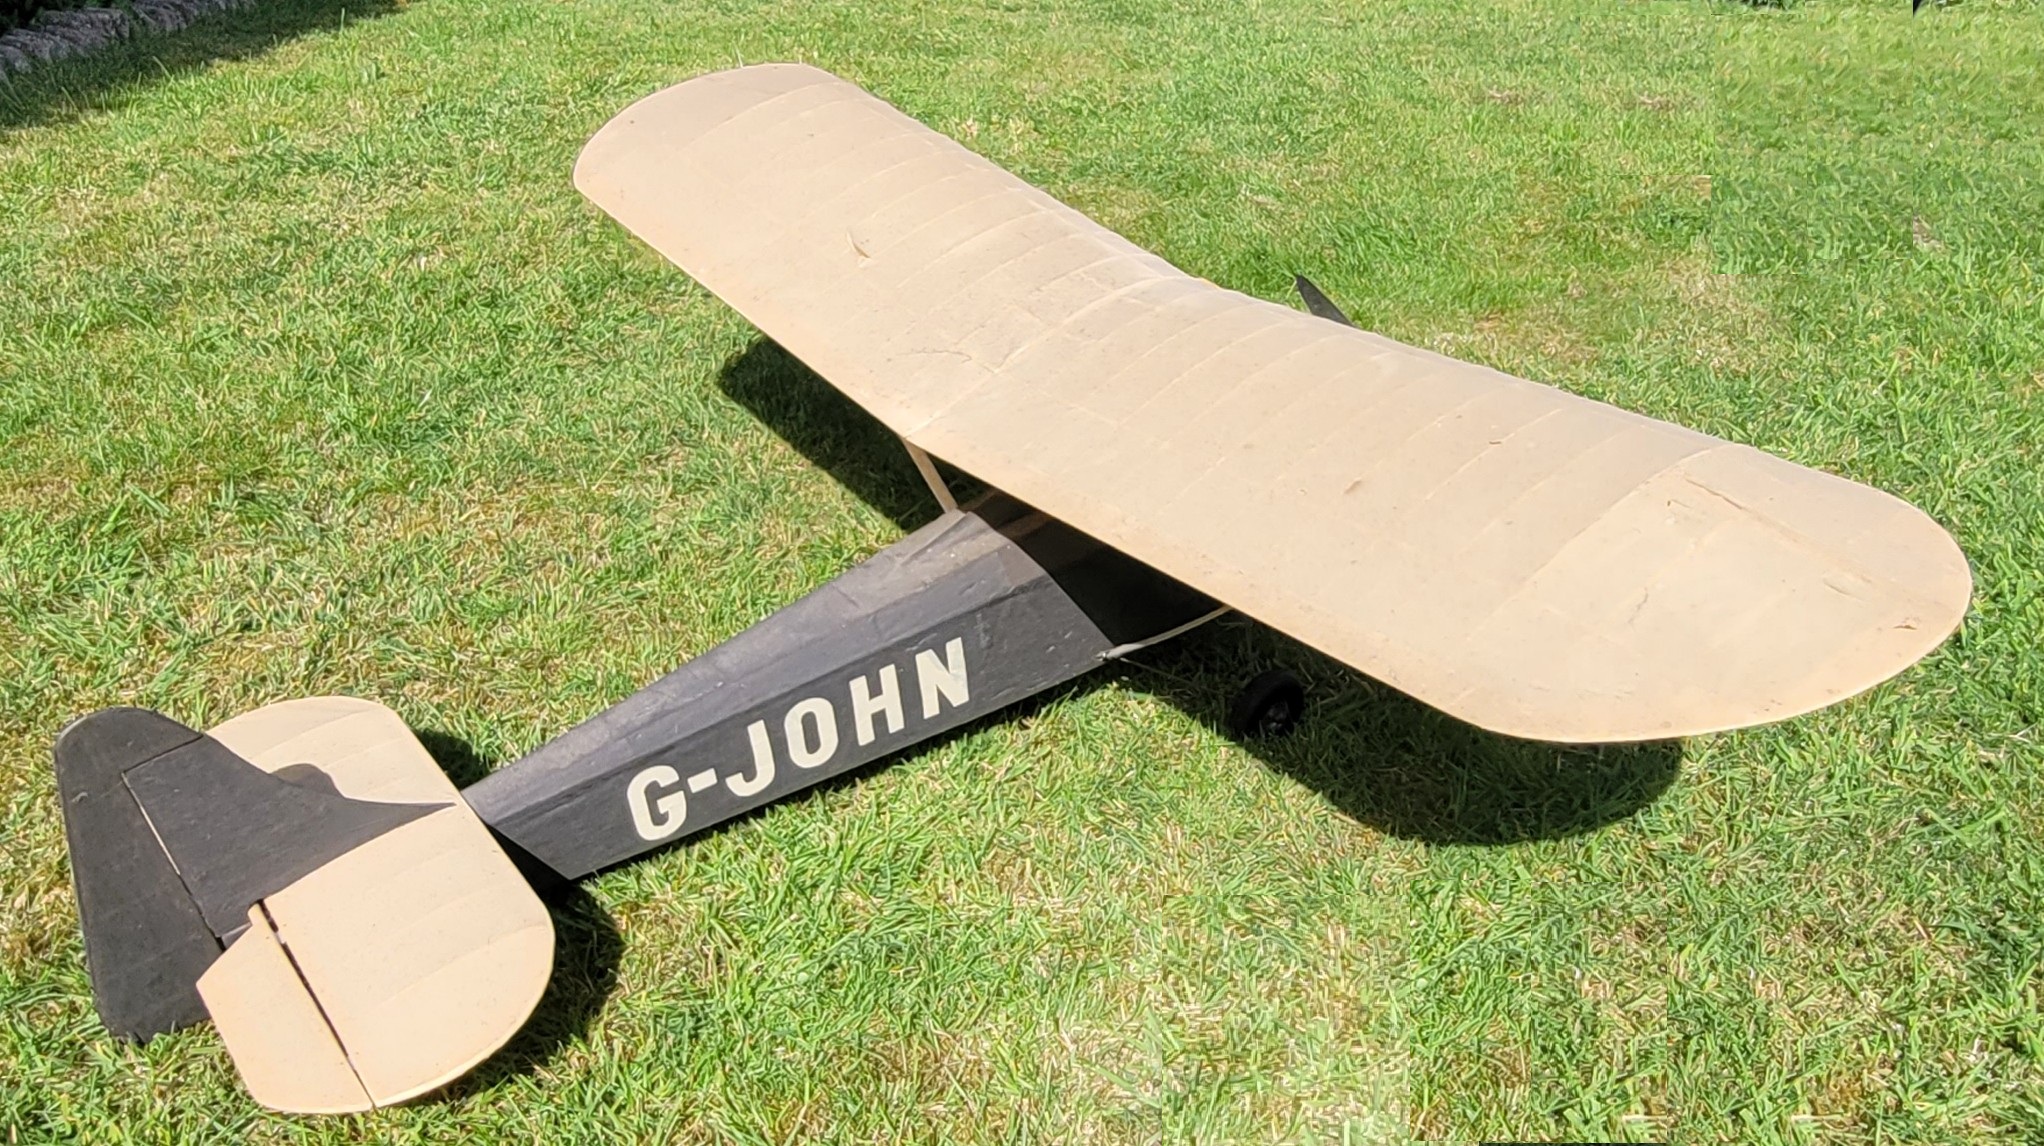
 A few days later he sent me a couple of photos showing that he’d done exactly that! I can’t help thinking that he could have made a rather neater job of filling in the redundant propellor cut-outs but 1066 says it’s an old model and he had his hot-melt gun to hand!
 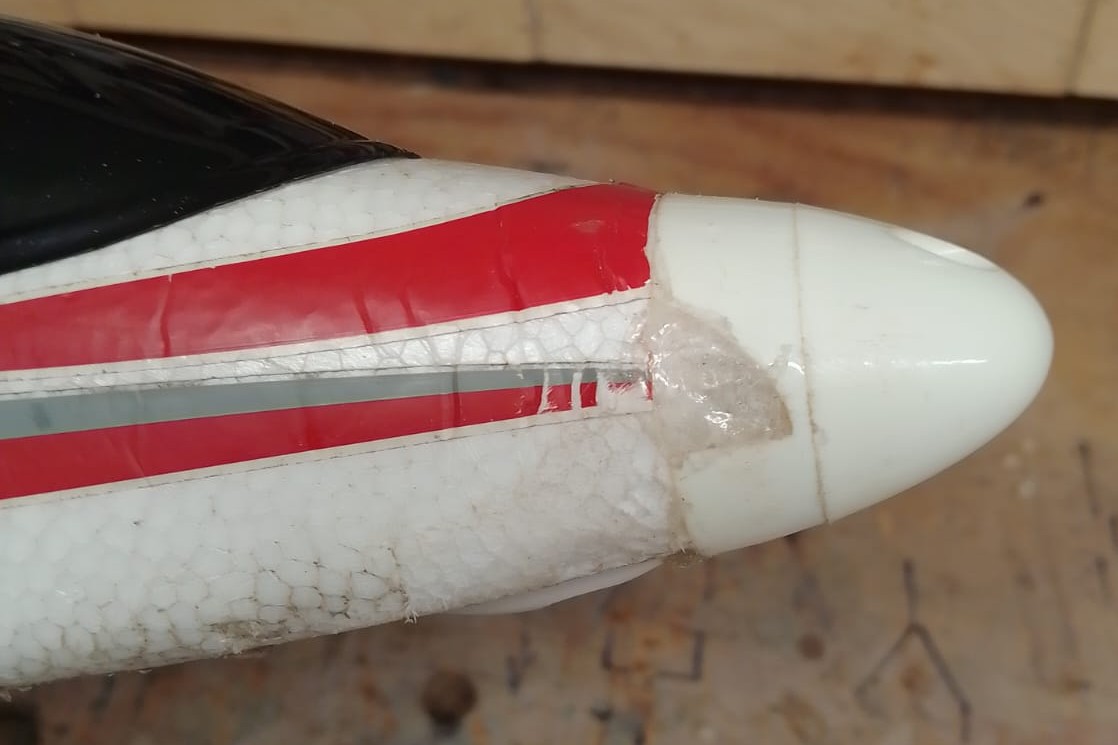 Fair point, The Viper flies as well as ever although it’s a tad nose heavy now, I wonder why!
New member young Tom is now the proud owner of a Durafly Ugly Stick. It’s not a new one, Tom (no doubt helped by grandad Dom) bought the plane from Woody who had decided to sell it as it was surplus to requirements, plus he needed the space!
 The Ugly Stick is an ideal next model for Tom, the Arrows Hobby Mustang that he also owns is a big step up from the little QIDI-560 Maule M7 that he can fly really well.
 This month Tom had lots of flights with the Ugly Stick and he’s flown it superbly with no problems at all. On the last flying day in June there was a strong and gusty wind that was challenging for all the fliers, but Tom had several successful flights with the Ugly Stick.
 On every flight he took off, flew around, did some touch and go’s, and finished with great landings back on the patch. Despite only starting to fly very recently he coped with the conditions much better than many of the established pilots! I filmed Tom flying in the blustery conditions so you can see how good he is at the end of this month’s video.
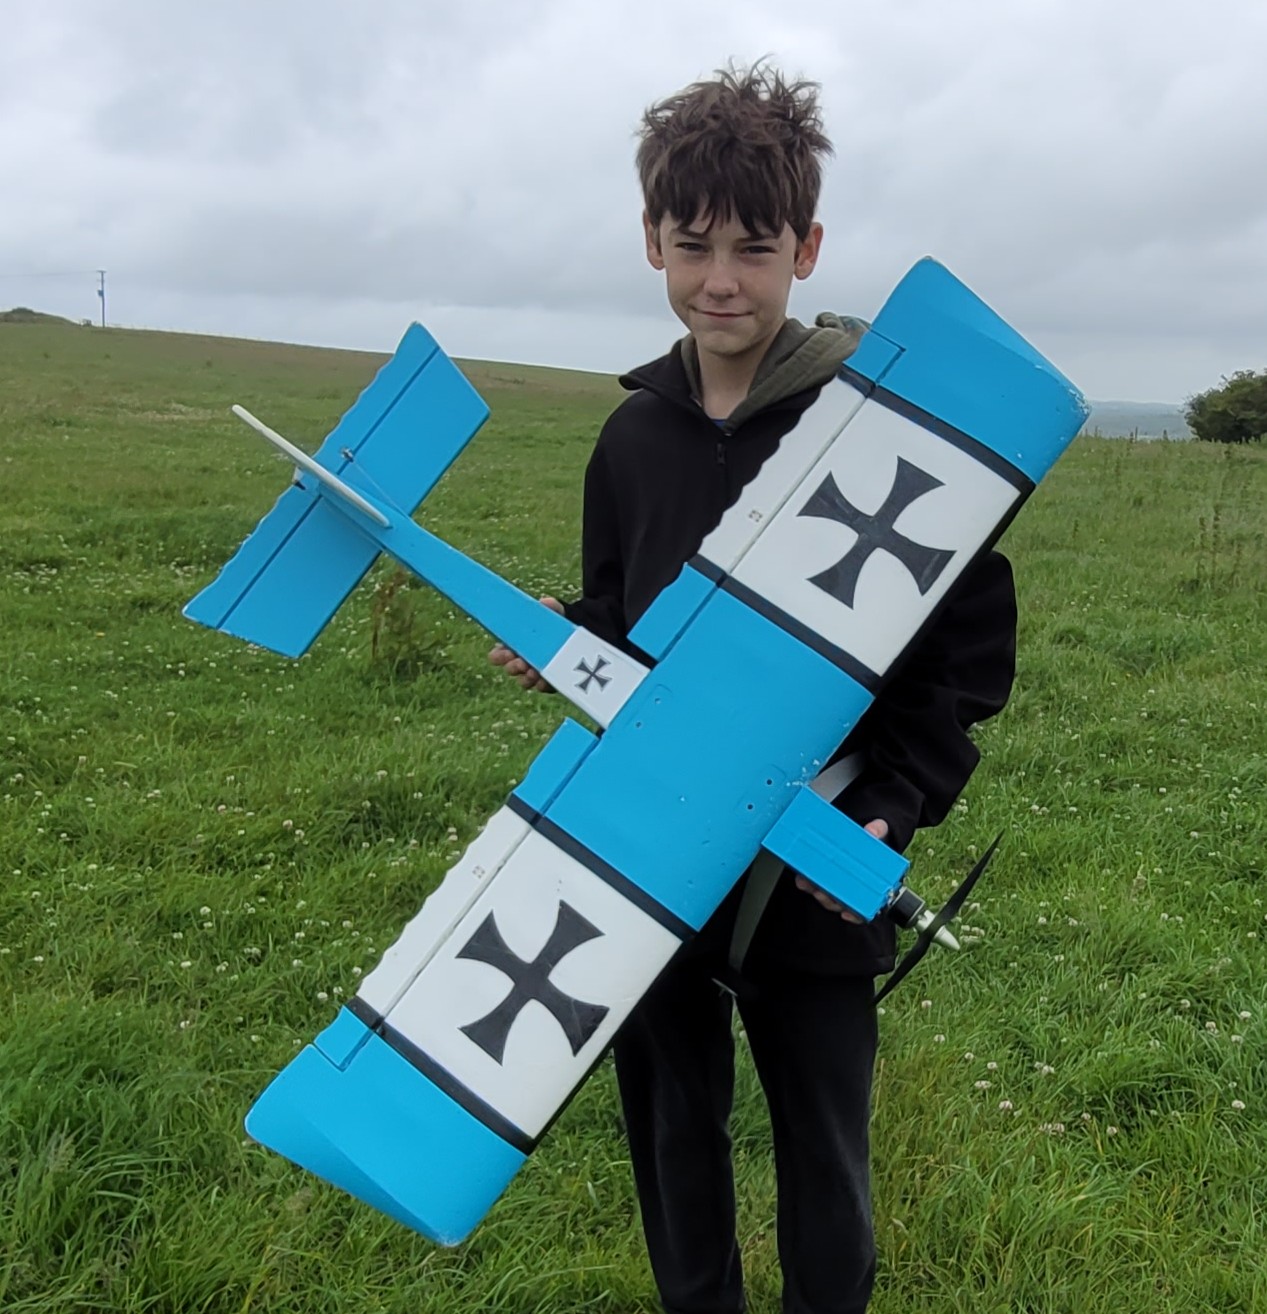
In June Bob the Builder turned up at the patch with another new creation that he’s built.
 This is what he told me about it: My BobScout is based on the Flite Test Simple Scout. Wing span is 800mm, the maximum I could get from a single sheet of Hobbycraft 5mm foamboard. The whole thing is made from 2 sheets of foamboard.
 I just wanted something that I can play around with, so it has fairly large control surfaces and a low wing just be different. What could possibly go wrong?
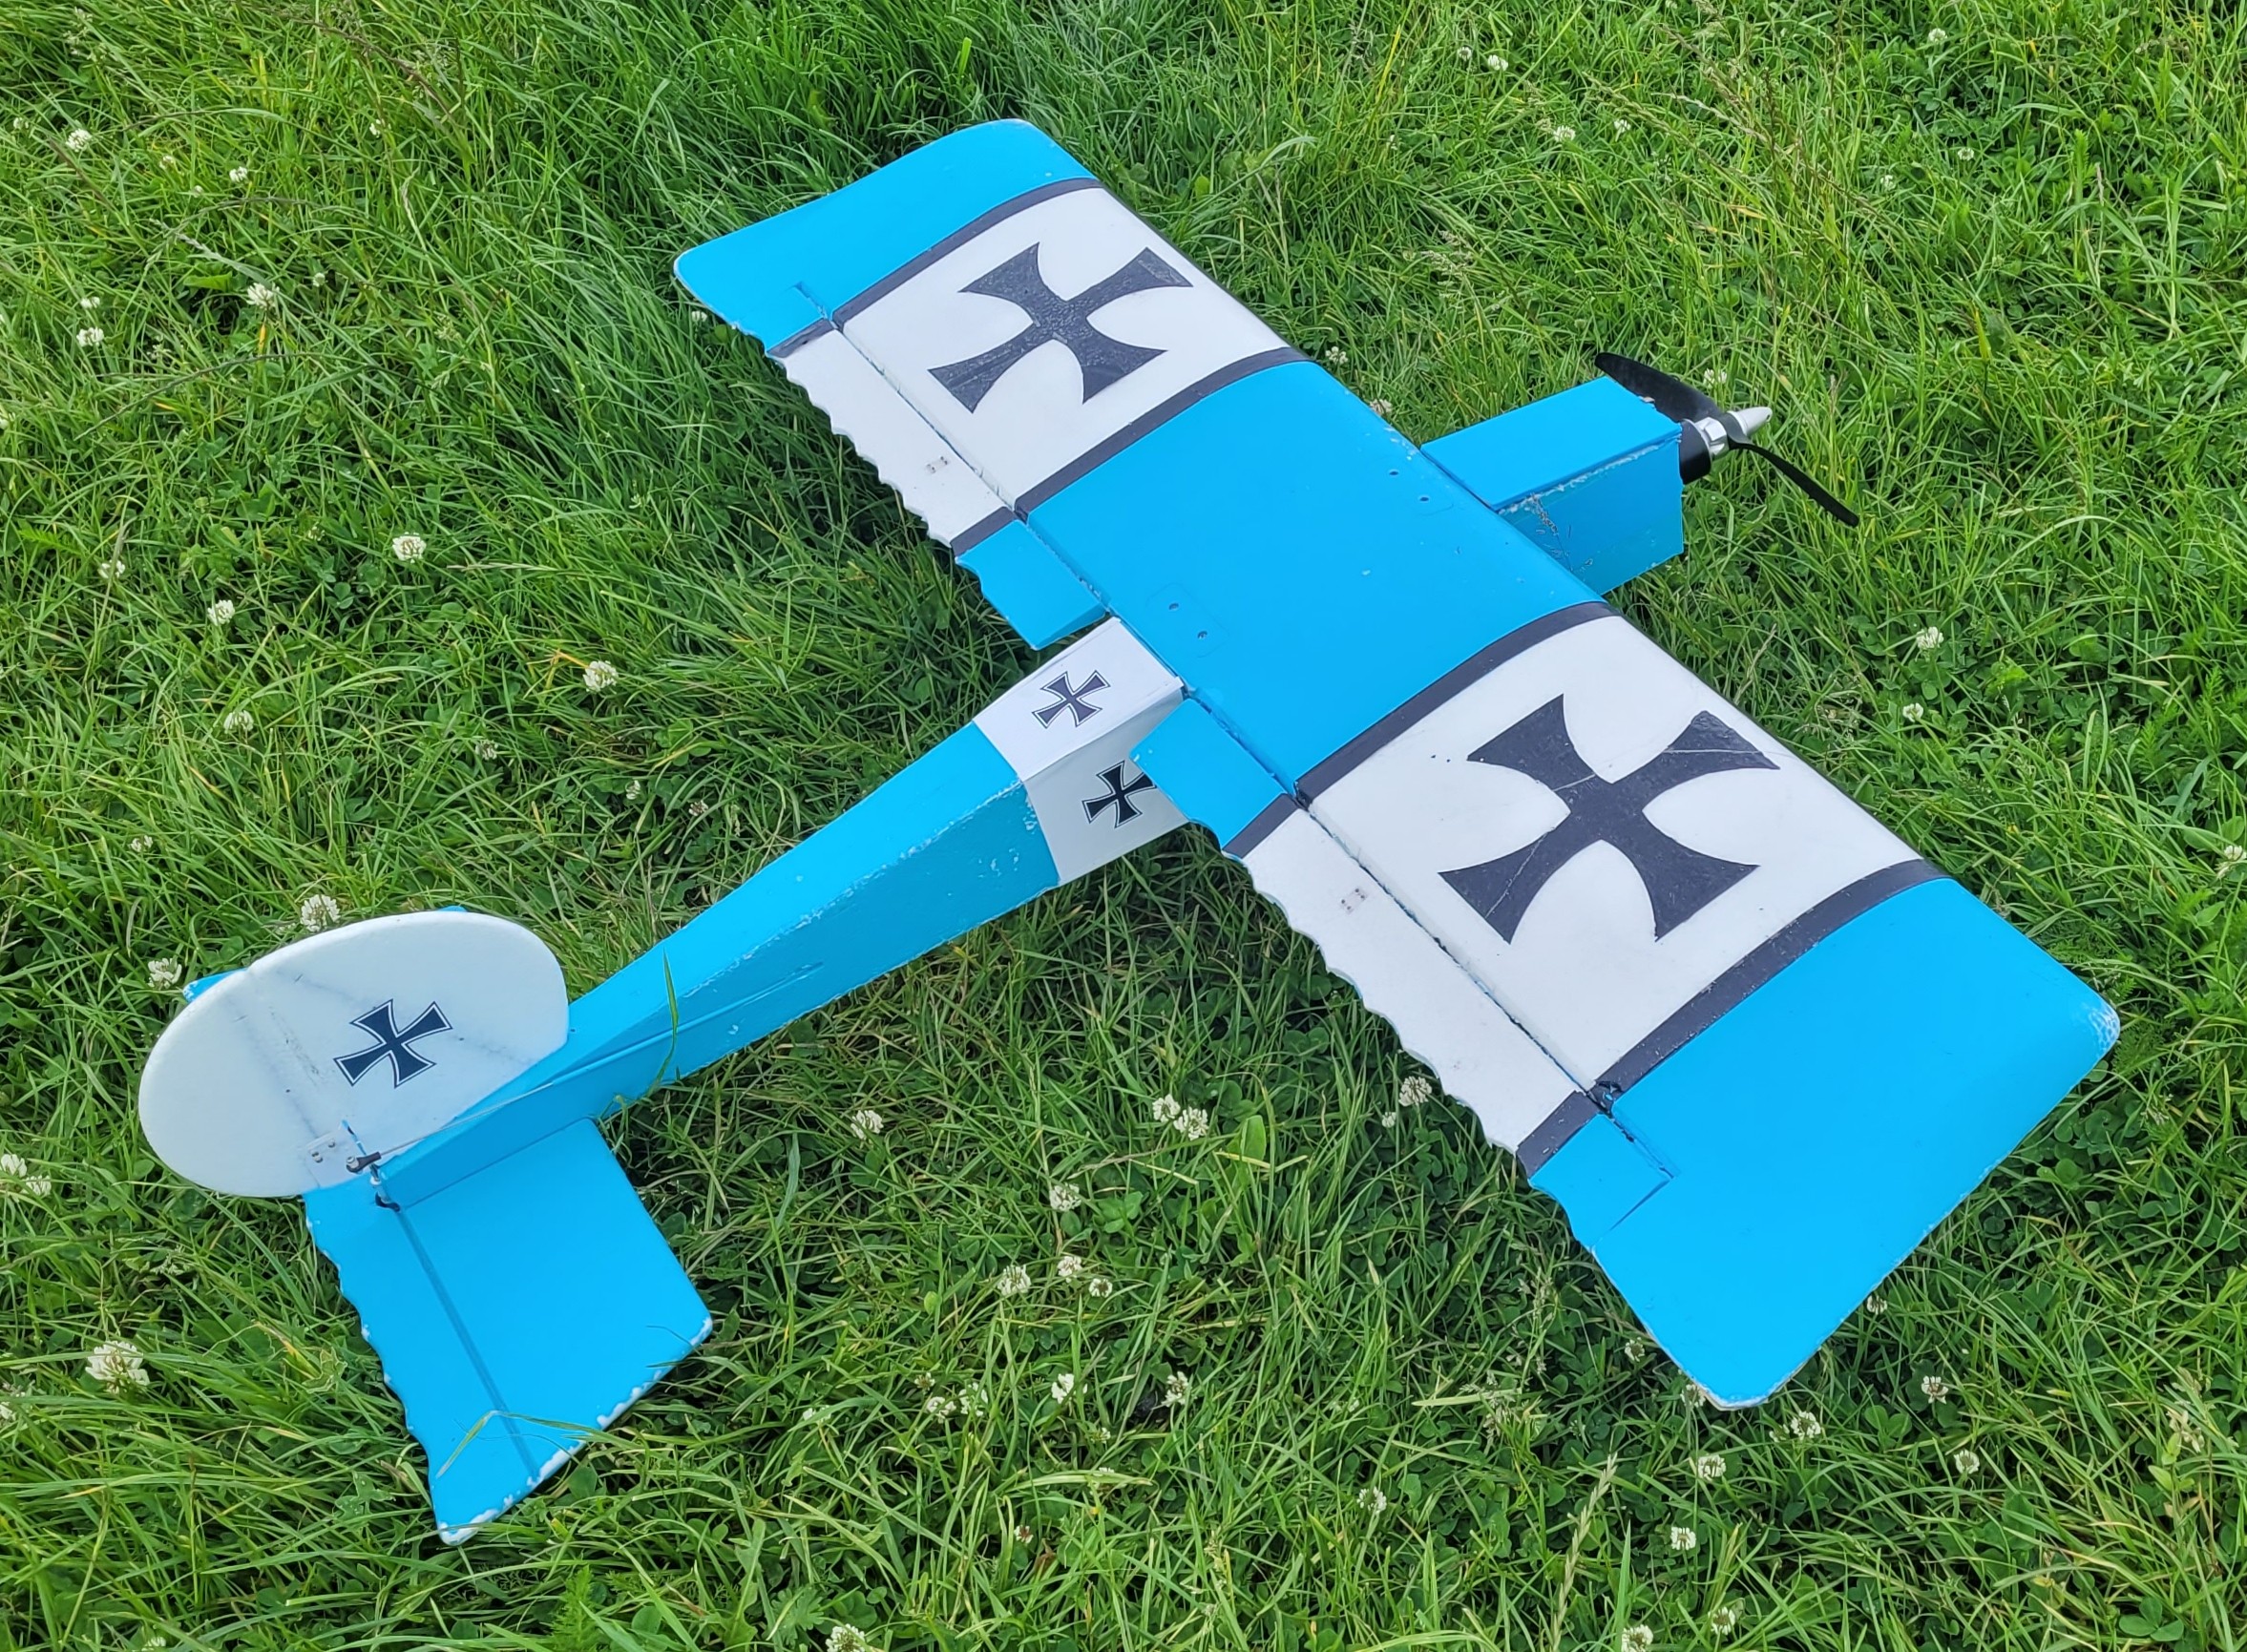
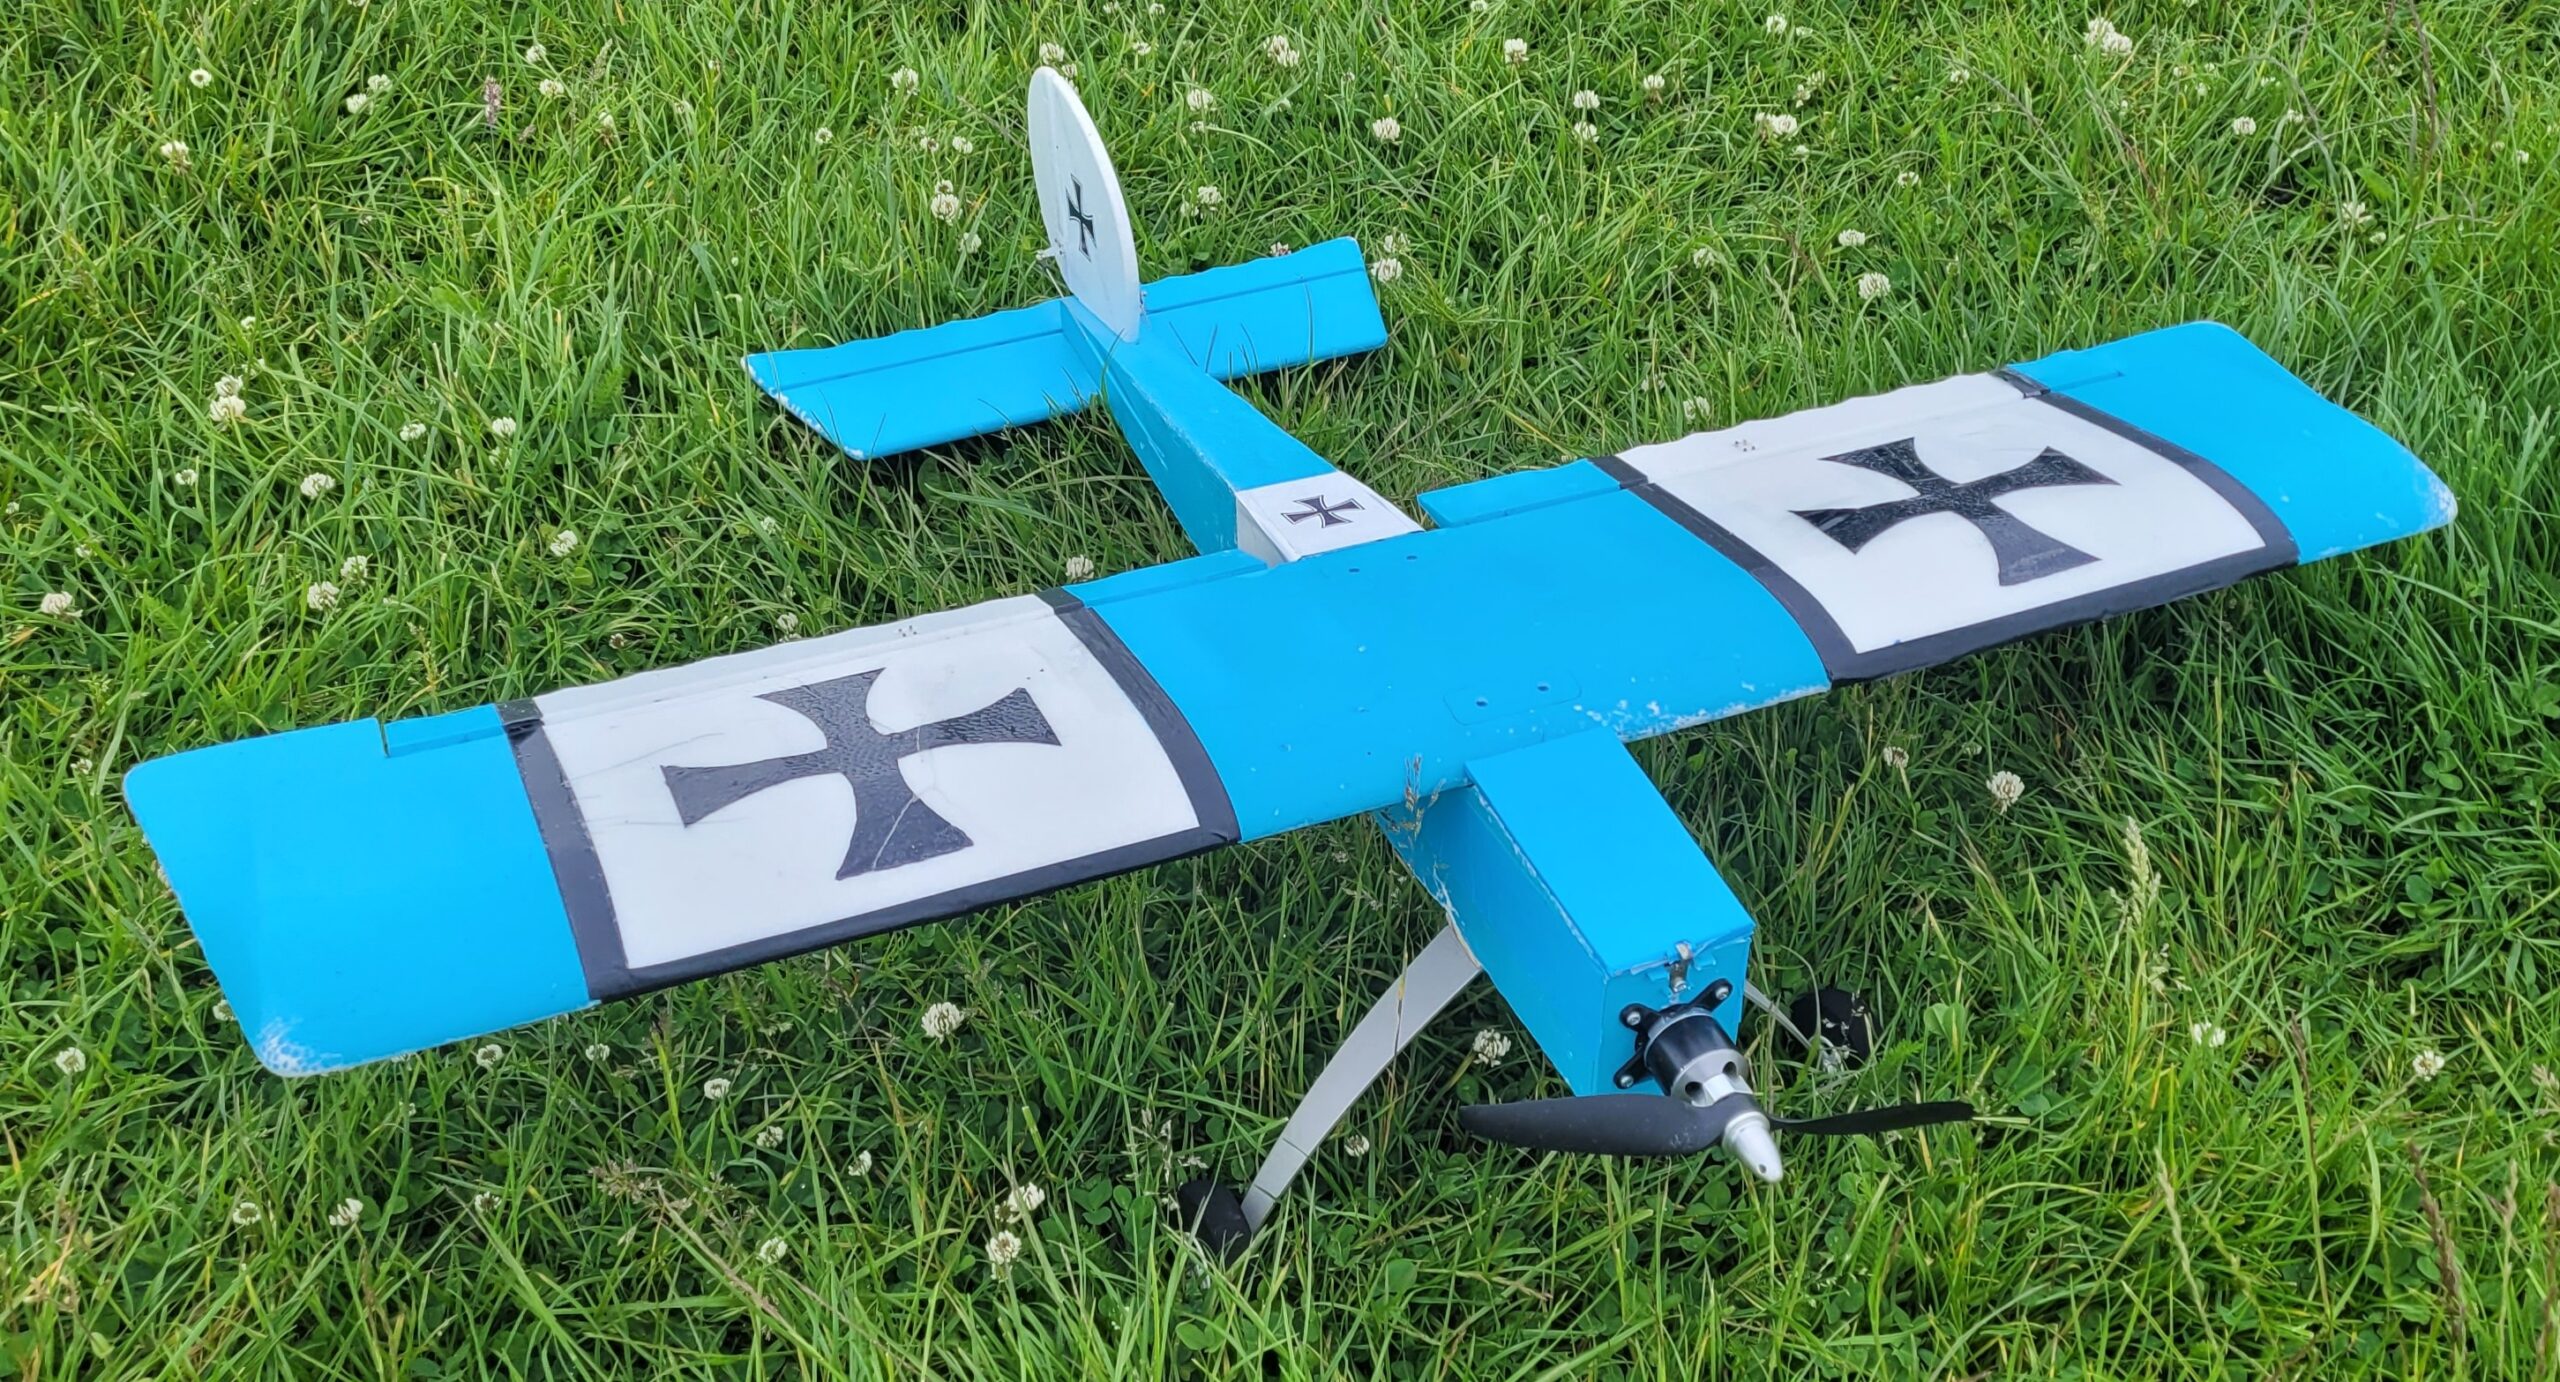
 SunnySky 2216 1400Kv motor, 30amp ESC, 1300 3s lipo, 4 11gram servos. Currently using a Fly Sky S8R stabilised receiver. Spray paint finished to protect foamboard paper covering and to make it look better. All up flying weight 640 grams, about 150 watts/lb.
 Cheap and easy to make and repair, fun to fly, room for variations, uses parts most of us have laying around. Would make a good club build. Thanks Bob, it looks like a nice all-rounder. I don’t have any video of it flying yet, hopefully I’ll be able to shoot some in July.
Bob also sent me some information about a new giro he’s been trying out: I have purchased an FMS Reflex3 giro and fitted it to my Skylark. I am hoping that the FMS name will ensure some quality and it has a useful feature that allows the gain to be adjusted from a phone app. Seems OK so far and it makes the Skylark a lot easier to fly. 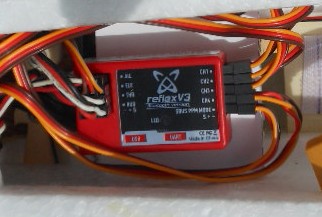 I’m not sure what giro Bob was using in the Skylark previously but it did seem to give him a lot of problems so hopefully this one will prove to be better.
This month, as last month, the action photos were all taken by young Tom:
Video time now, this month with footage by me, MacFly, Dougal, and Captain Slow: Please watch the video full-screen, it’s so much better with small models flying around. If the video won’t play for you please click HERE
The Final Funny: Many years in the future a young pilot is flying around in his spaceship, and after flying for quite a while he lands at a convenient fuel station to refuel his spaceship’s tanks. Once he’s filled up he asks the cashier where the nearest bar is. The cashier responds with “Pop over to the next moon, there’s one called The Keyboard, you’ll find it easily enough.” The astronaut thanks the cashier and flies off to the next moon. Once he’s landed he finds The Keyboard easily enough, just as the cashier had said, so he goes in and sits down. The bartender asks him what he would like “Just a drink or something to eat as well?” “I’ll just a beer for now please. Oh, and tell me, why is this place called The Keyboard?” The bartender says “Because it’s a space bar…”
Colin Cowplain
Patch News – May 2026
It’s still officially spring in England but it hasn’t felt like it. I was away for about half of the month so I missed some of the action but I’m told that for the first ten days of my holiday it was freezing cold, and it rained every day in England. But just before I returned the country was hit by a heatwave that saw record high temperatures for over a week!
 All the rain made the buttercups grow more than the grass but the usual suspects got stuck in, and in the photo above 1066 was trying to look as if he was working hard.
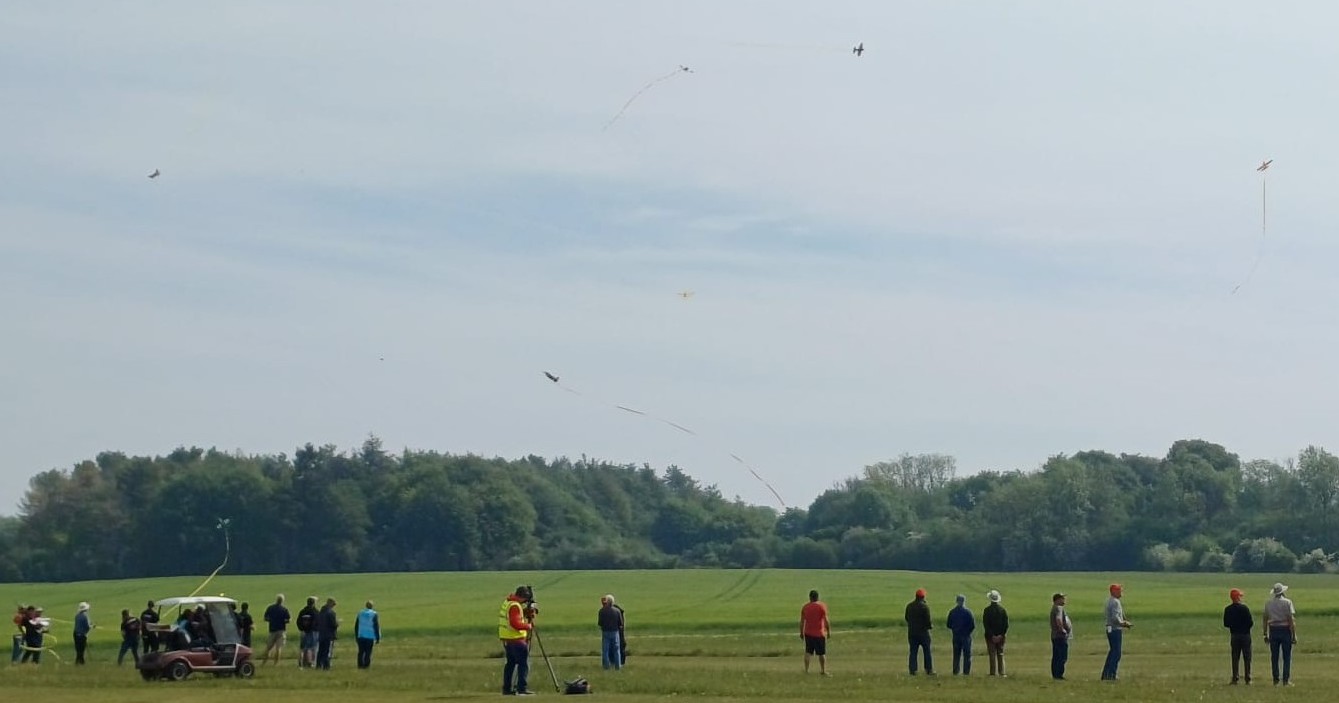
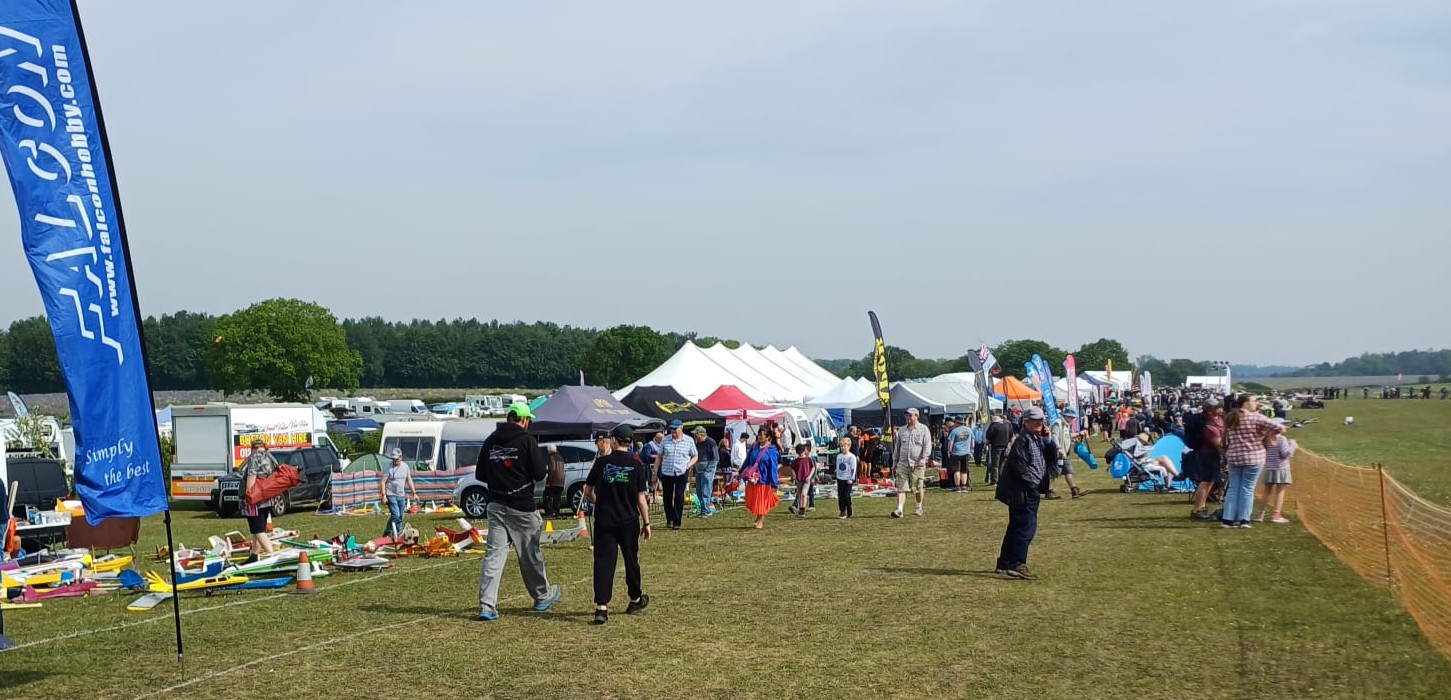
The Popham Model Show was held over the weekend of 9th/10th May with the forecast predicting the best weather on the Saturday, the day I went away, so sadly I missed the it. 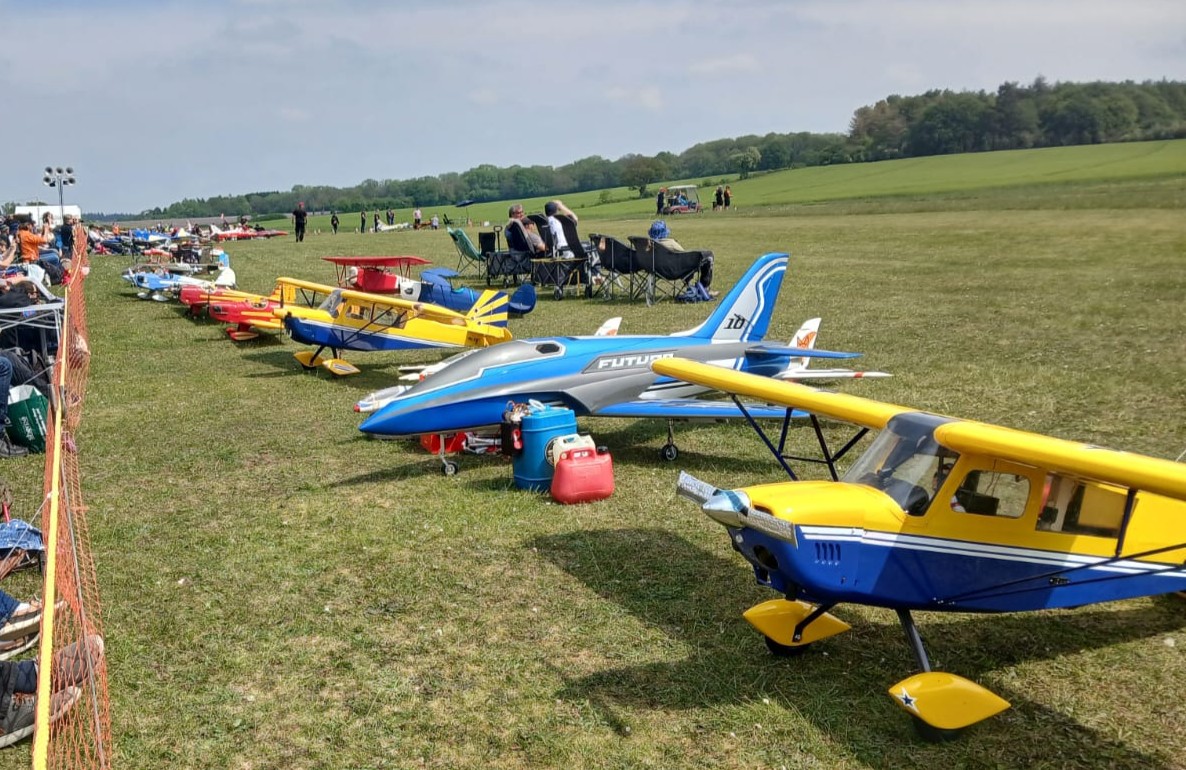
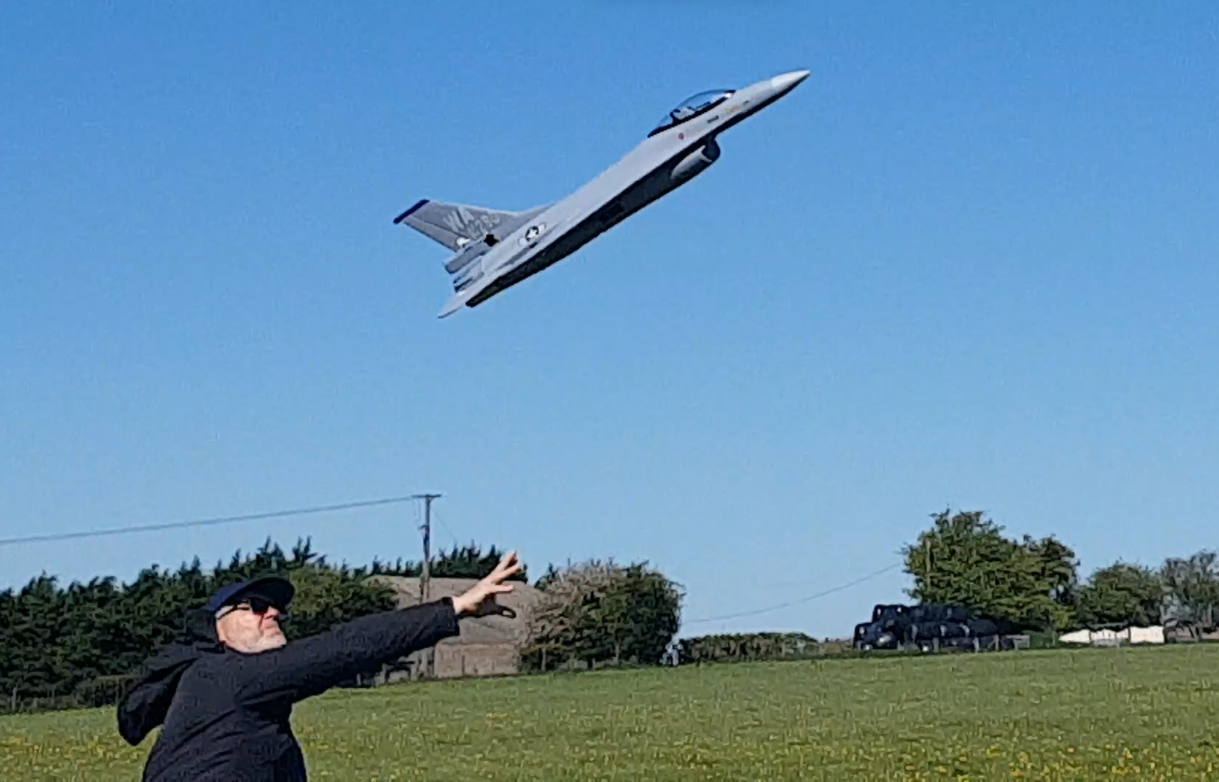
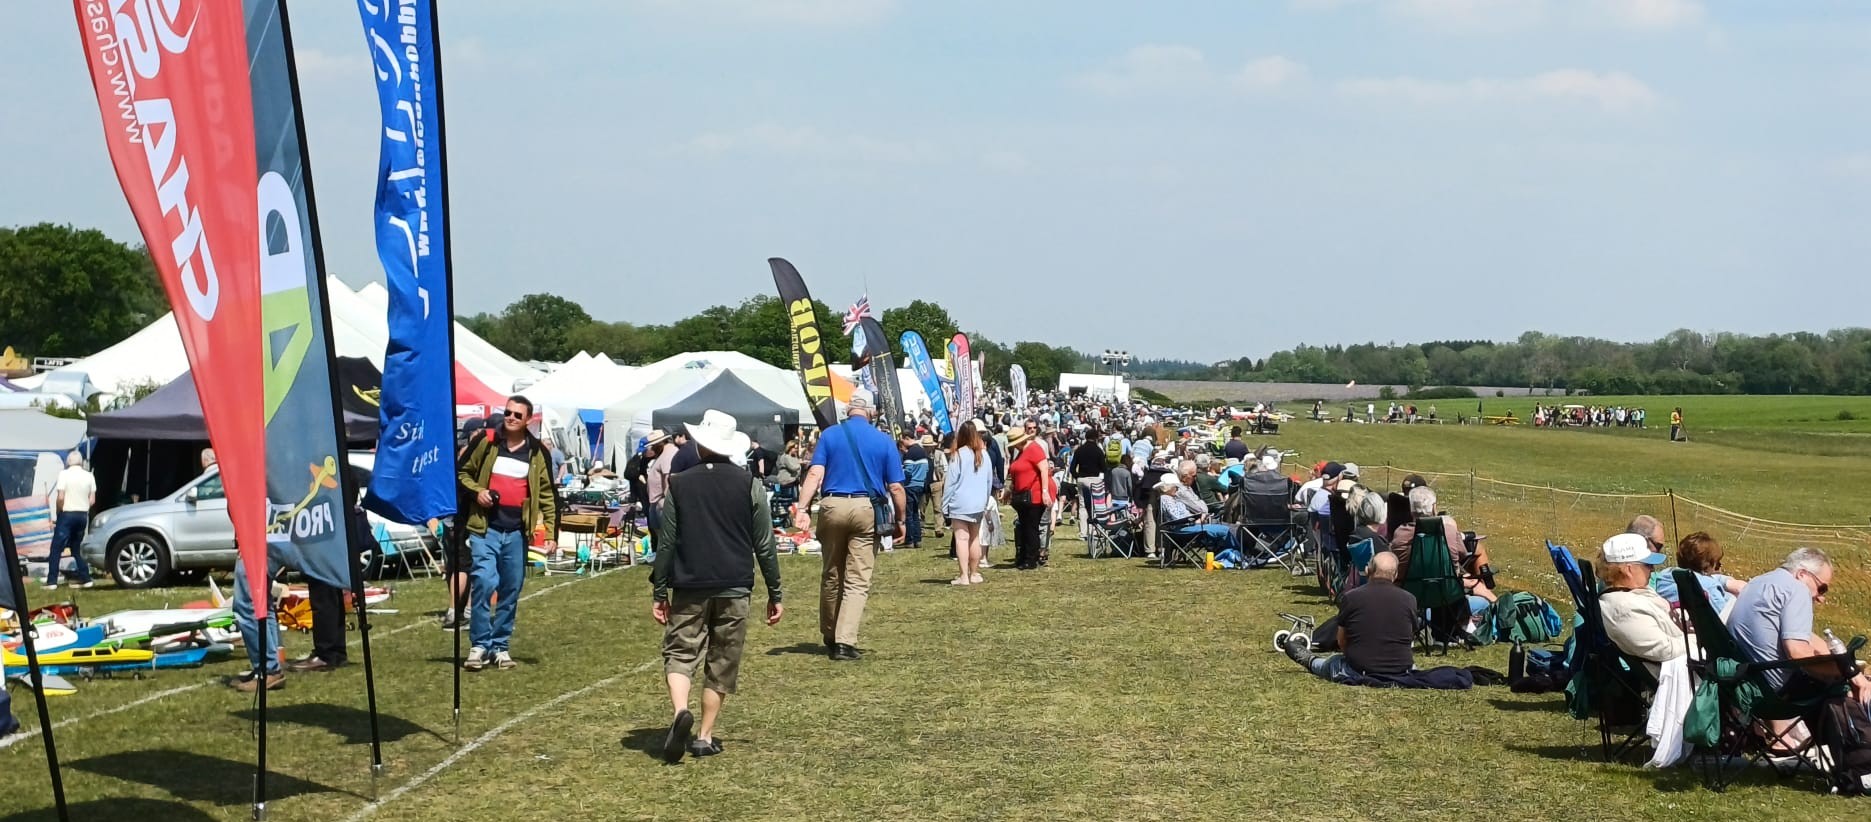 But several PAM members made the trip and by all accounts it was a great show with non-stop flying displays of fixed-wing aircraft, gliders, helicopters, and FPV (First Person View) drones. Highlights included excellent flights from pilots like Adam Broomhead with a half-scale Bucker Jungmeister and Dave Franks flying a 1/5th scale turbine F-16.
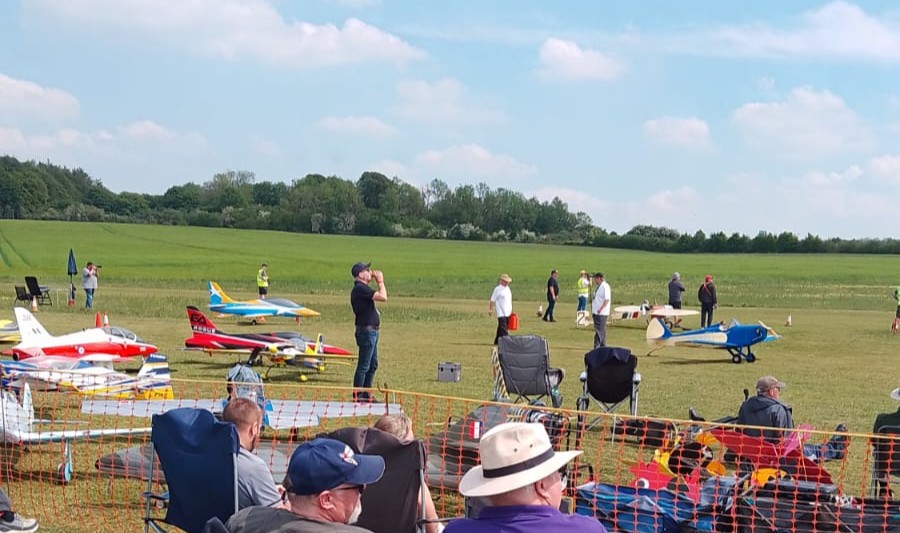
 Alongside the flying displays the main marquee featured ground demonstrations and “have-a-go” activities with RC drift cars, tiny whoops (drones), military vehicles, boats, and scale tanks. Chas and Dougal Entendre sent me a few photos of the event and when I asked Dougal if he’d bought anything I was expecting great things, a twin motored EDF Su-57 perhaps, or a 1/3rd scale Pitts Special complete with onboard smoke system?
 But no, all he bought was a DPR chuck glider! Never mind, maybe next year…
Well, thinking of the Chuck Glider Competition, as Dougal obviously is, I’ve just checked with PAM Comp Sec Dwayne Pipe who has confirmed the comp will take place at Buriton Recreation Ground on Wednesday 15th July at 7.30pm. If the weather is bad it will move to the following Wednesday, the 22nd. It’s always a fun evening, be there or be square!
To redeem himself Dougal sent me some photos of a new toy he’s purchased, but from AliExpress, not Popham. His report starts with some sad news: My first bit of news for May is the sad demise of my venerable Sportjet, after 12 years of loyal service. It was already looking tatty after numerous repairs, so I was taking more and more chances with it (coming inverted through the trees etc). In the end it was a simple landing goof on my part which knocked the nose off, having clipped the long grass and cartwheeled onto the patch. Inspection back at base revealed that the battery housing was broken, the nose cone was fairly well splintered, and an earlier repair on the wing mount had given way.
 Plus I had a brand new plane waiting for the receiver, so the equipment was duly stripped out, and the foam consigned to the bin.
The new one is a Freewing Flightline Velocity, sourced as a PNP from AliExpress. It takes a 4s 1800-2600 pack, and given how small it is (1M span), I’m hoping it’ll go quite fast!
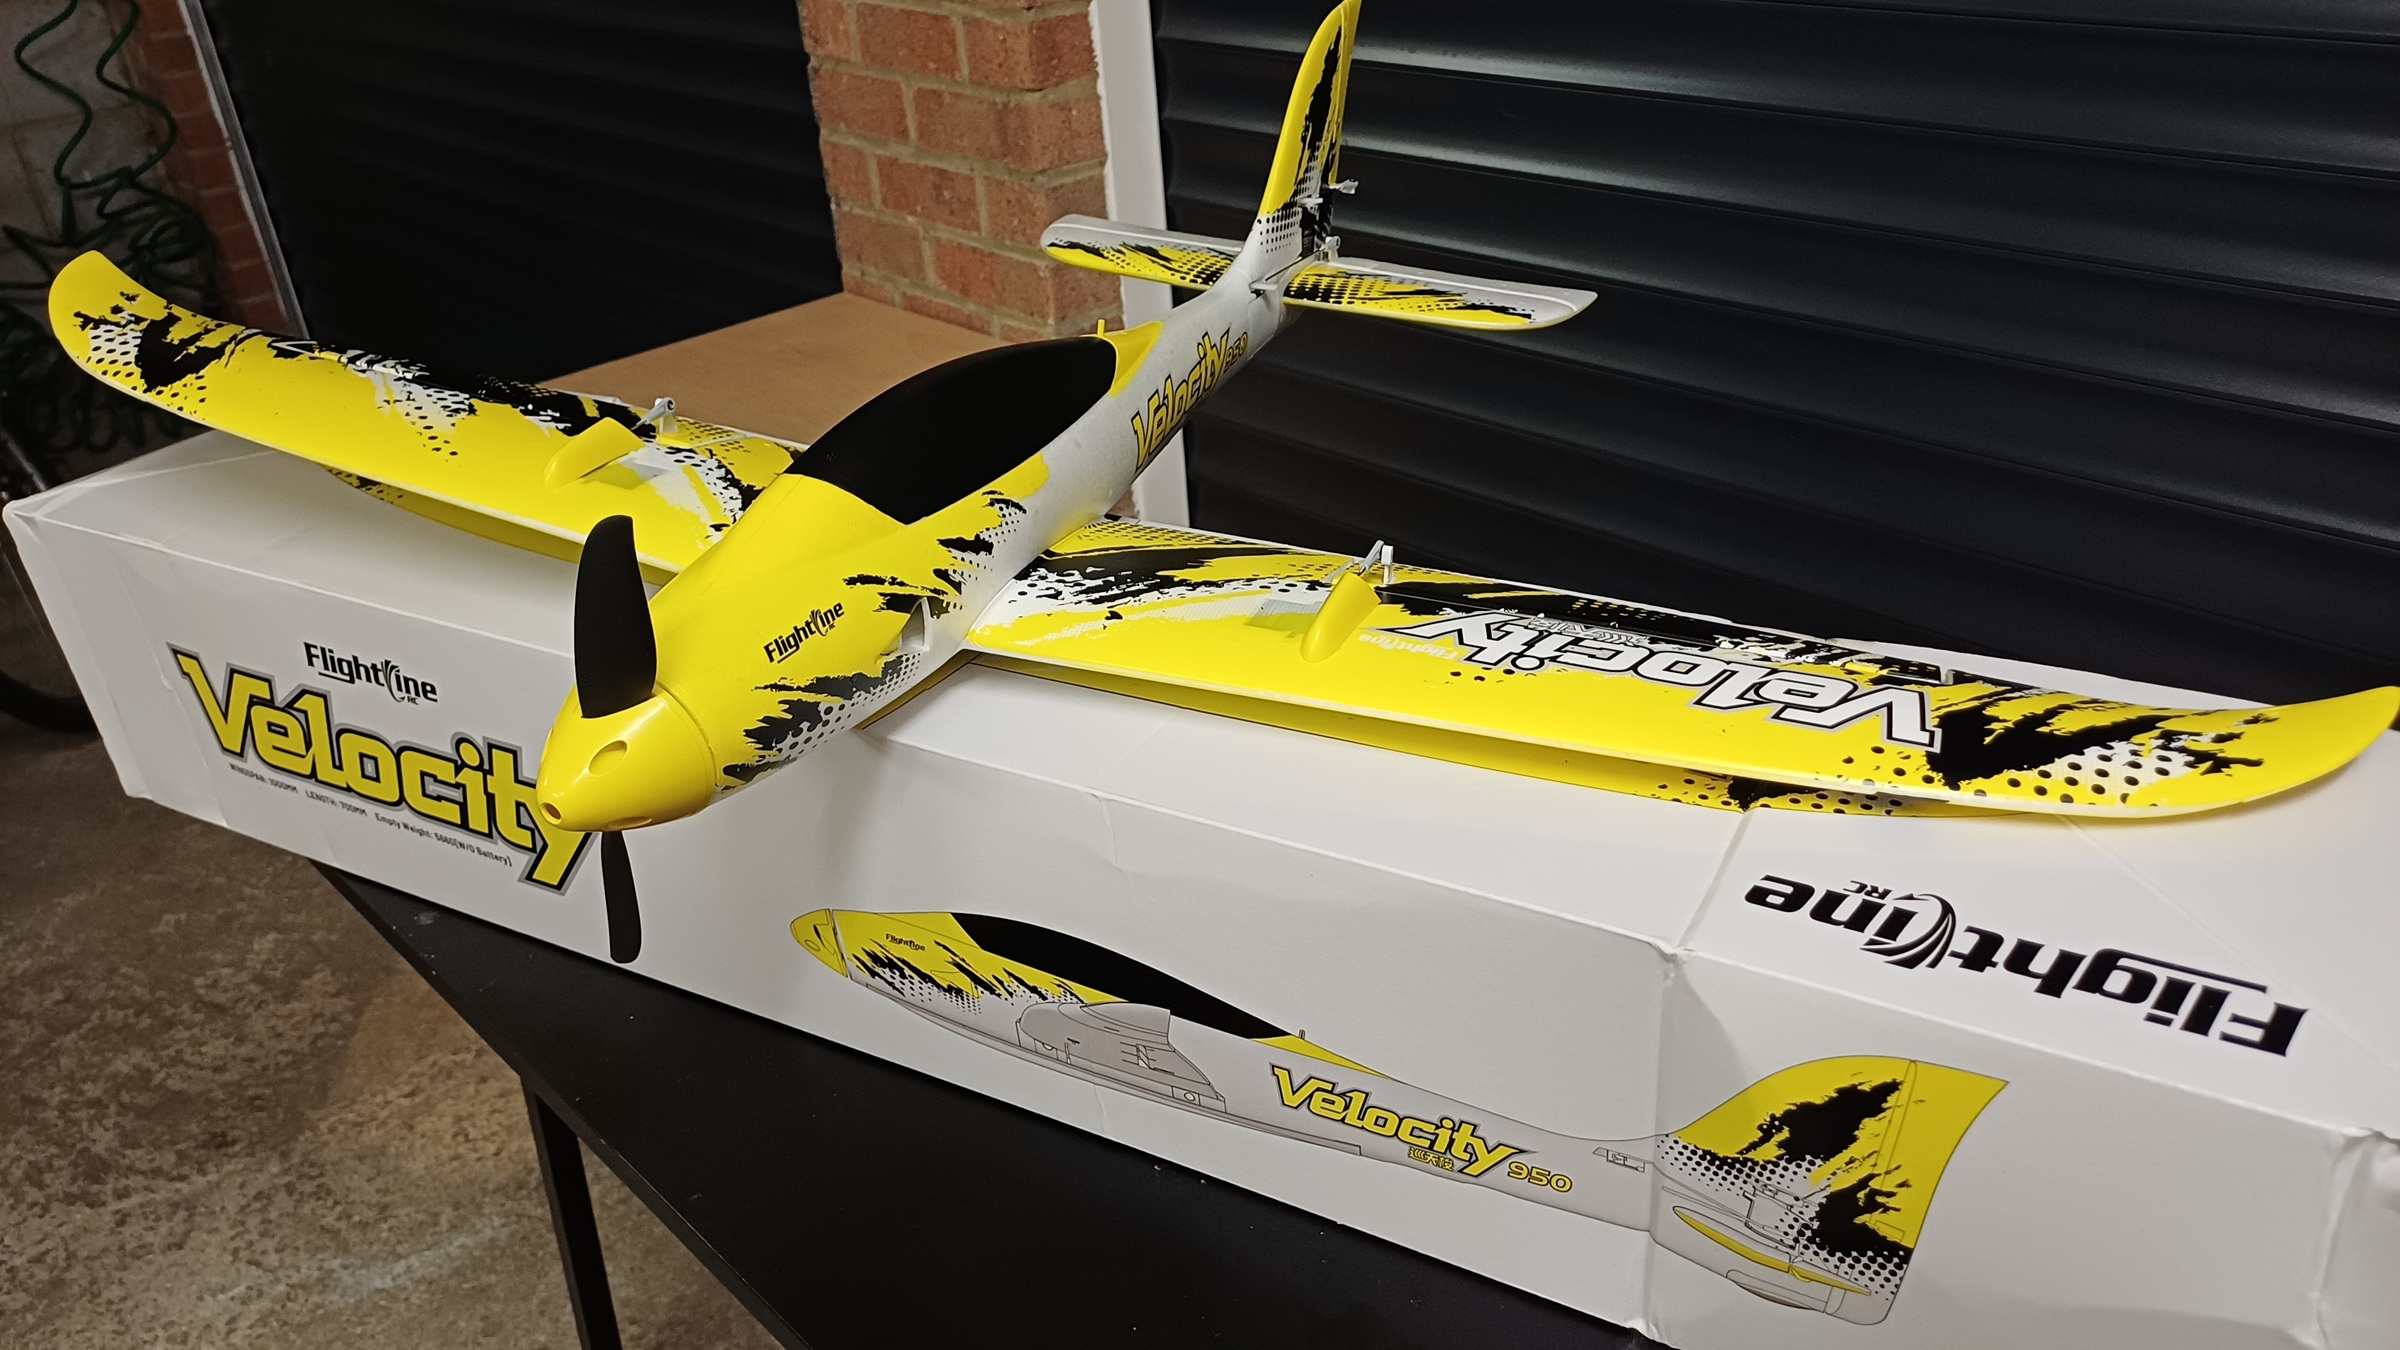 Assembly entailed two screws to hold the tail on, four screws to hold the wing on, and two screws to hold the battery mount in place. To make it a bit more like real modelling I then had to glue the plastic skid onto the fuselage and wing with the EPO glue provided.
 Installing the receiver and getting the Tx set up took longer than the rest of the build.
I’m already getting apprehensive about the first flight. If my experience with the Rare Bear is anything to go by, it’ll need an underarm launch and about two thirds throttle to avoid torque problems. We’ll just have to chuck it and see.
 Thanks for that Dougal. I think it will be much easier to get away from a hand launch than the Rare Bear, I’d be happy to give it an underarm launch, what could possibly go wrong..?
Towards the end of May we were very pleased to be joined by two prospective new members, Dom and his grandson Tom. Tom is thirteen and has already been flying a little gyro stabilised foamie model but having recently purchased a P-51 Mustang they decided to seek some help and advice before flying it. They first came along on Sunday 24th (when I was enjoying a 14-hour flight delay to get back home!) and brought the Mustang along to be checked over by experienced modellers. Dougal and 1066 gave it the once over and found there was way too much aileron movement, but not having any knowledge of the transmitter, they couldn’t figure out how to save the settings so were unable to test fly it.  Dom and Tom returned the following Wednesday having reduced the aileron movements on the Mustang, and they also brought along Tom’s small foamie, a QIDI-560 Maule M7.
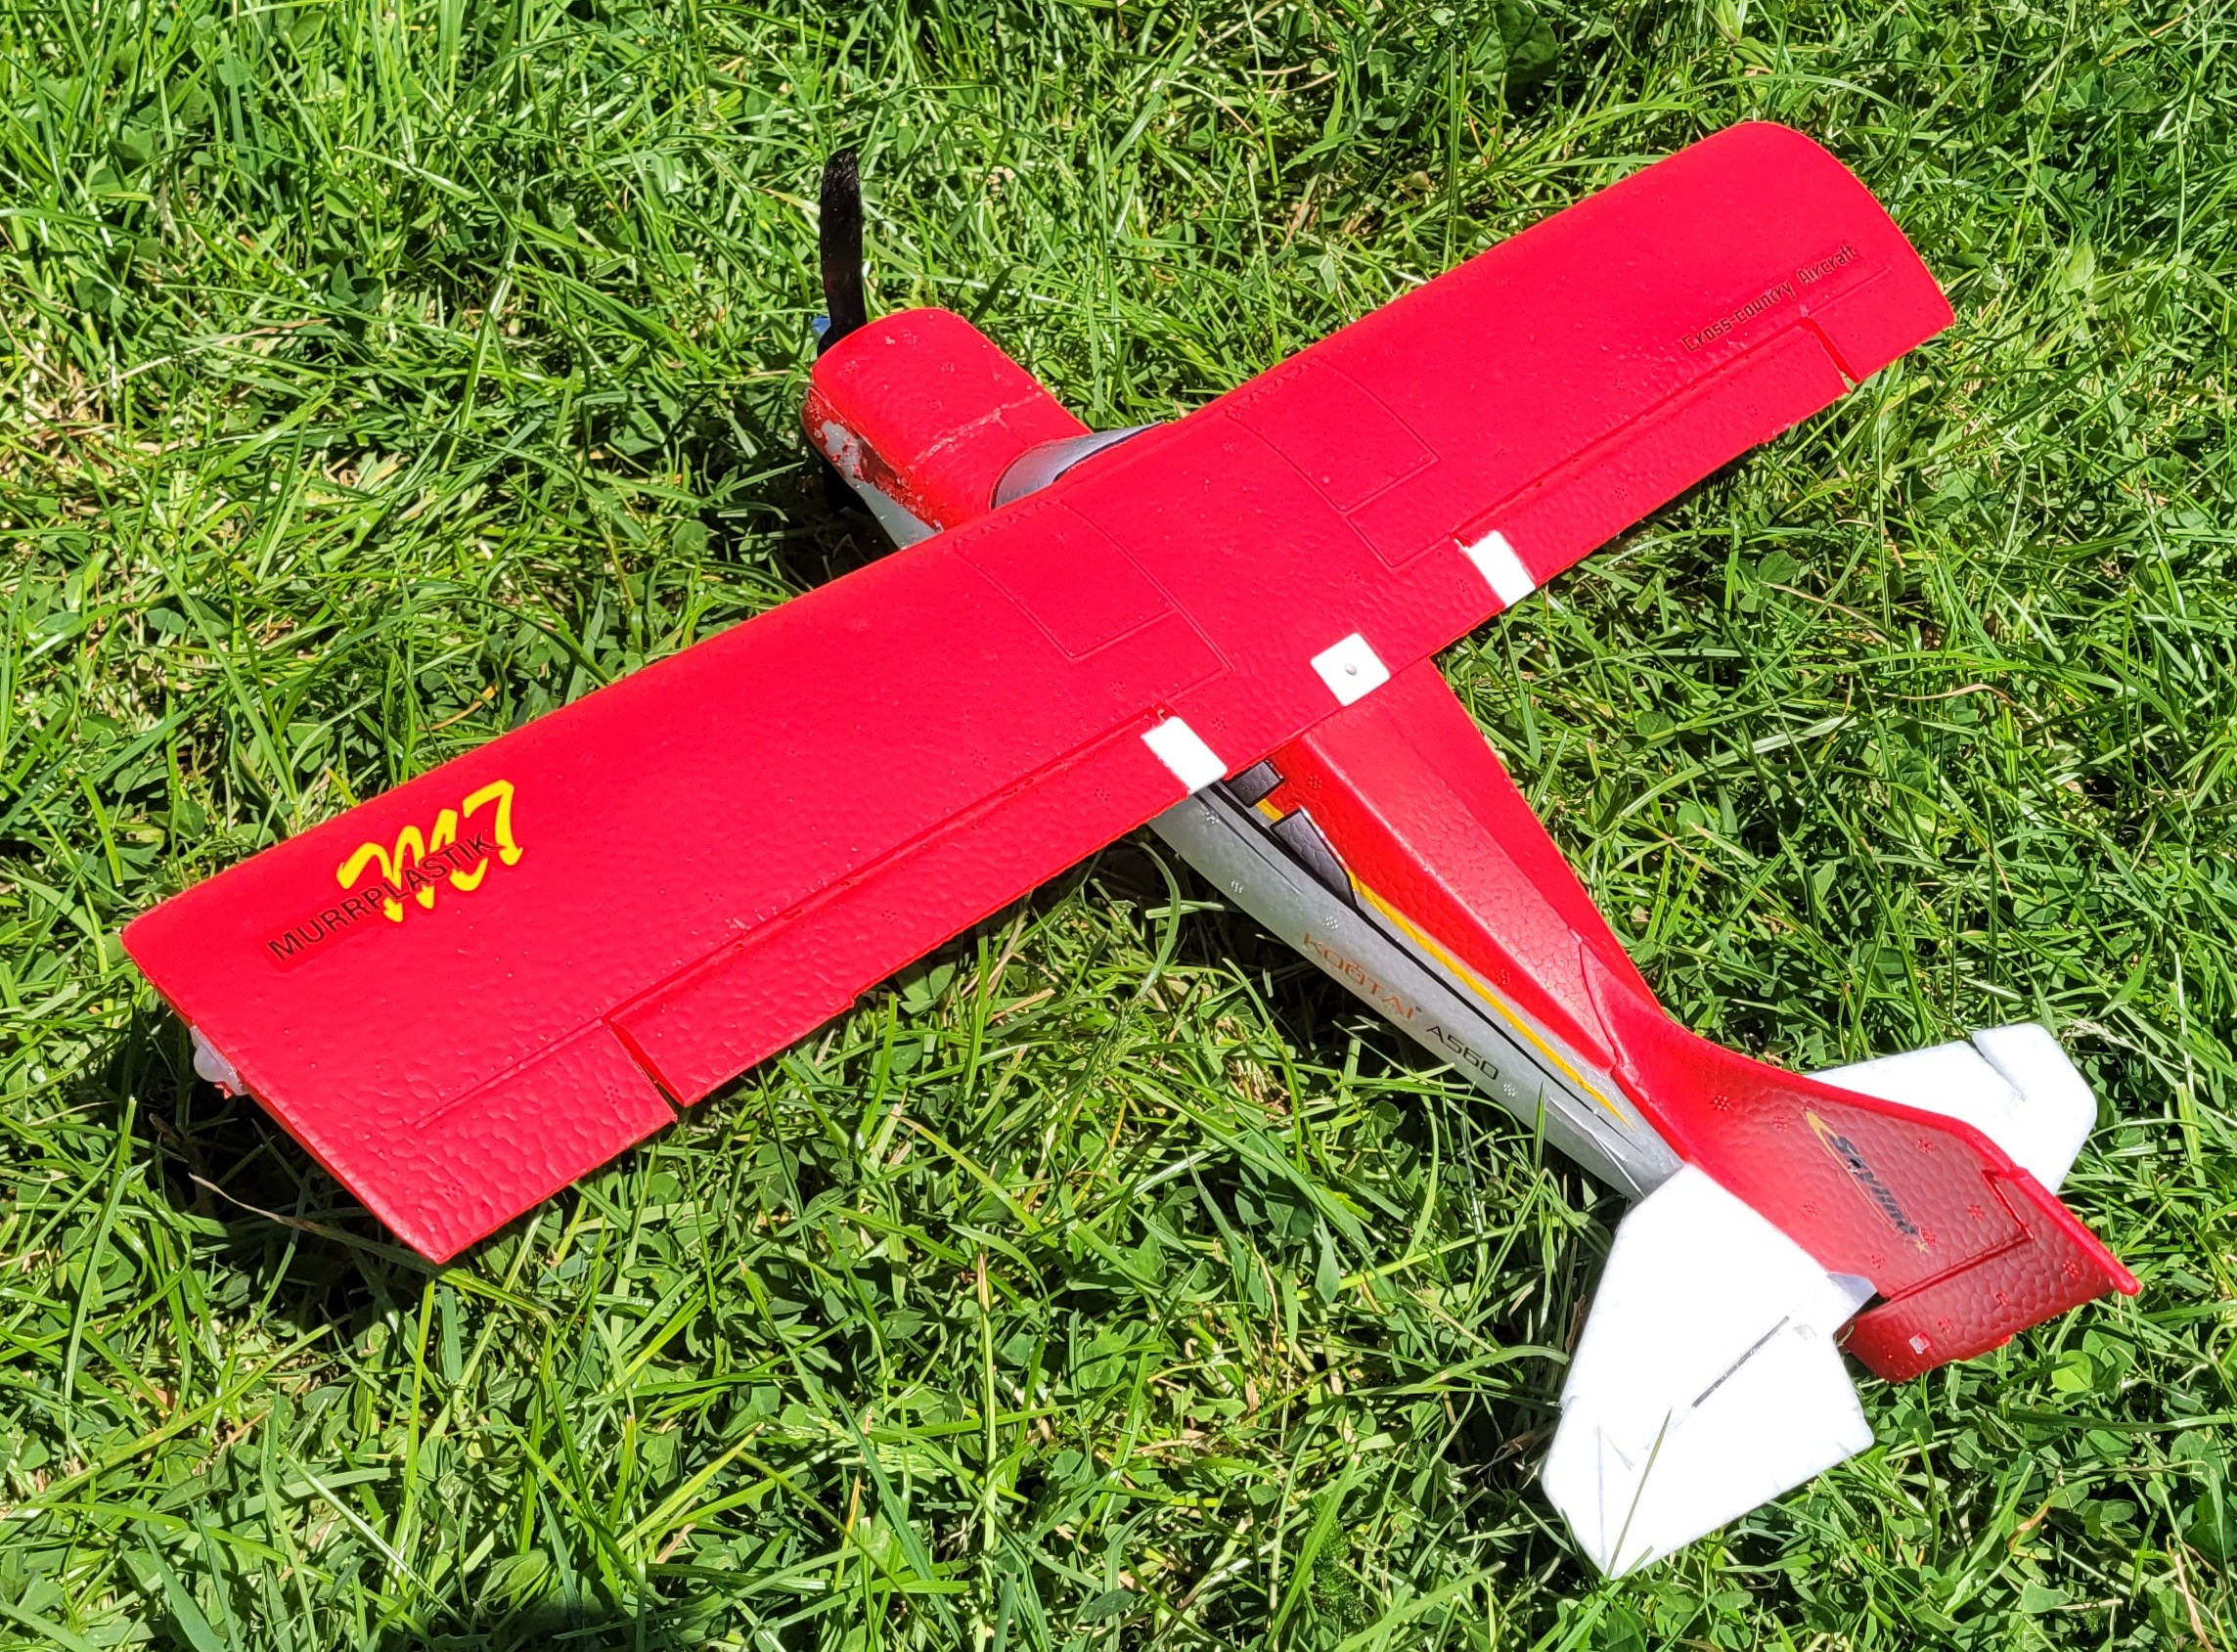
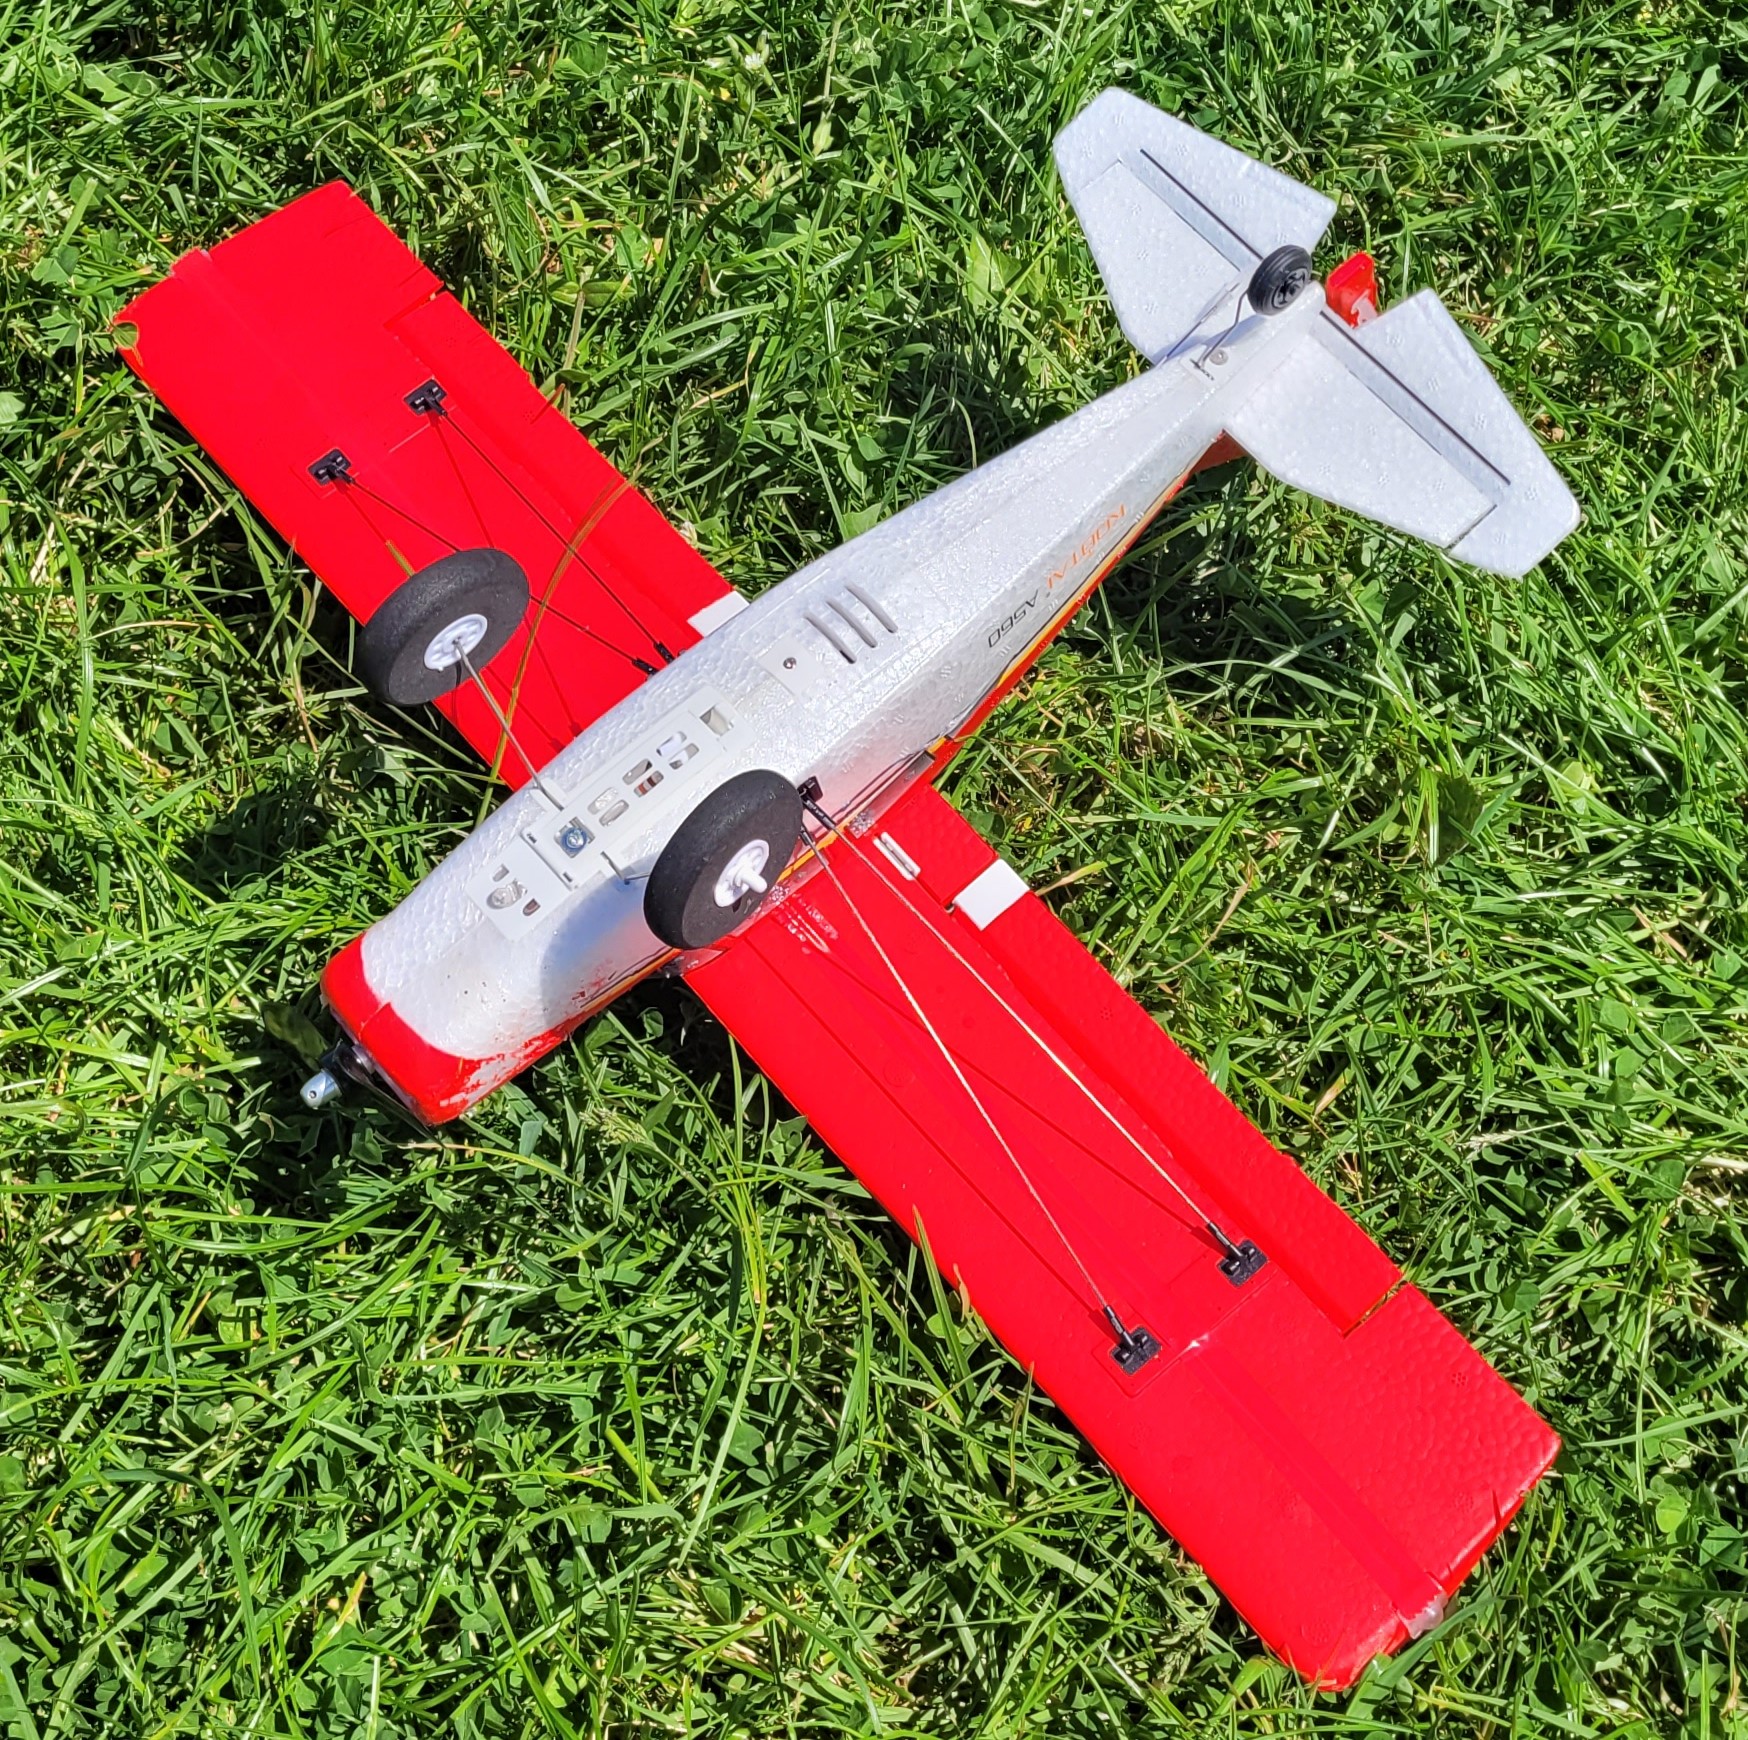 The Maule is 510mm wingspan, weighs just under 100gms, and flies on a single cell 500mAh lipo battery. It has the usual controls, ailerons, elevator, rudder, and throttle, and has a switchable gyro. Woody loves it as it also has lights! It was a bit breezy for such a small, light model but Tom had no trouble flying it at all, I think we were all surprised at how good he was! He had several flights and landed safely back on the patch every time.
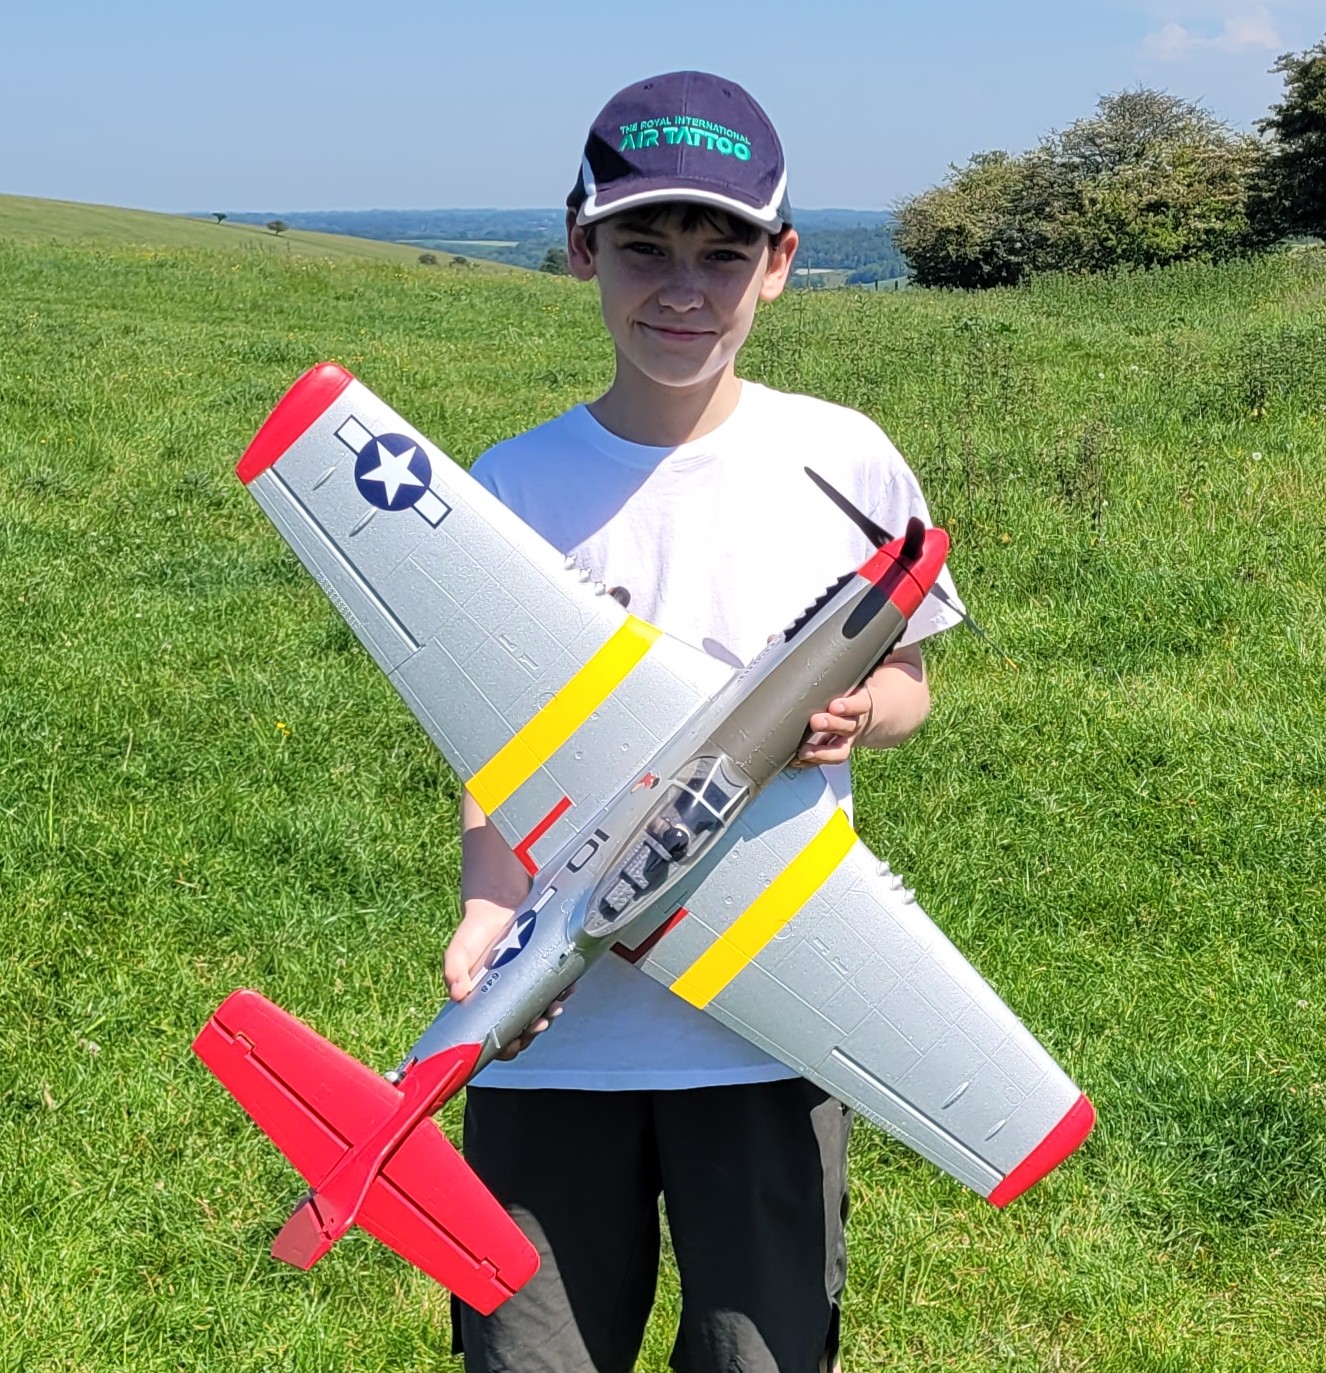
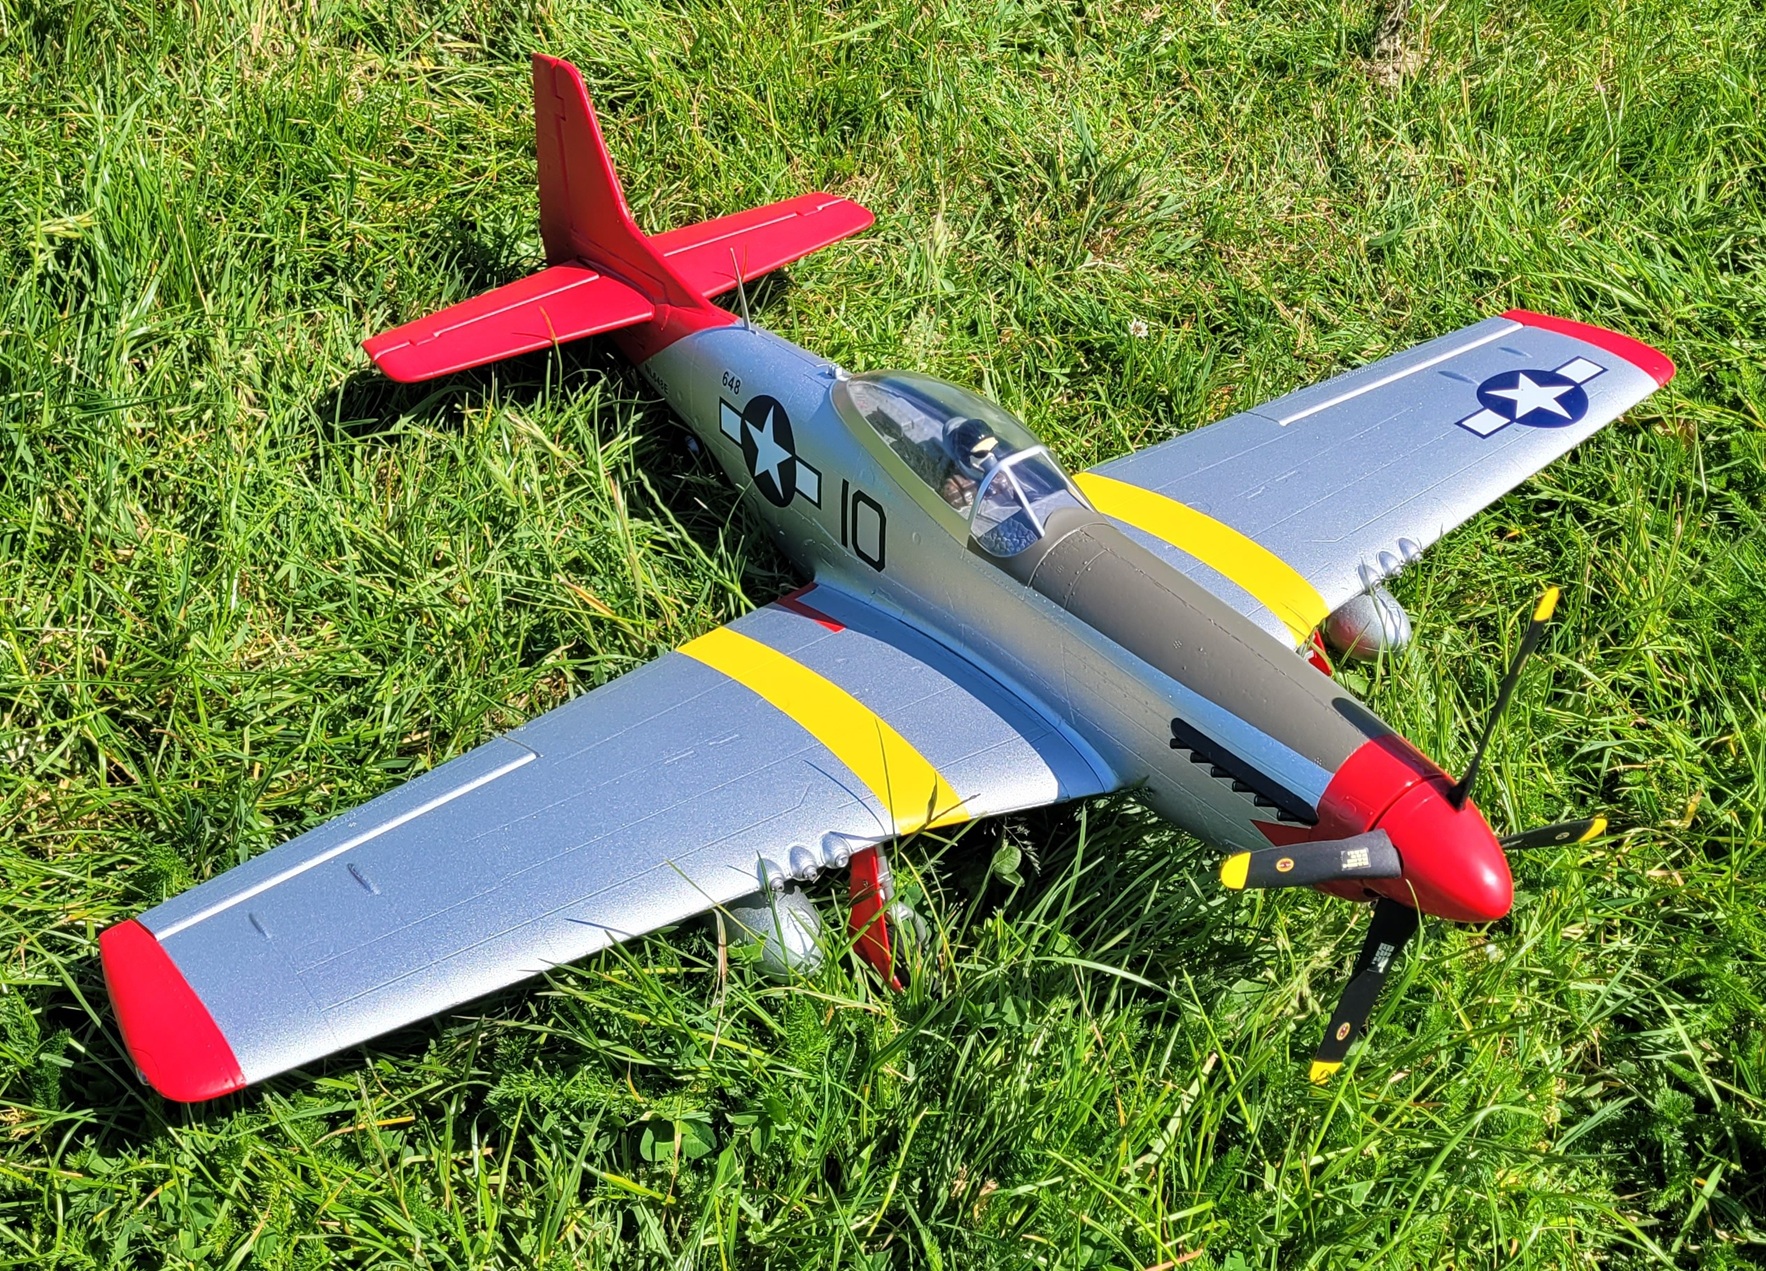 The Mustang is one from Arrows Hobby and this is from their website: The Arrows Hobby P-51 Mustang 850mm PNP with Vector Stabilisation System captures the character of the legendary WWII fighter with crisp scale detailing, from riveted panels and machine guns to exhaust stacks, drop tanks and cockpit detail. A glue-free assembly approach makes getting airborne quick and tidy, while the pre-installed 30A ESC and 2212 1300KV power system offer the vertical performance and classic warbird manoeuvres enthusiasts expect. With 4-channel control, a high-lift wing section and LED navigation lights, this compact EPO warbird is built for confident, spirited flying. Experience Level: Intermediate / Advanced. Age Recommendation: 14+. Sounds like a perfect trainer for a 13-year-old beginner…not! I checked it over and thought the aileron movement was probably still a bit too aggressive but it should be OK to fly. The wheels are quite small and there are lots of buttercups growing on the patch at the moment which stopped the Mustang taking-off so 1066 gave it an underarm hand launch and it flew away beautifully.
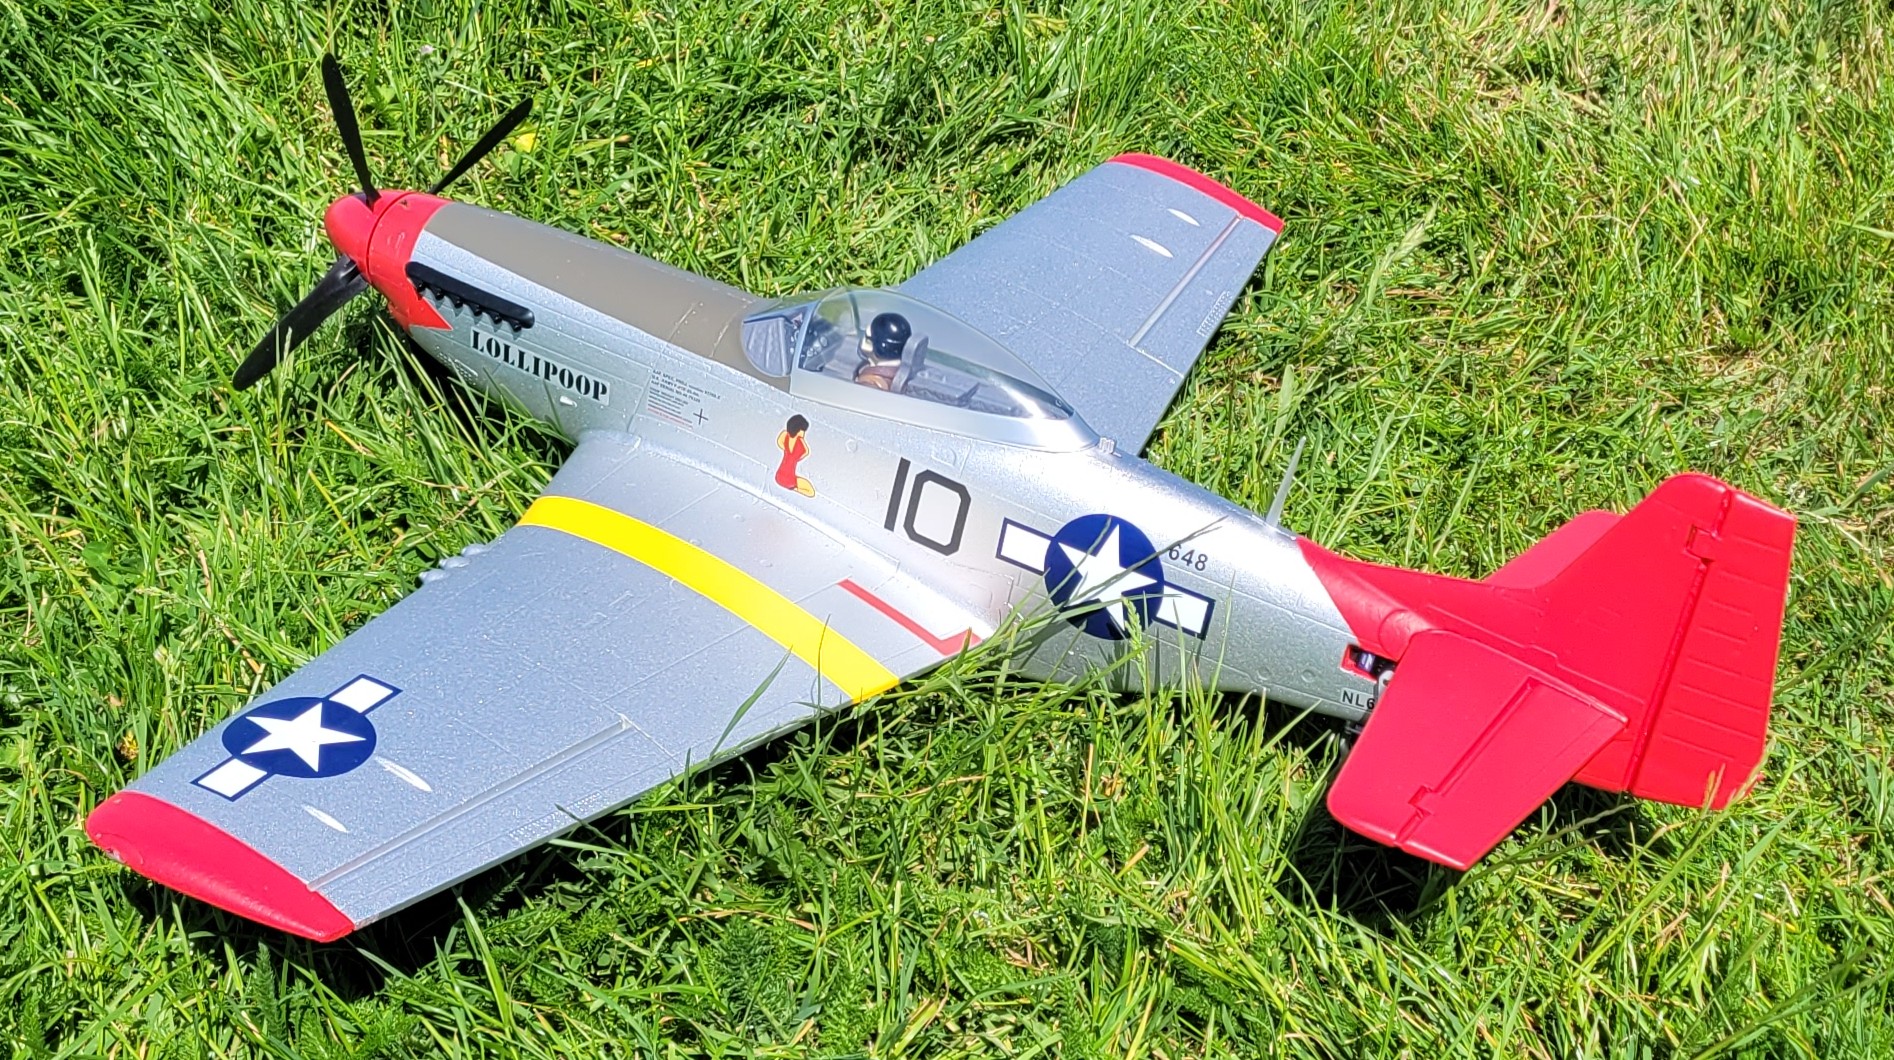
 It was definitely a bit twitchy on aileron but otherwise perfect, just needing a couple of clicks of up trim adding. After a few minutes checking it out I asked Tom if he wanted a go, fully expecting him to instantly over-control and me having to snatch back the transmitter but no, he flew it well! He did slightly over-control a bit at first but soon settled down, the only problem was me having to tell him to keep it high enough for me to save it if he got it wrong. But he didn’t get it wrong and after a few more minutes he asked me to land it. I think all those present agreed that Tom is very quickly going to become a great pilot!
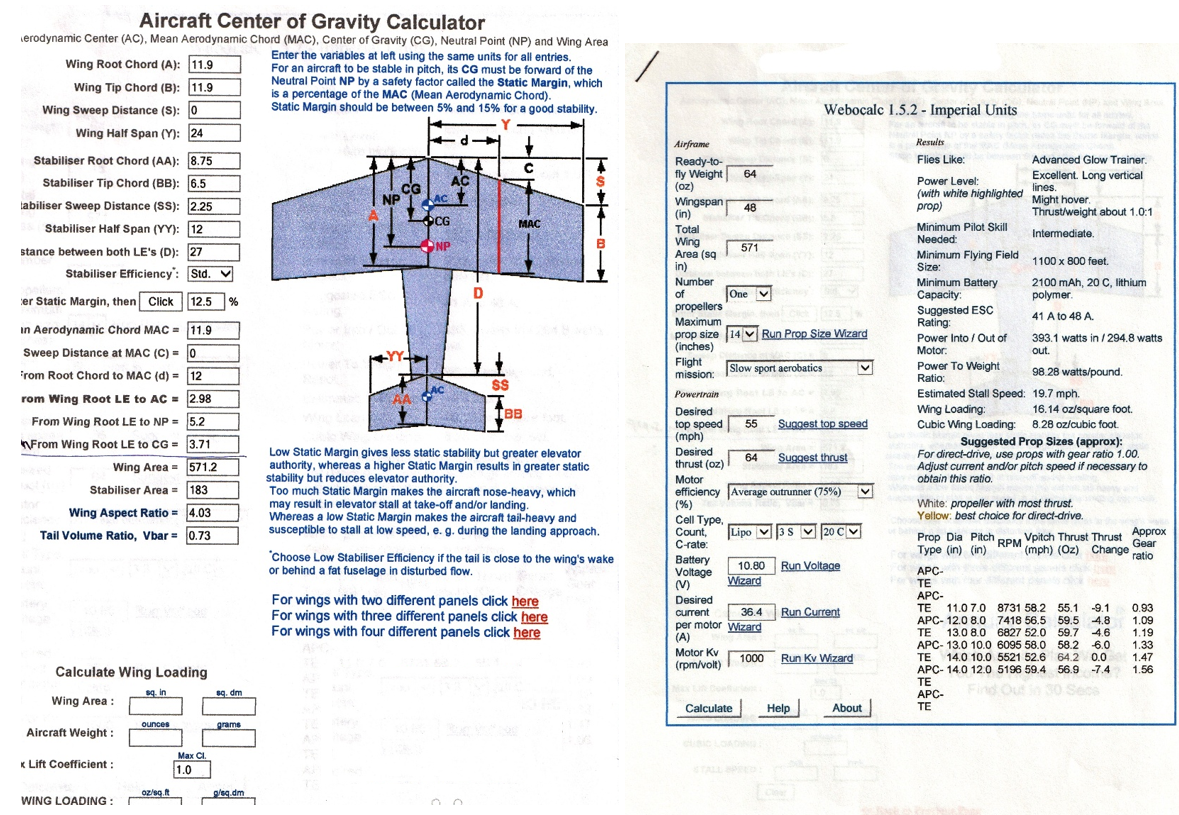
As many of you will know, Dwayne Pipe is an avid builder and is happy building new models using either traditional balsa construction or various types of foam. Over many years as a PAM member he has built dozens of models, some from plans but also lots that he has designed himself. I might be wrong but I don’t remember Dwayne having any off the shelf models. This month he’s been good enough to share some of his secrets of success: Not many flyers build their own planes anymore, so they may be unfamiliar with the skills that previous generations had to learn when deciding where the centre of gravity was on their new aircraft, or which KV motor to use with what prop size etc.
Even these days you may need to know these things if you buy a second-hand plane with no motor or prop. You may feel your existing plane is underpowered and do you increase the prop size and if so, how will that effect the current rating of the ESC.?
Due to the wonders of the internet, all these problems can be solved. There are several free programs available on the internet to calculate these parameters, but the ones I use are WEBOCALC for deciding motor size, battery voltage, prop size, current pulled and wing loading.
For working out the optimum centre of gravity for your plane I use the imaginatively named AIRCRAFT CENTER OF GRAVITY CALCULATOR.
Both can be found on your search engine of choice, and I have found them to be reliable.
 Thanks for that Dwayne, that’s useful stuff for all of us.
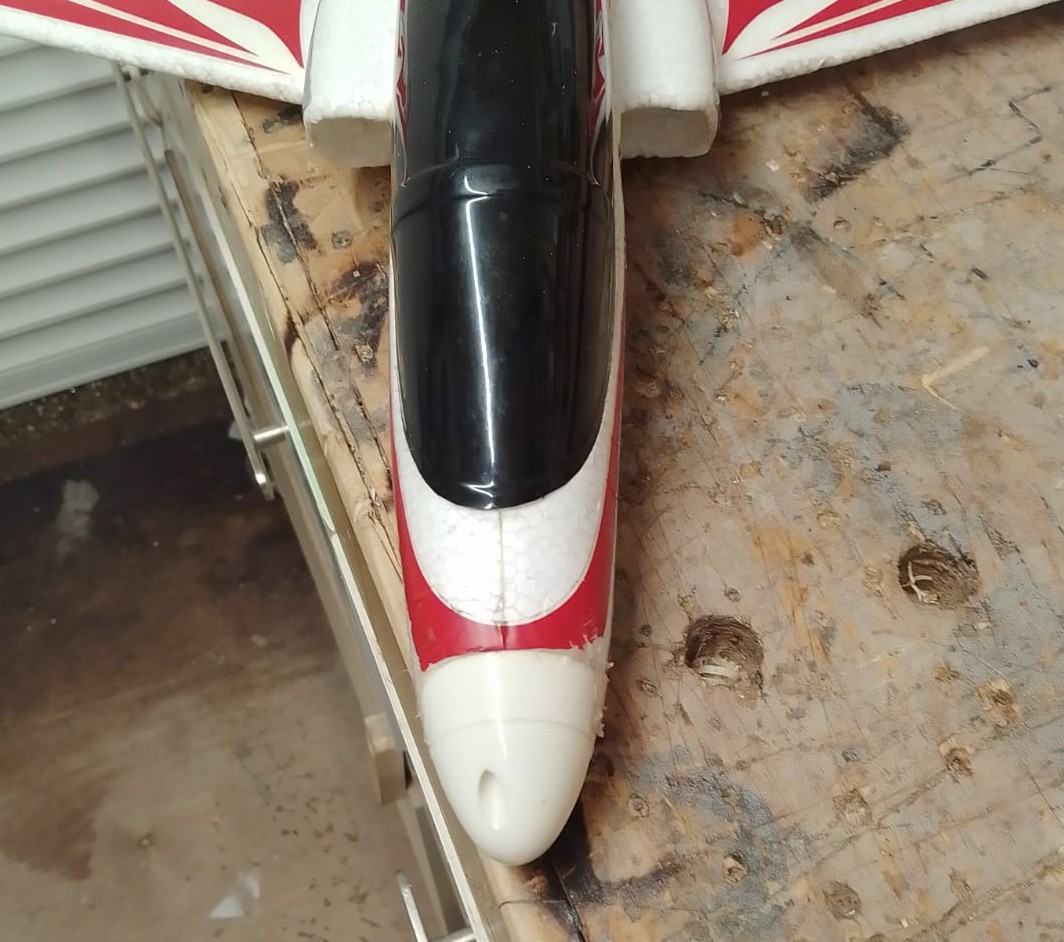
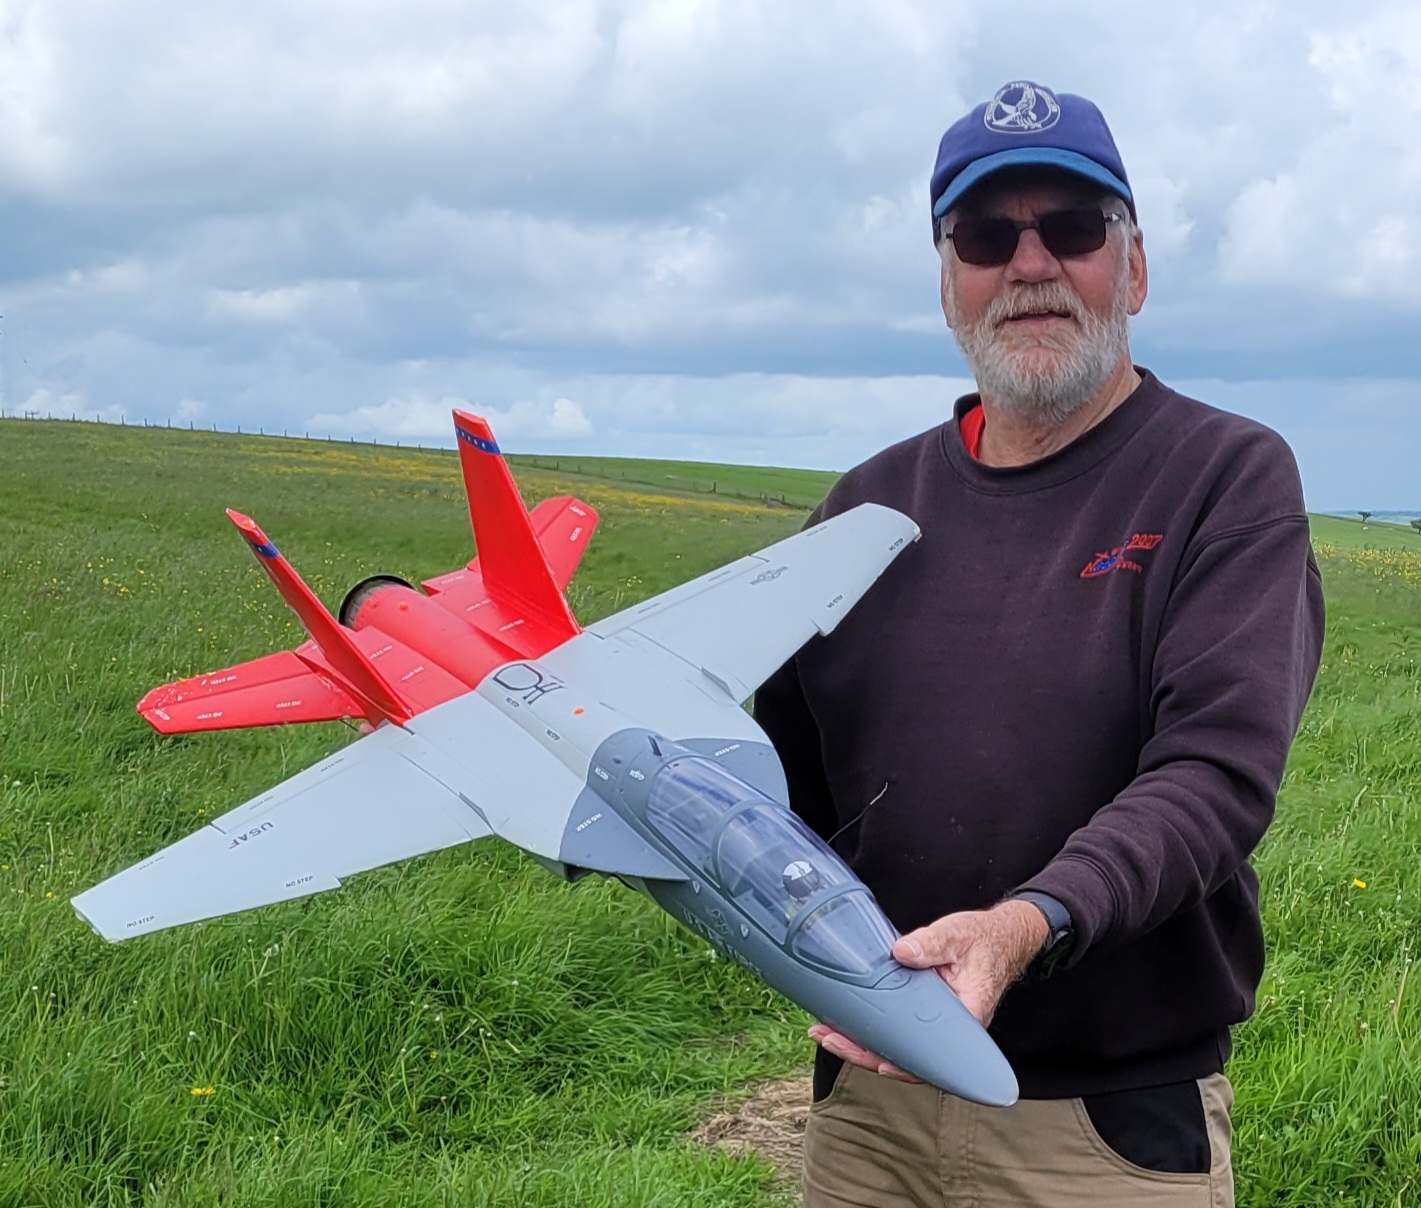
Another proper modeller who always seems to build his from scratch is Catapult King, so I was rather surprised to hear that he’d arrived at the patch with a plug and play EDF jet. 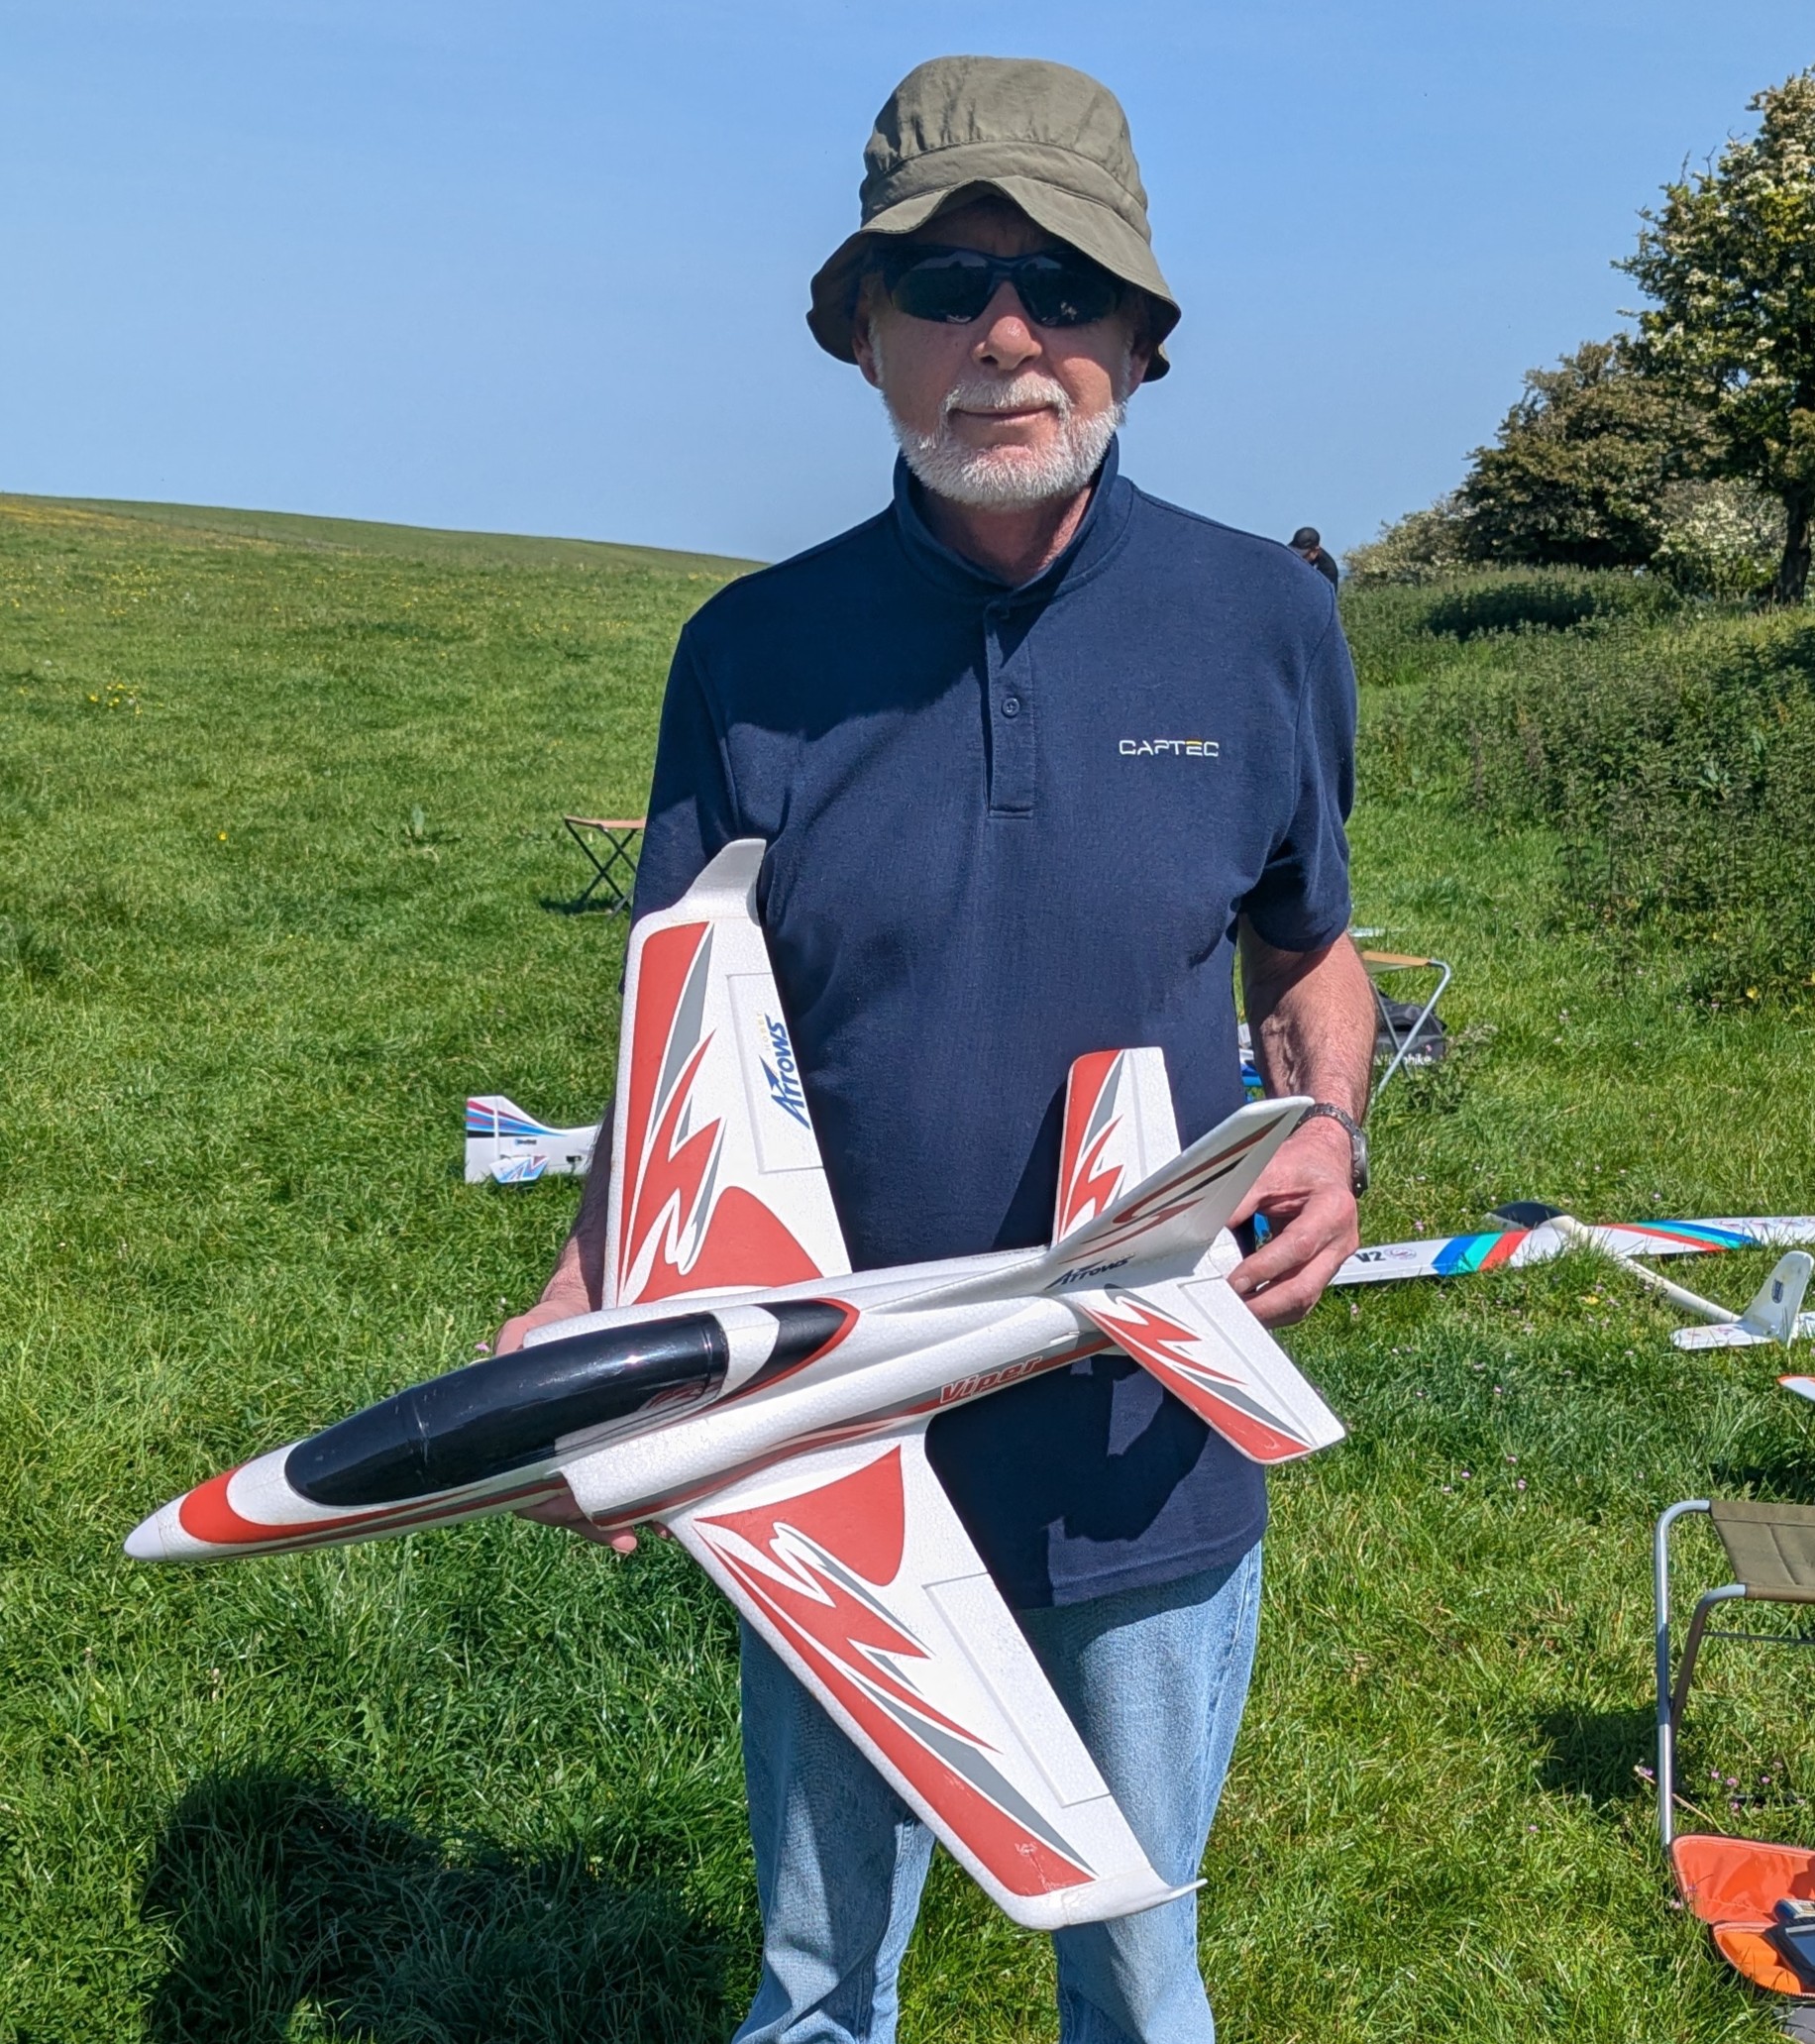 Things became clearer when Catapult explained that the Arrows Hobby Viper came from his nephew who had bought the model second-hand and then given it to him as a birthday present. Hmm… I have one nephew; I wonder if he reads Patch News?! Captain Slow sent me some photos but wasn’t able to take any video but no doubt I’ll be able to shoot some for the next Patch News. Several of us own Arrows Hobby models and they all seem to be of good quality and fly well with no problems, so there were no concerns with the Viper.
 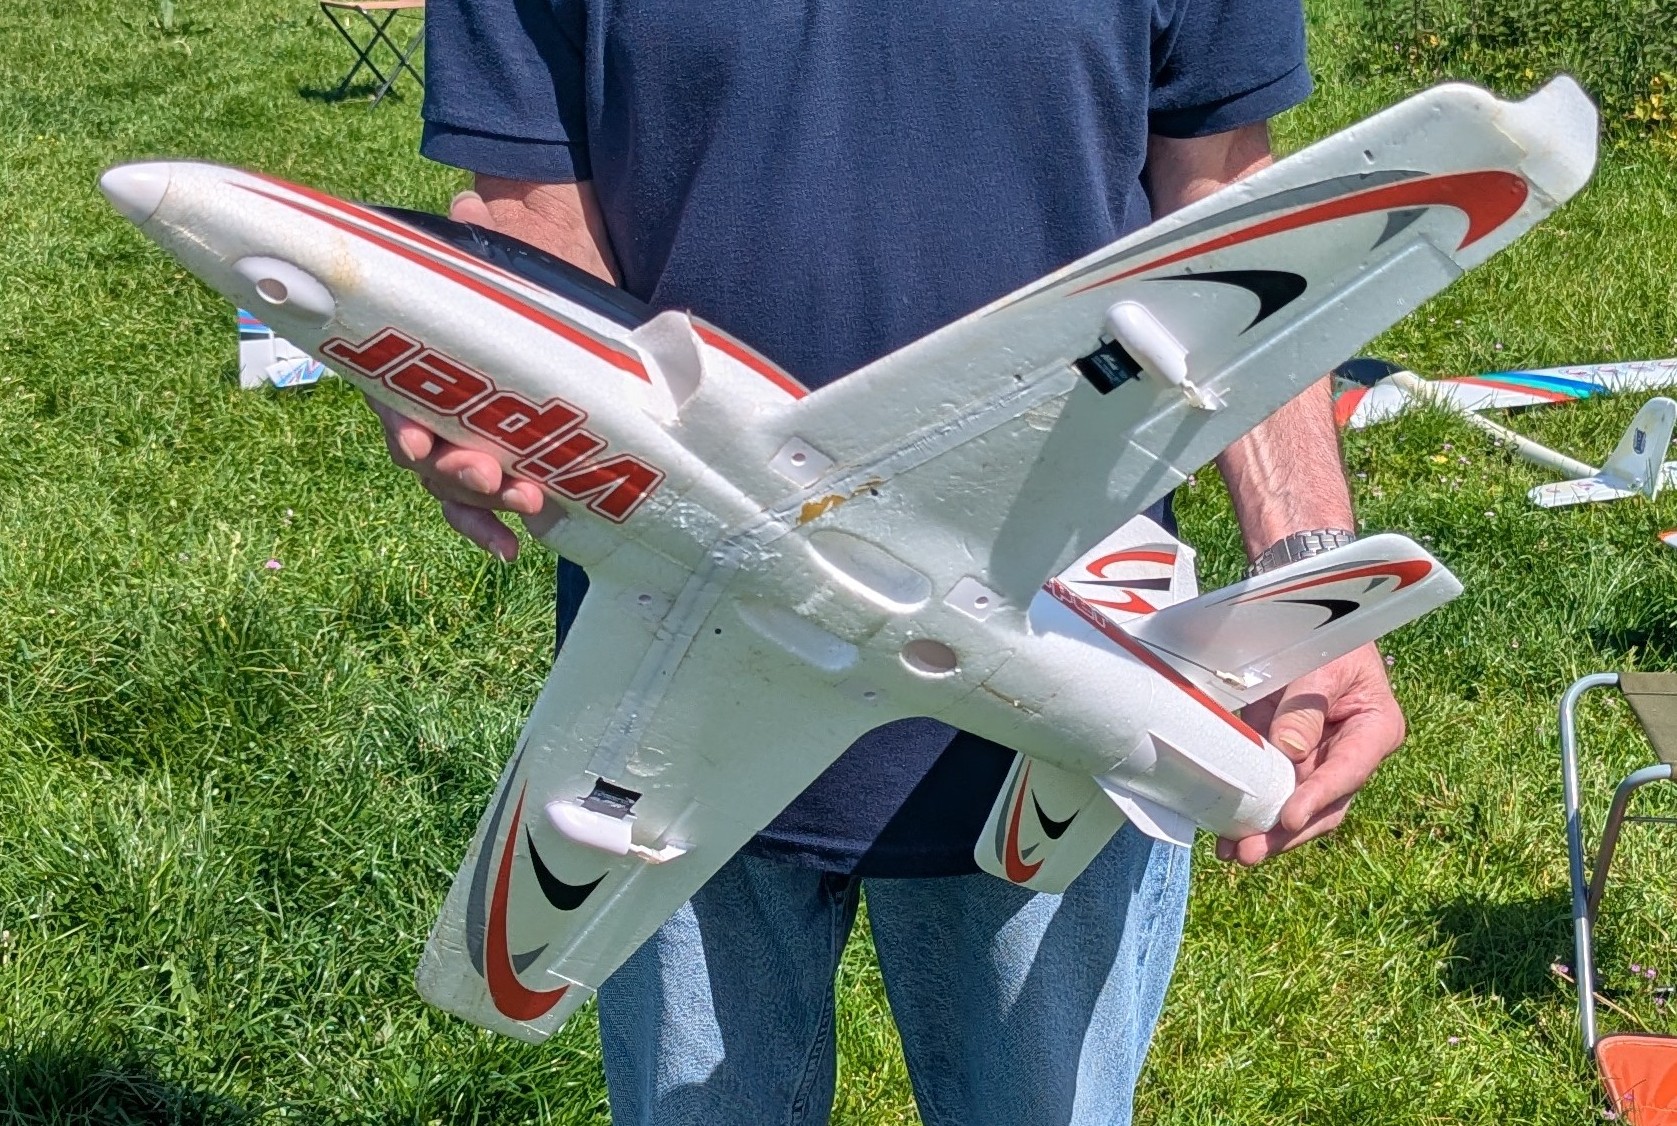 Dougal did the initial trimming and found that, as expected, it flew nicely and he was quickly able to pass the transmitter over to Catapult for him to enjoy.
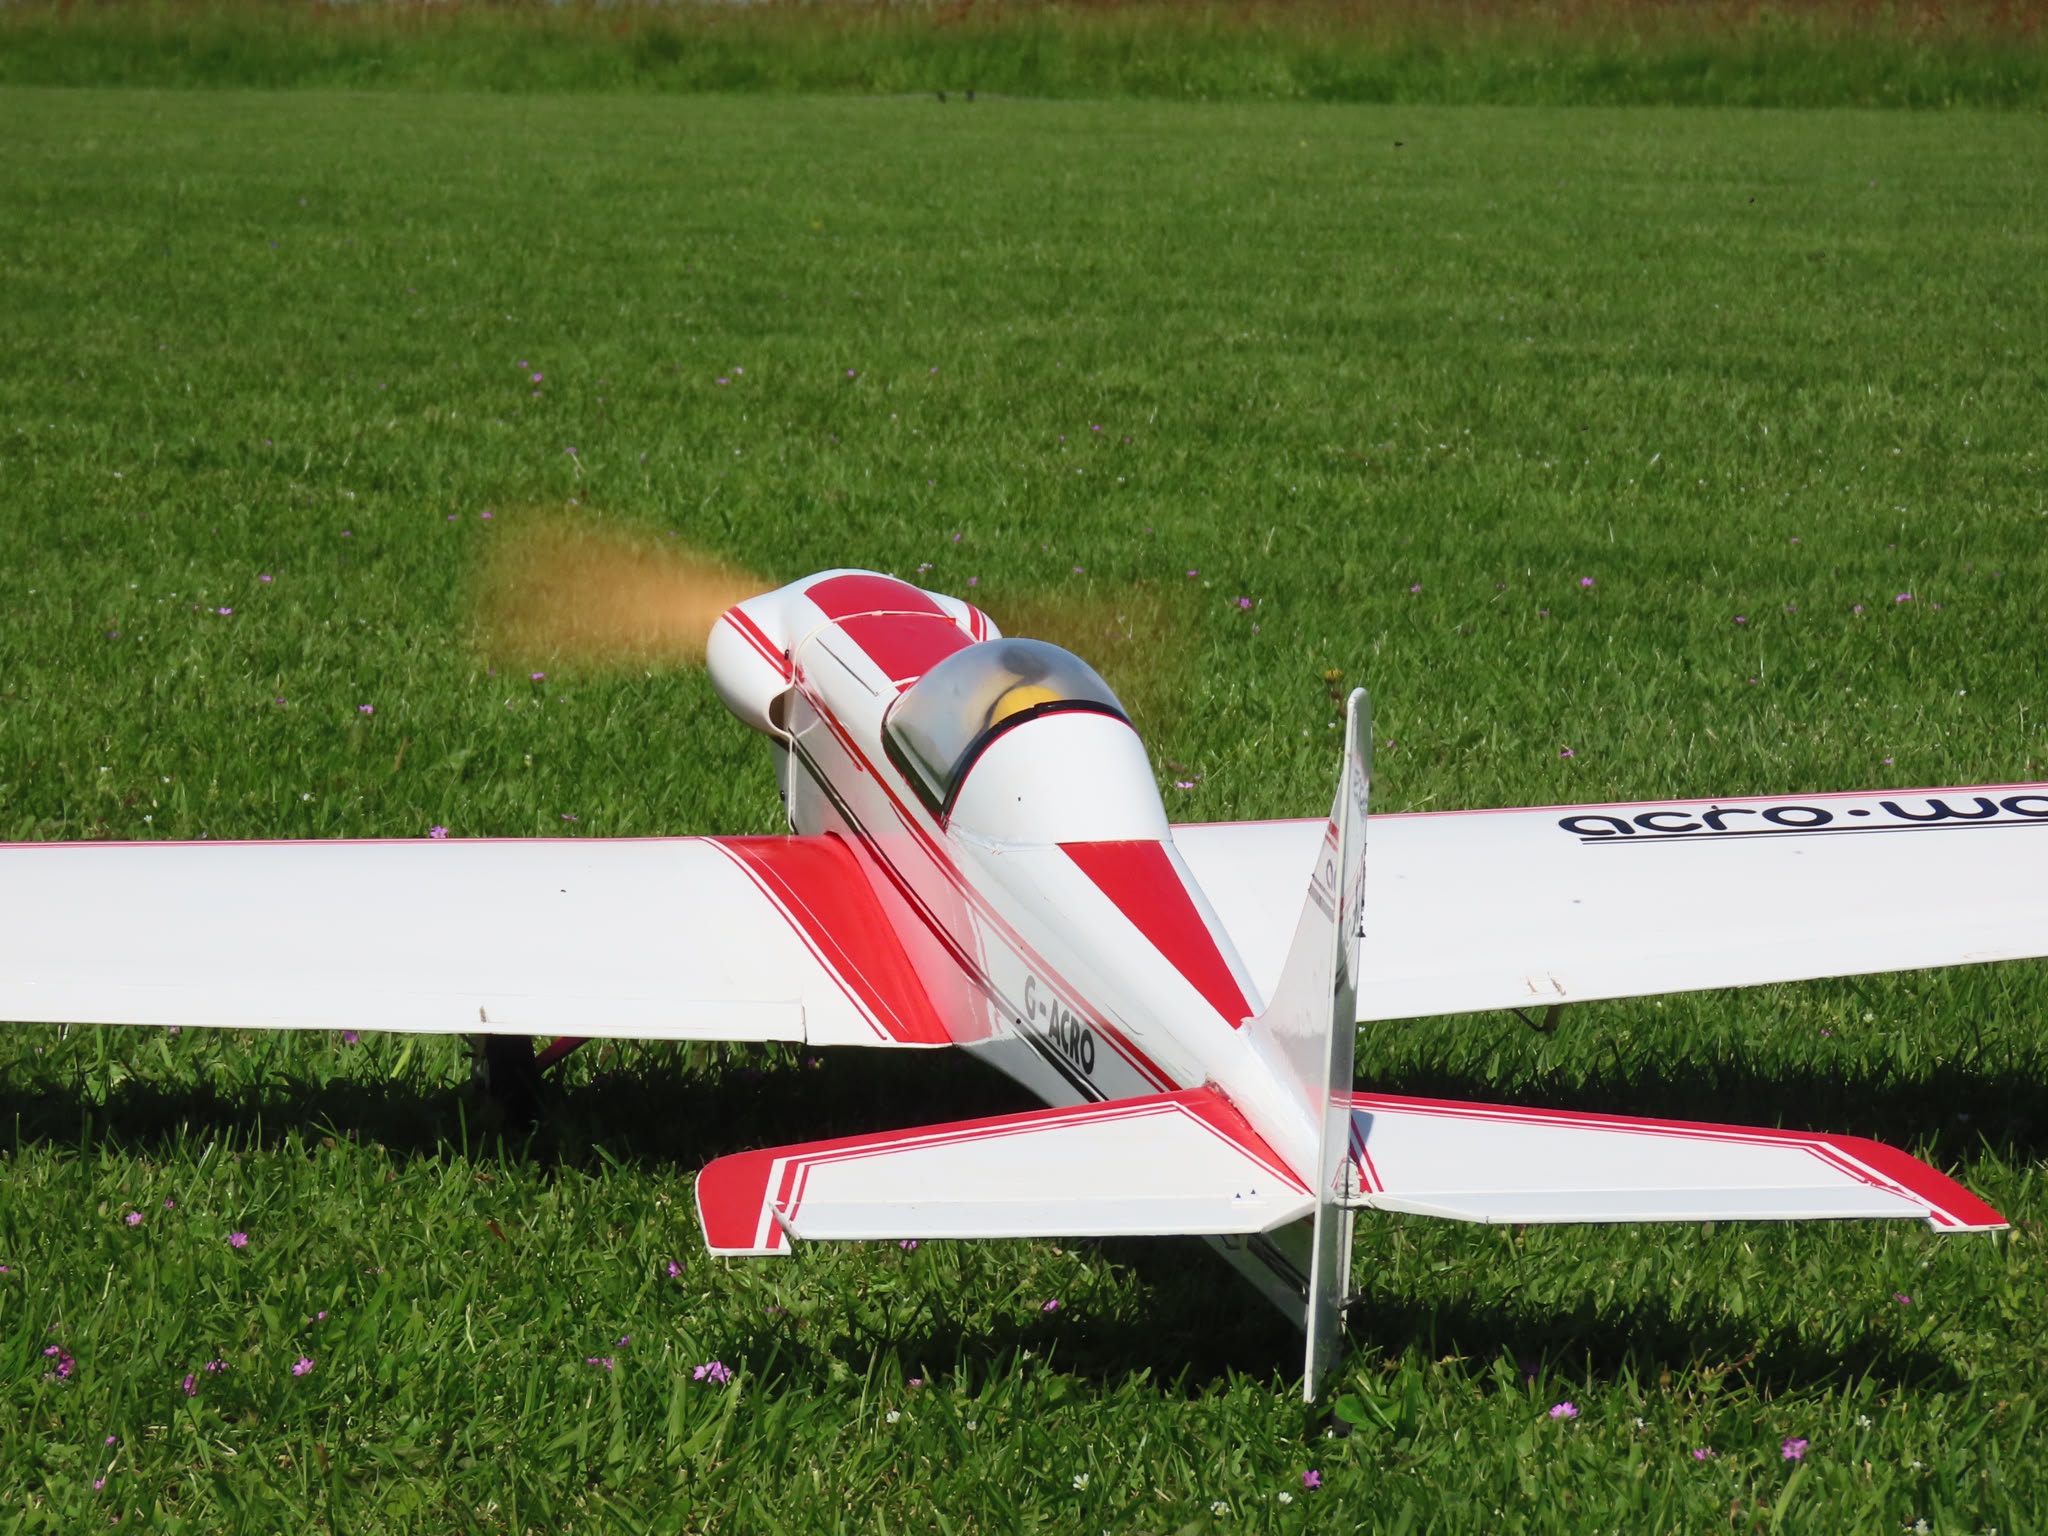
In May we were pleased to welcome Norwegian Nick back to the field after an absence of several months. He brought along an electric glider and an Archie that he’d built from a plan that was originally published in May 1972 in the Radio Modeller magazine. Nick built his Archie a few years ago but has only flown it once before, a couple of years ago.
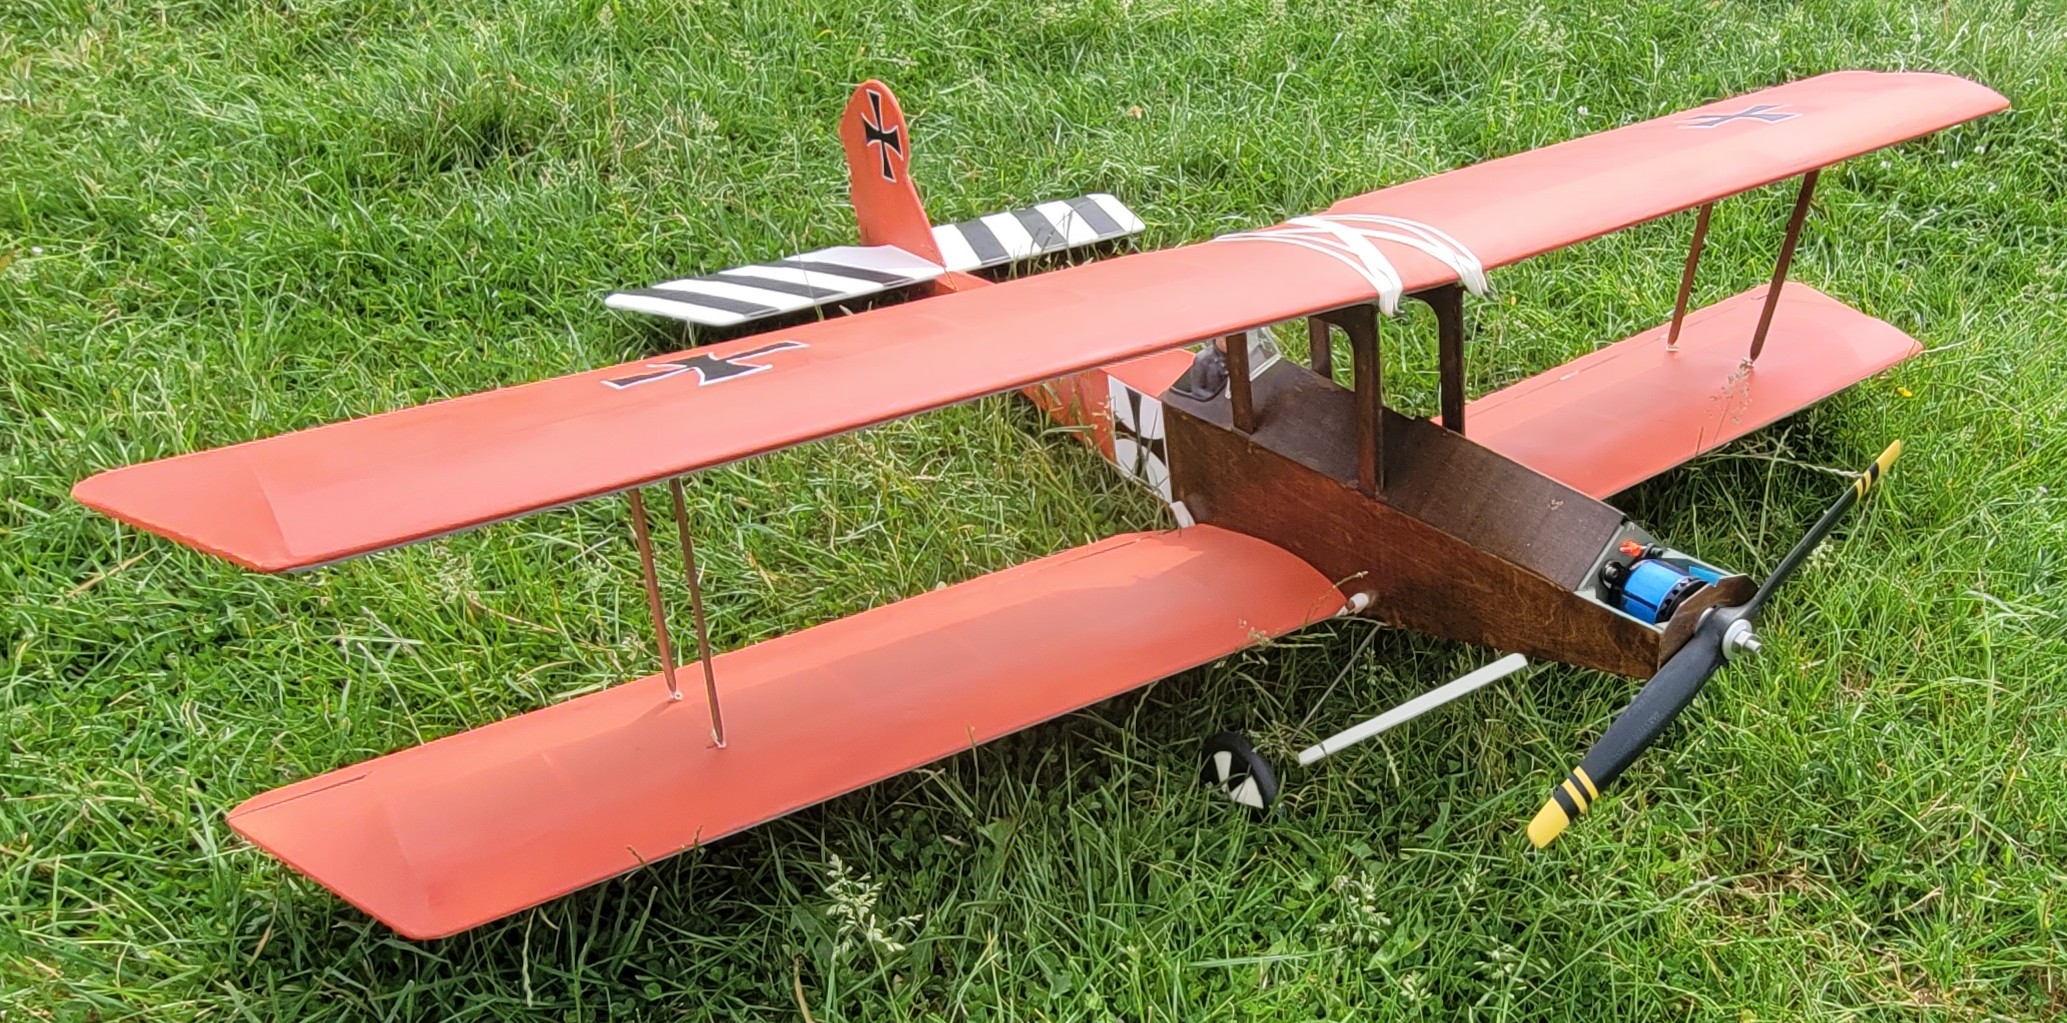
 It was designed by Peter Holland and the plan is available as a free download from Outerzone who say this about Archie: For the average to skilful pilot Archie is a perfect relaxer for a lazy afternoon in the sunshine, as the bee’s drone and the wispy clouds drift lazily across the sky. Although it is relatively slow flying, it is far from loath to perform simple manoeuvres, such as loops, rolls, inverted flying and similar aerobatics, but it will not spin easily because the stall is almost non-existent, which is as it should be, so that it can be ‘held off’ for those satisfying three pointers, or touch and go’s. Also, if you fancy a brief chat to your next-door pilot, Archie will fly itself around quite happily for a circuit or so, yet send a control and it will respond. In other words, then, a model to have fun with. What, however, if you are not a practised pilot? Well Archie is still for you, because it is a trainer which is not outgrown as soon as one has mastered the rudiments of flying. We do not recommend Archie as a trainer to someone who is going it absolutely alone from scratch – not because it is not as docile as other trainers, but because, if one does make an error, as all beginners do, then being a biplane there is more of it to break!
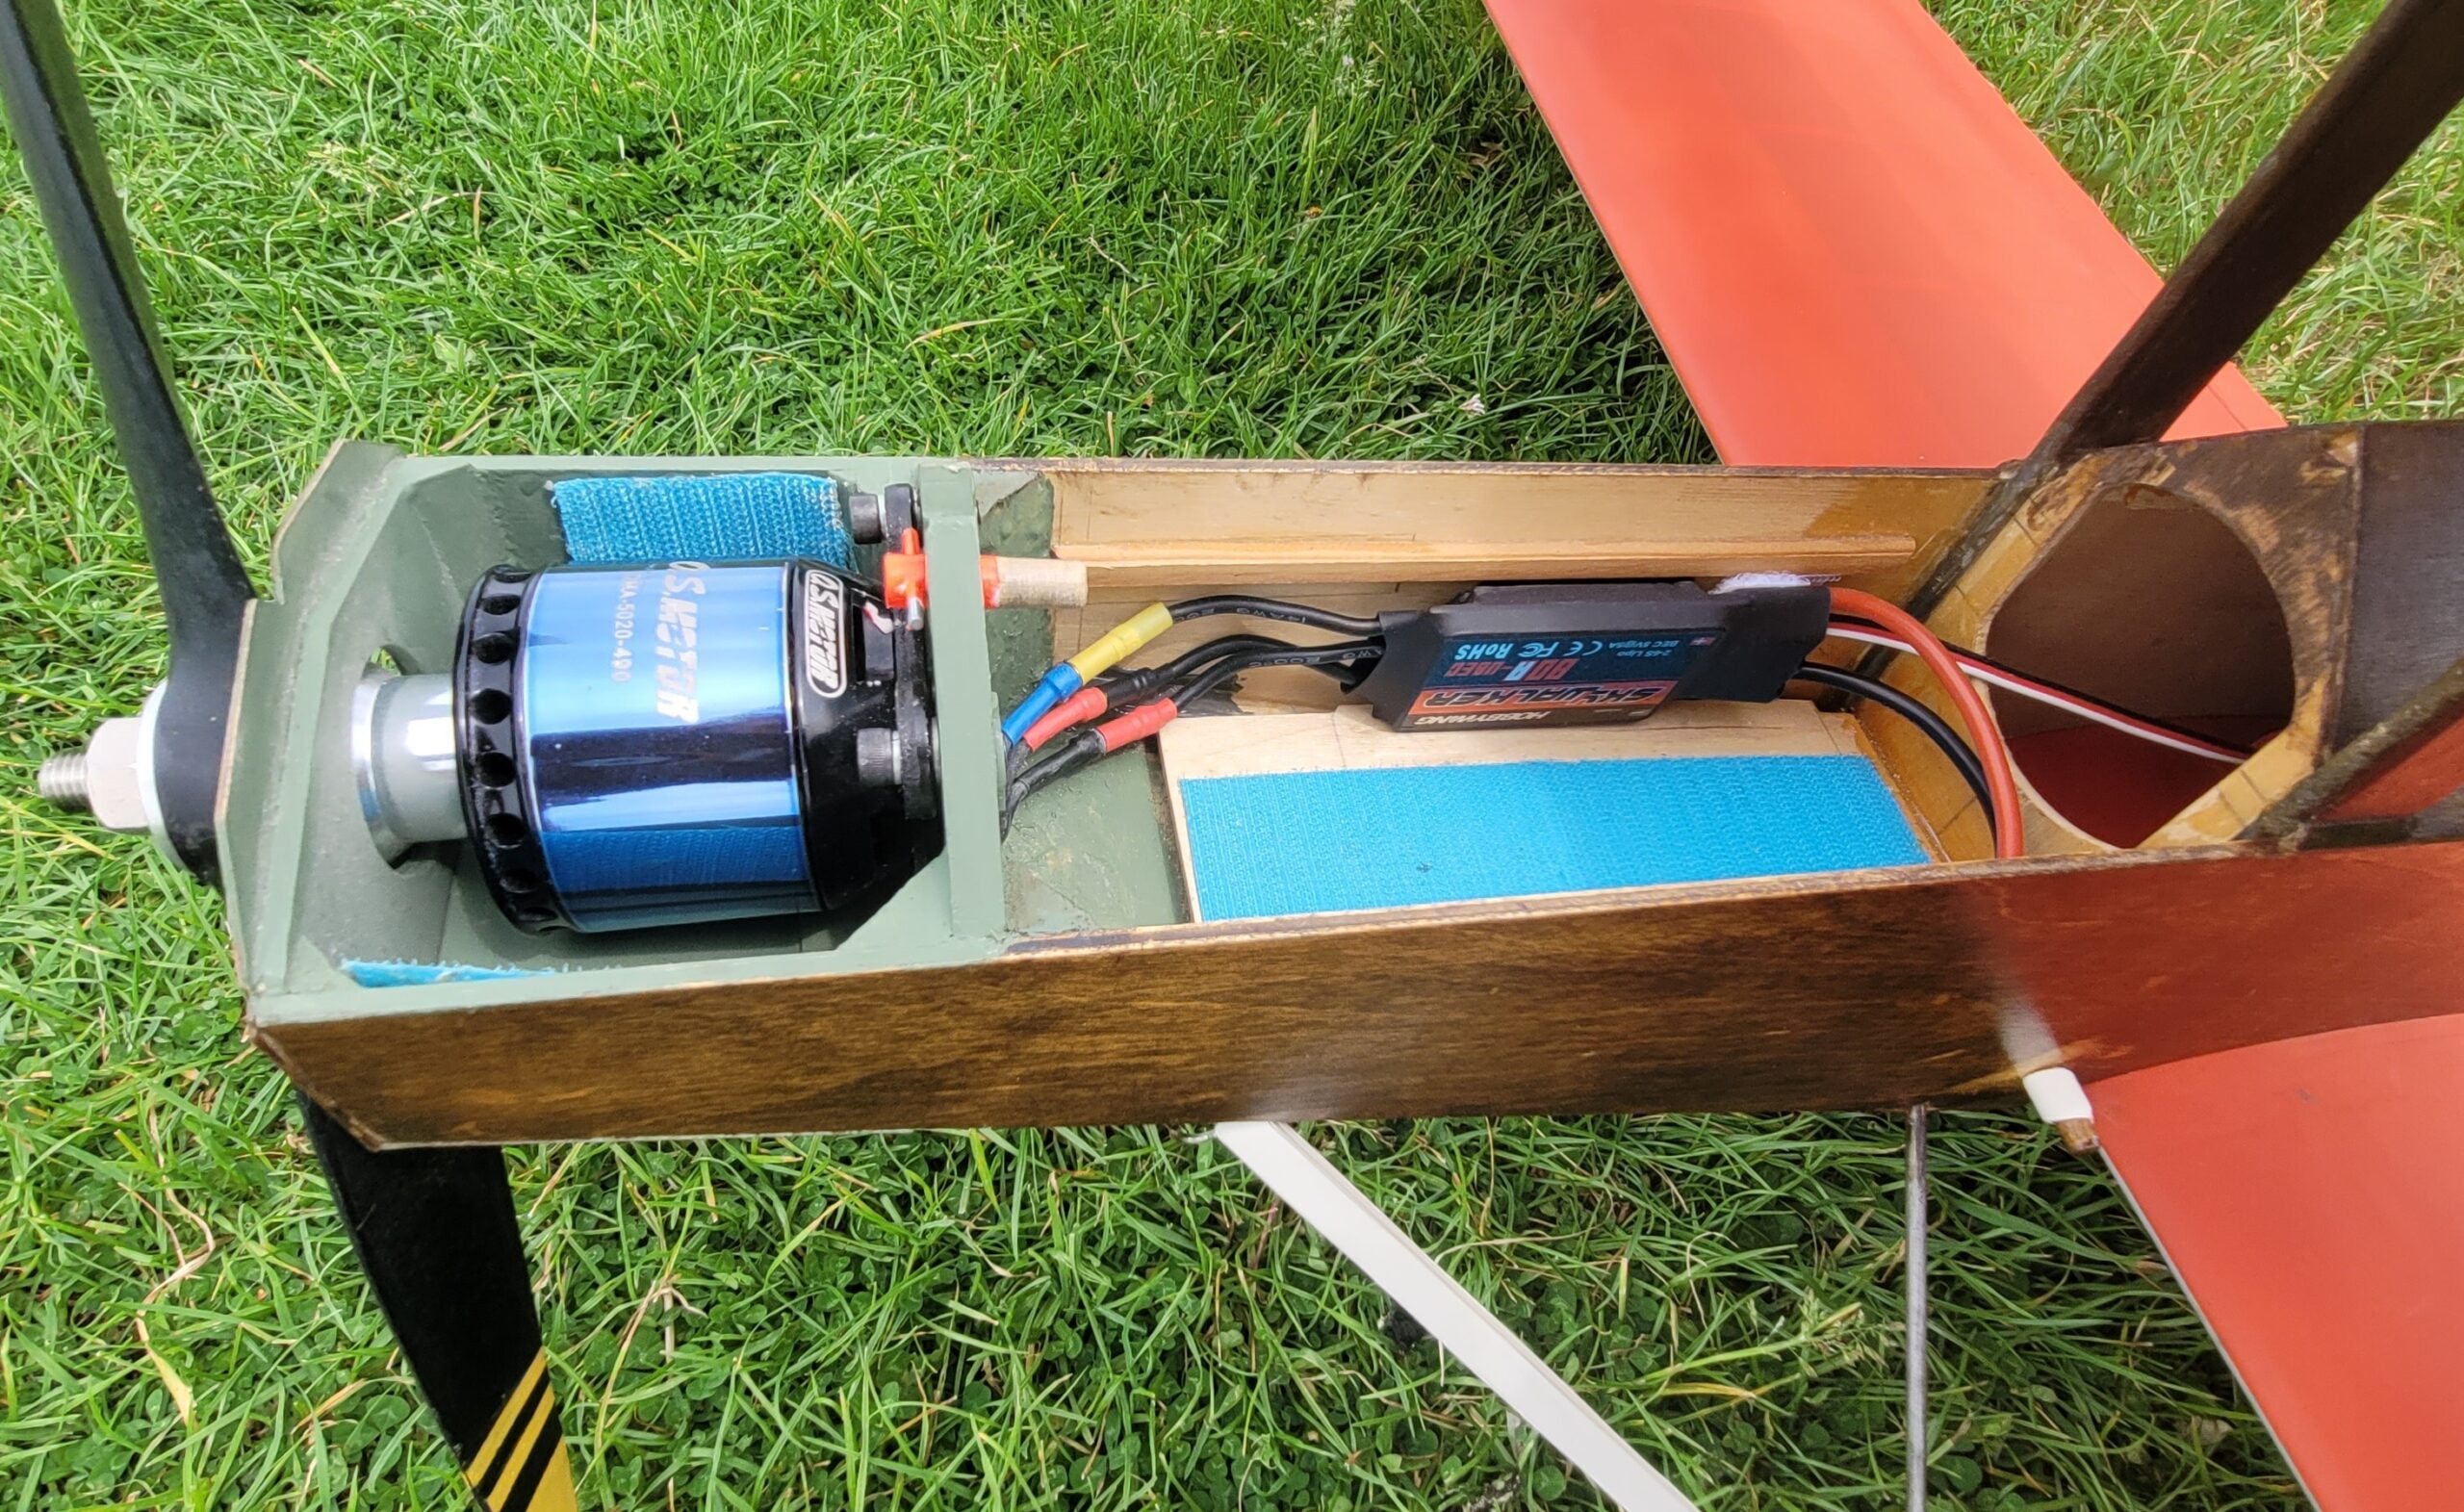
 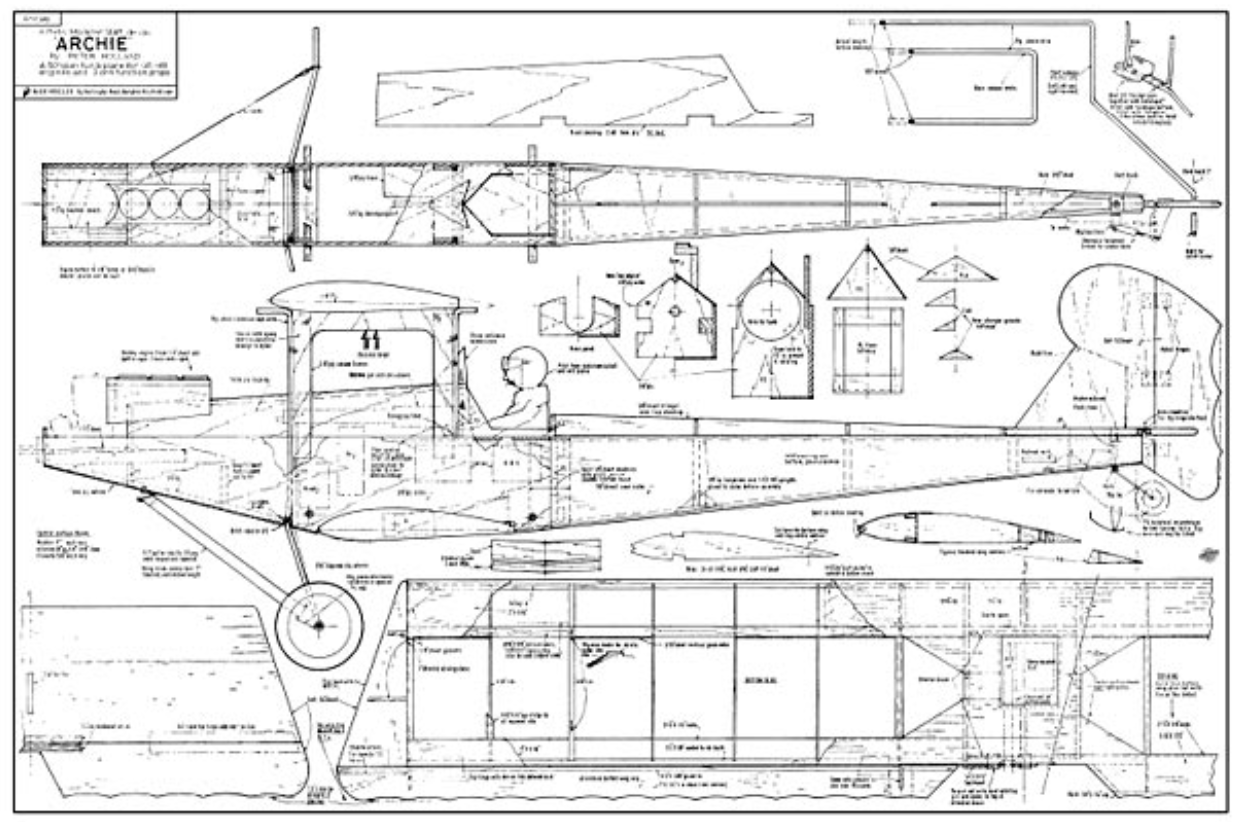 However, for the tyro who has the help of someone who, as a minimum, knows how to take-off and land, Archie can be recommended as a happy choice to ease your way into solo flying…” As it is a forty-four year old design it was of course designed to have an IC engine but as we only allow electric Nick has made his electric powered and has fitted an OS 5020-490 motor, a Hobbywing 80A speed controller, and a four cell lipo pack. The OS website says the motor is equivalent to a .55-64cu.in 2 stroke or a .72cu.in 4 stroke but the plan says to use a .35-.49cu.in motor so Nick’s Archie has more than enough power!
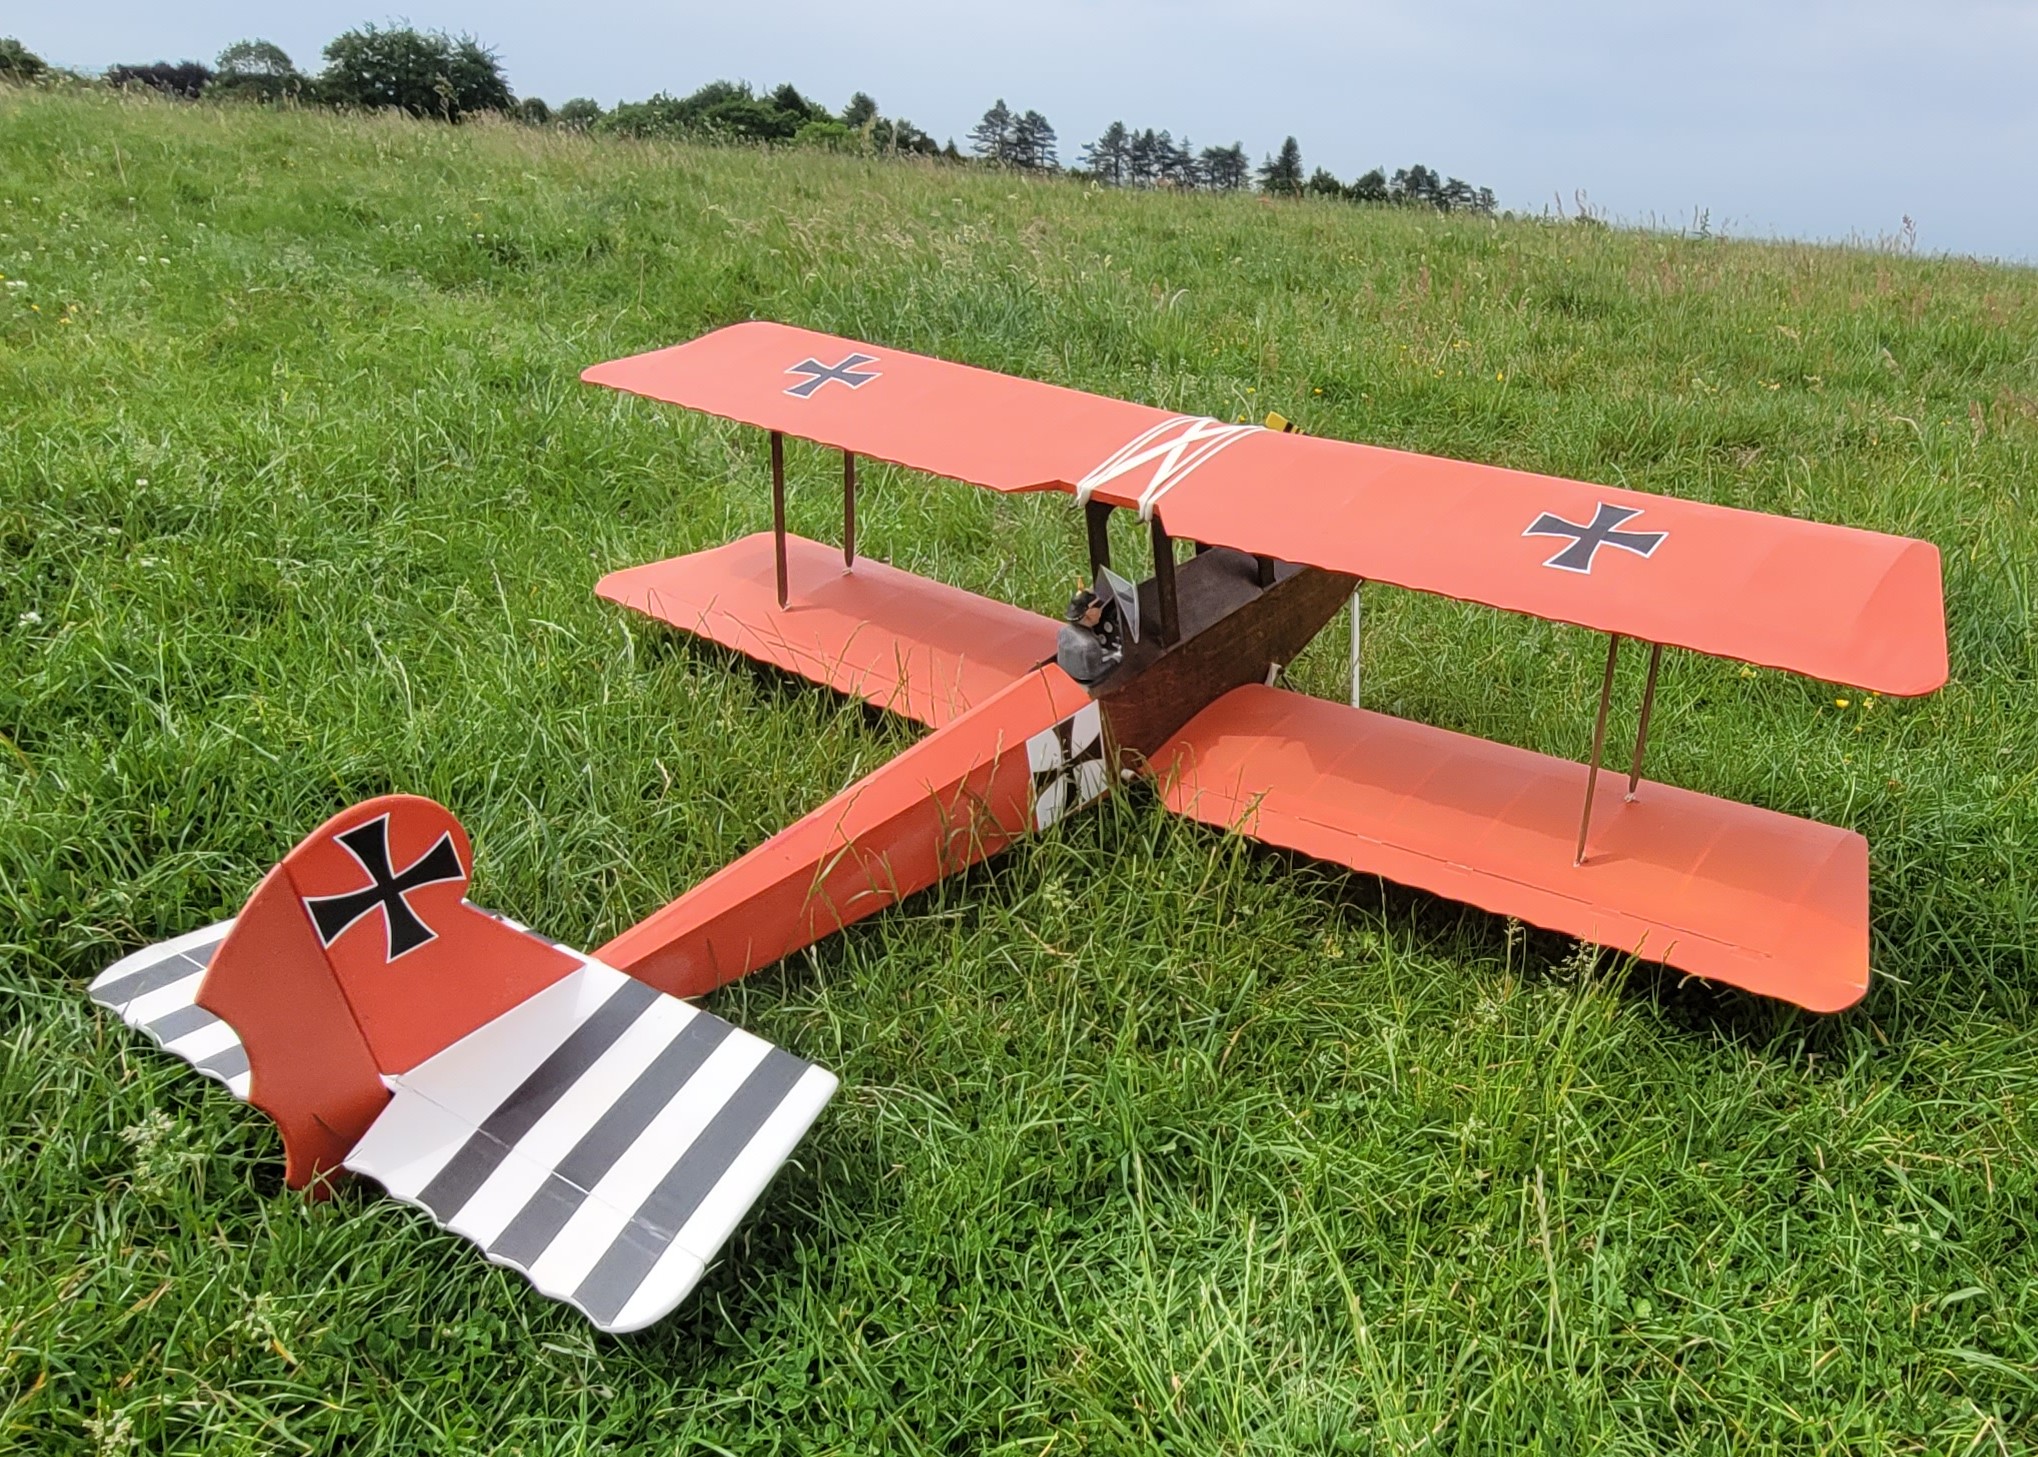
 It flew around nicely on about third throttle and seemed to fly well although Nick said it was too twitchy on elevator and perhaps the C of G needs to be a bit further forward.
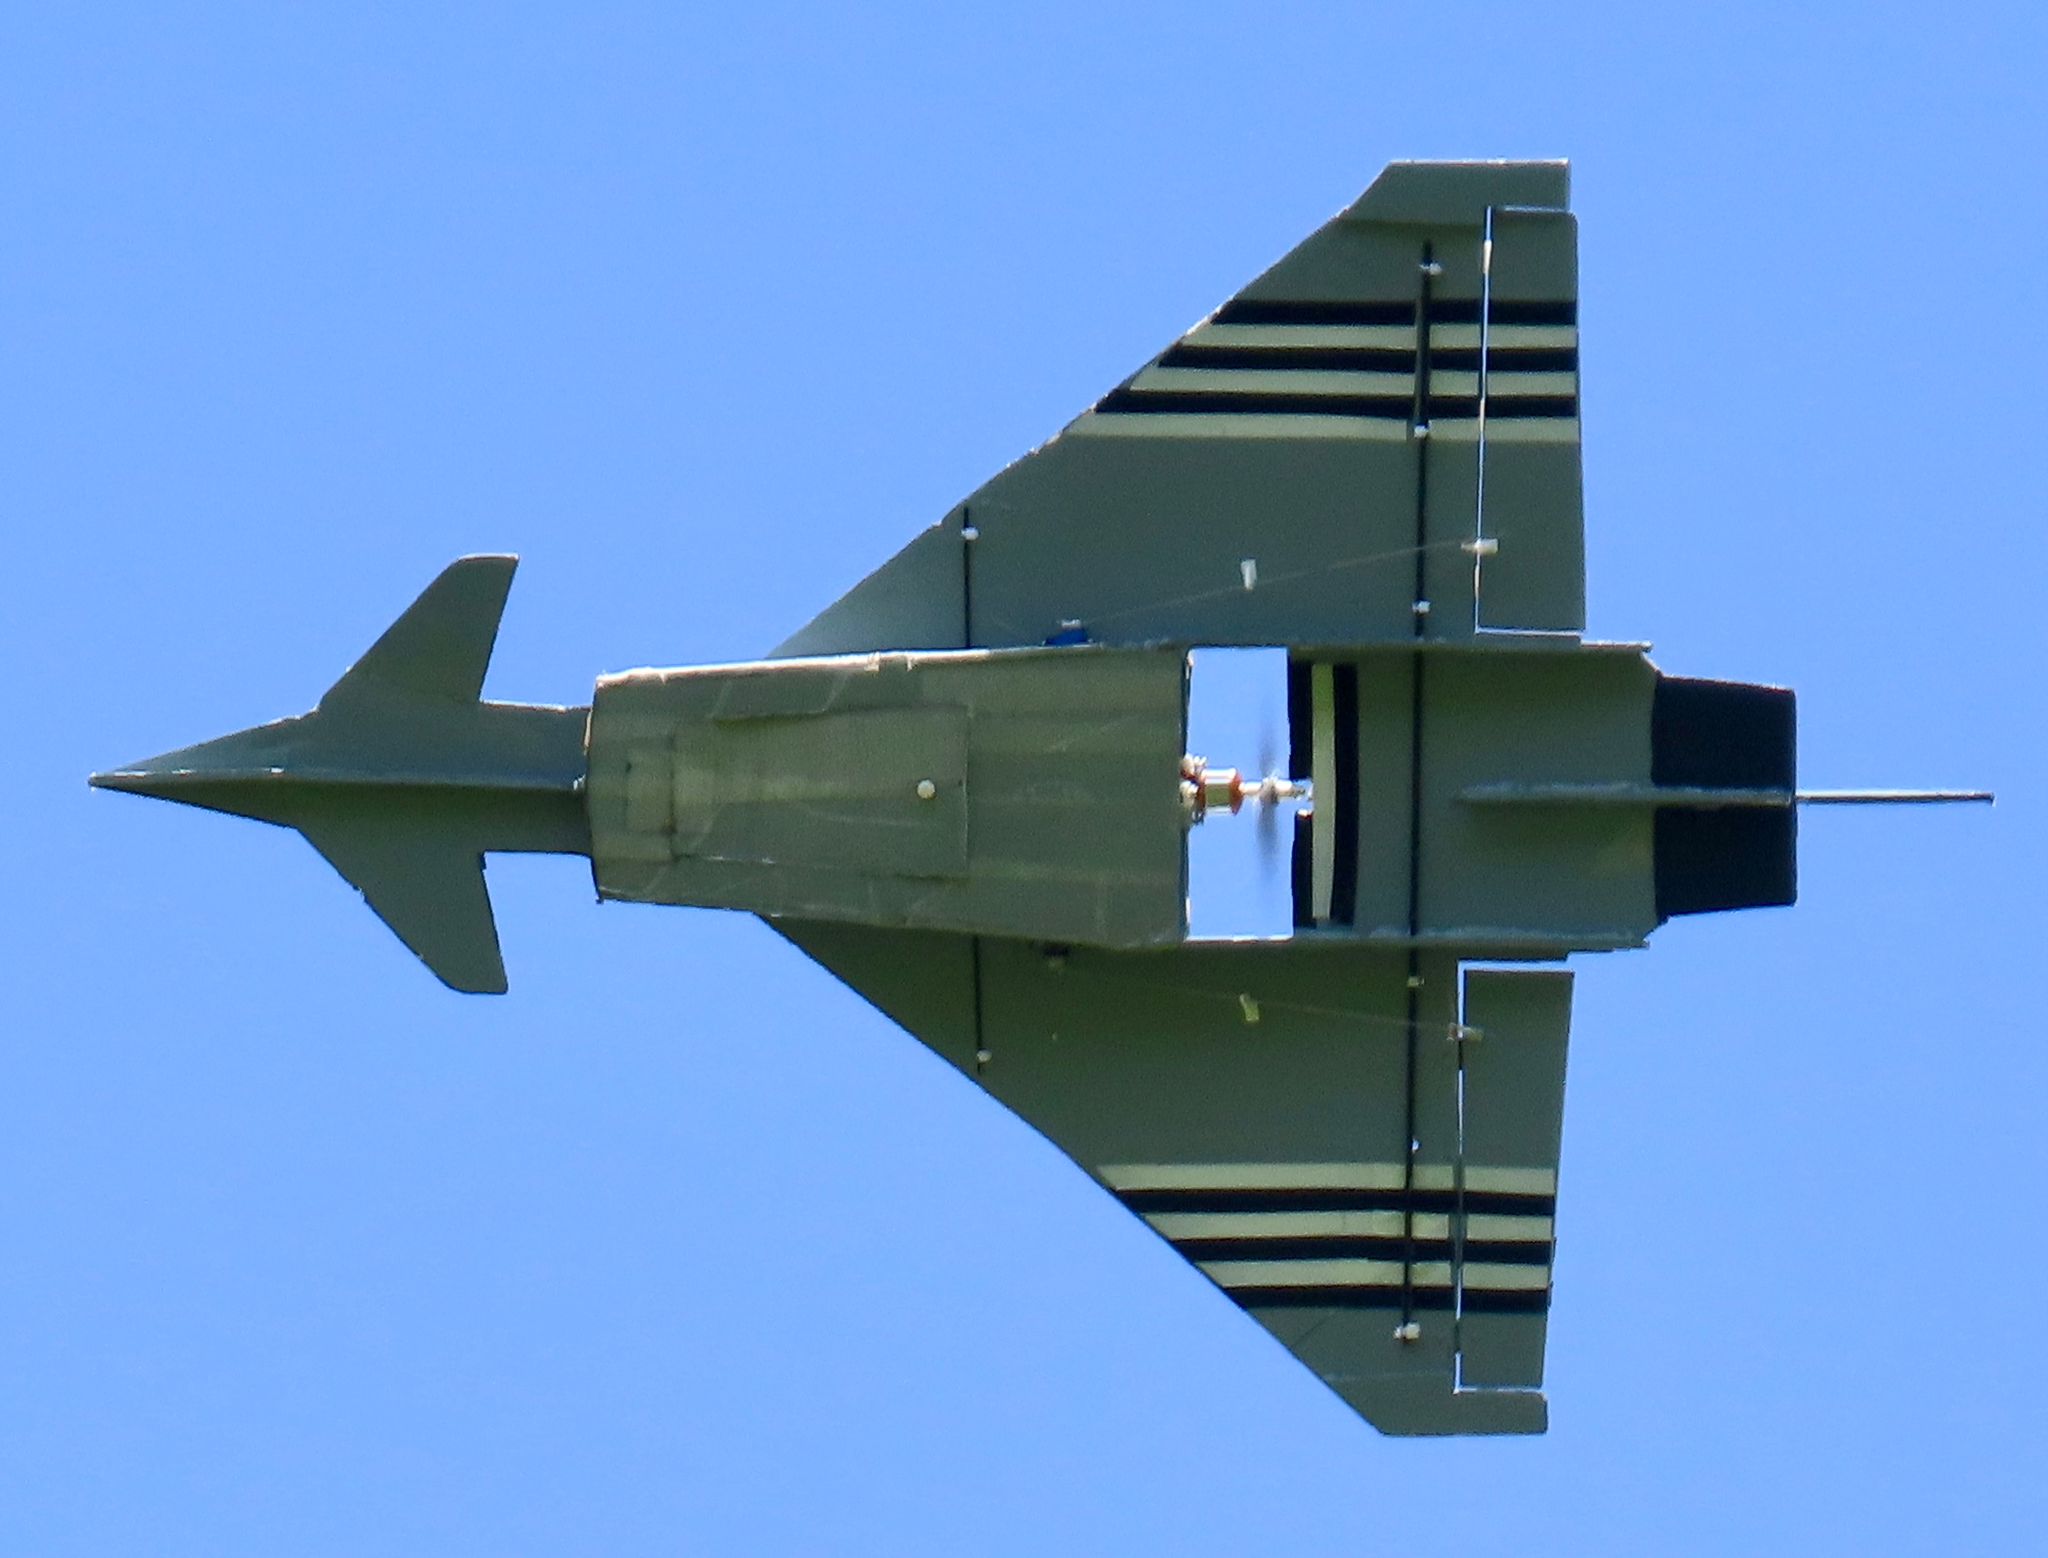
May wasn’t the best month for Woody as early in the month he totalled his foamie Eurofighter Typhoon when he lost orientation. It’s loss is a great shame, it was a nice flier.
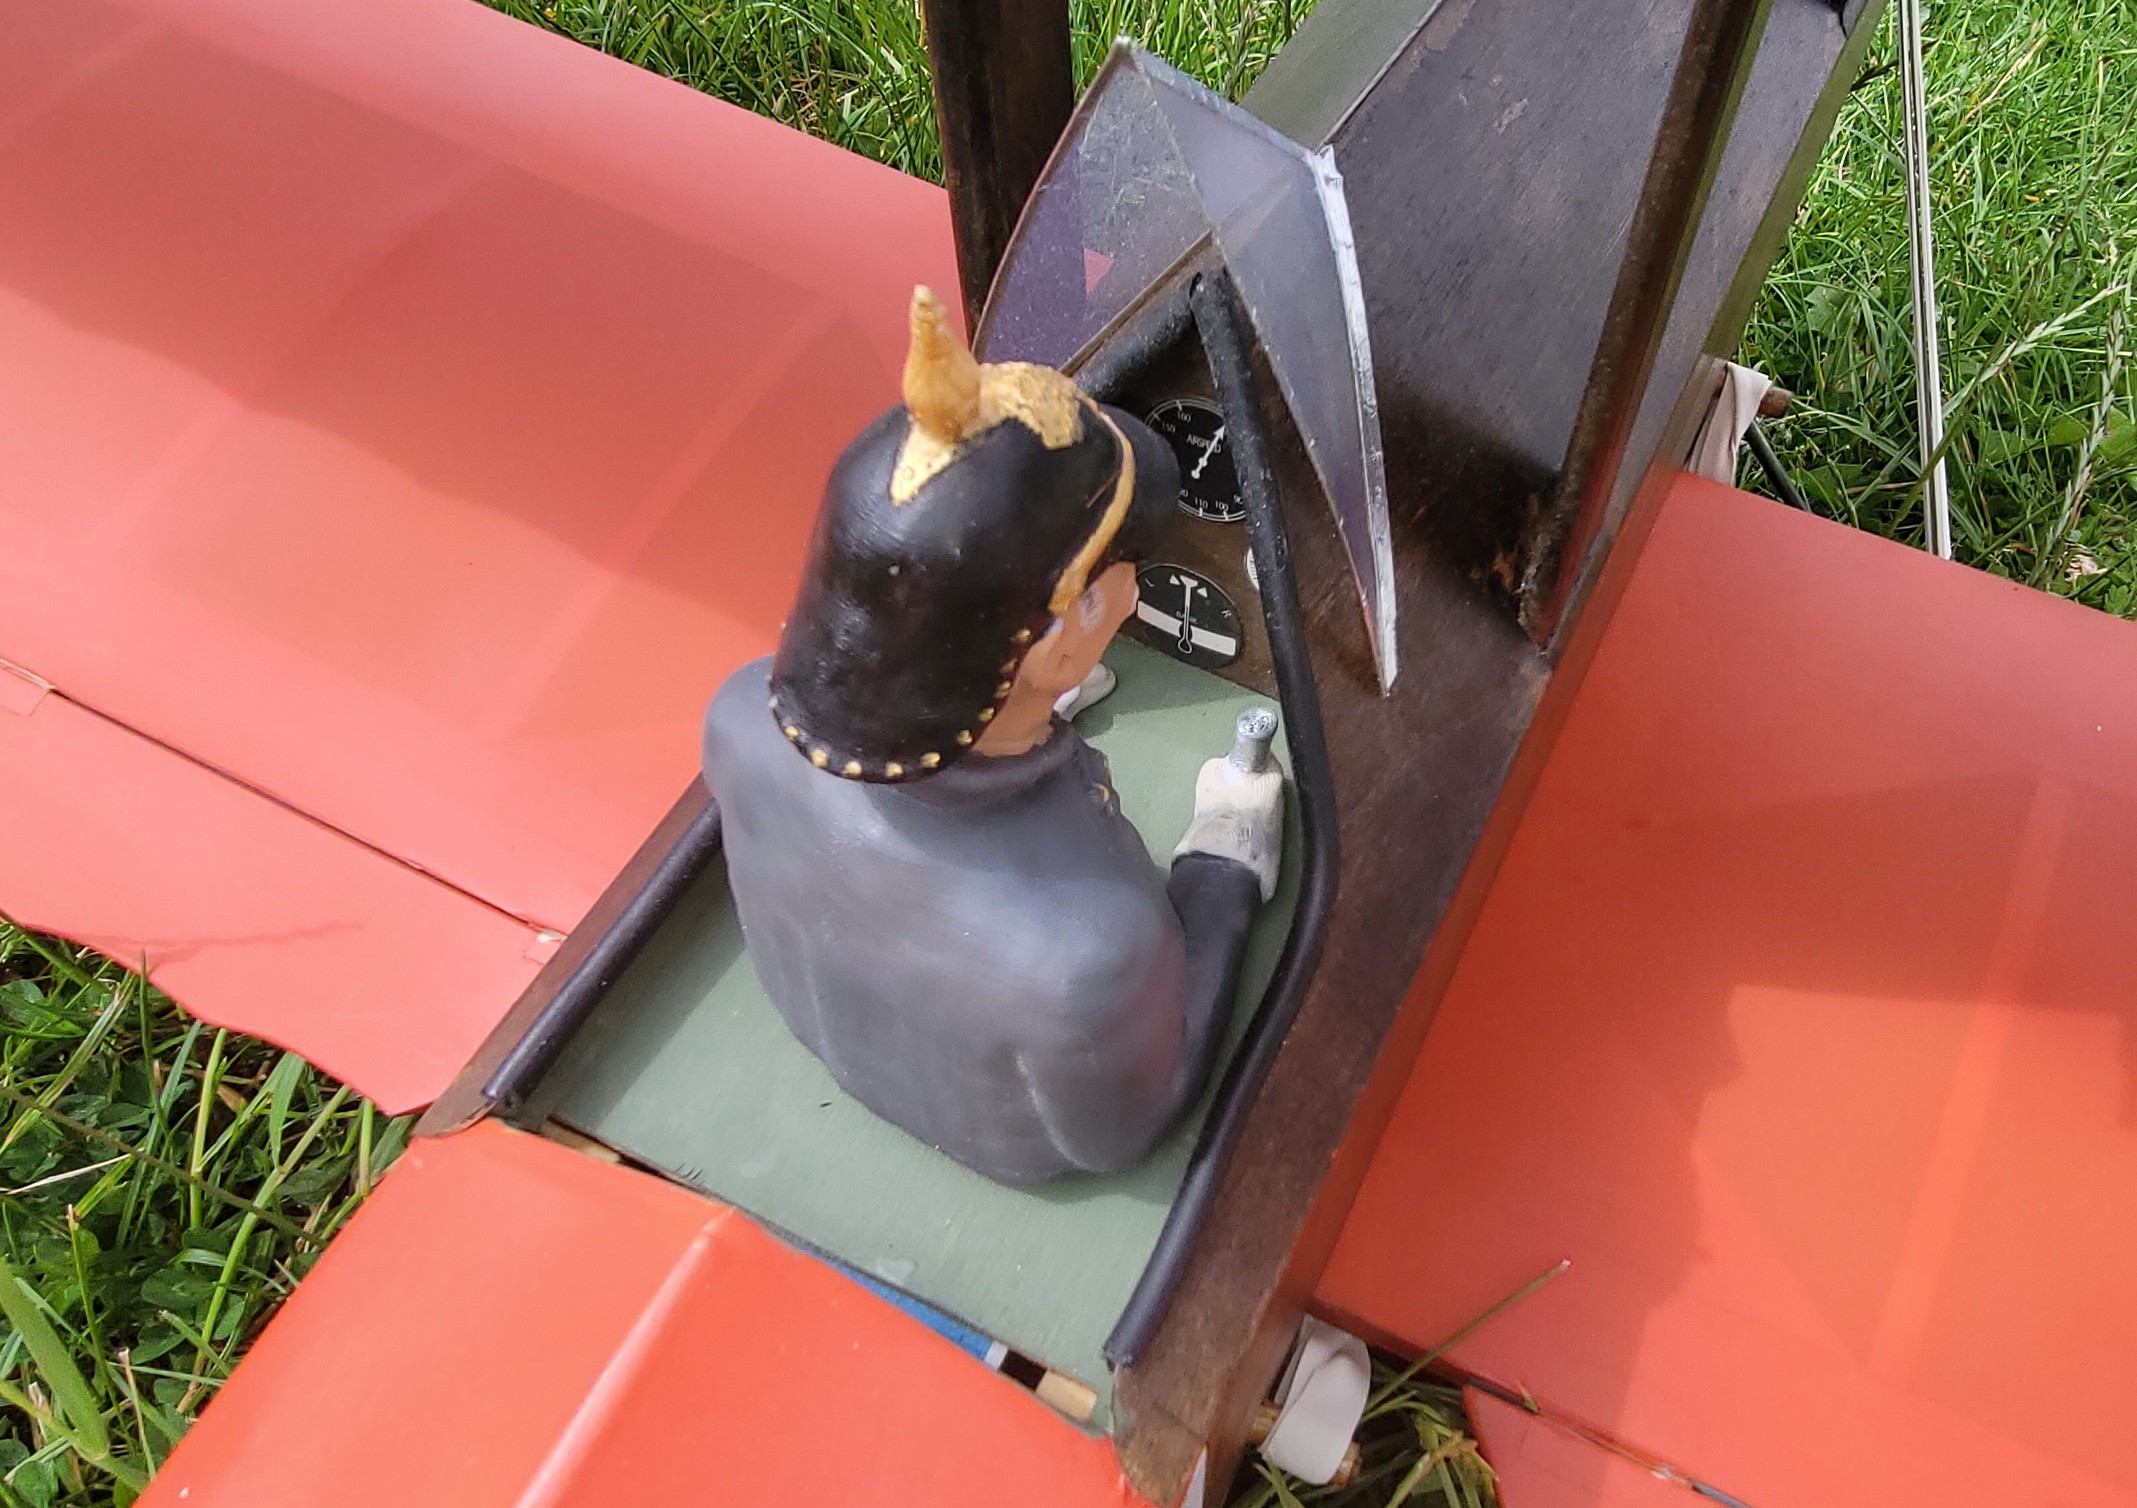
 Then, at the end of the month, he joined the illustrious ranks of the tree dwellers when he landed his XFLY Tasman very gently in the top of Dougal’s Dogwood! The Tasman looked to be undamaged but the problem was how to retrieve it without wrecking it.
 Almost immediately Windshy took the decision to climb the tree and he was soon able to give the branches it was wedged into a good shake. He couldn’t quite reach the plane, the branches were too thin to take his weight, but he managed to get it to fall lower down. It’s not easy to see but Windshy is in both of the photos, you’ll need to zoom in to see him!
 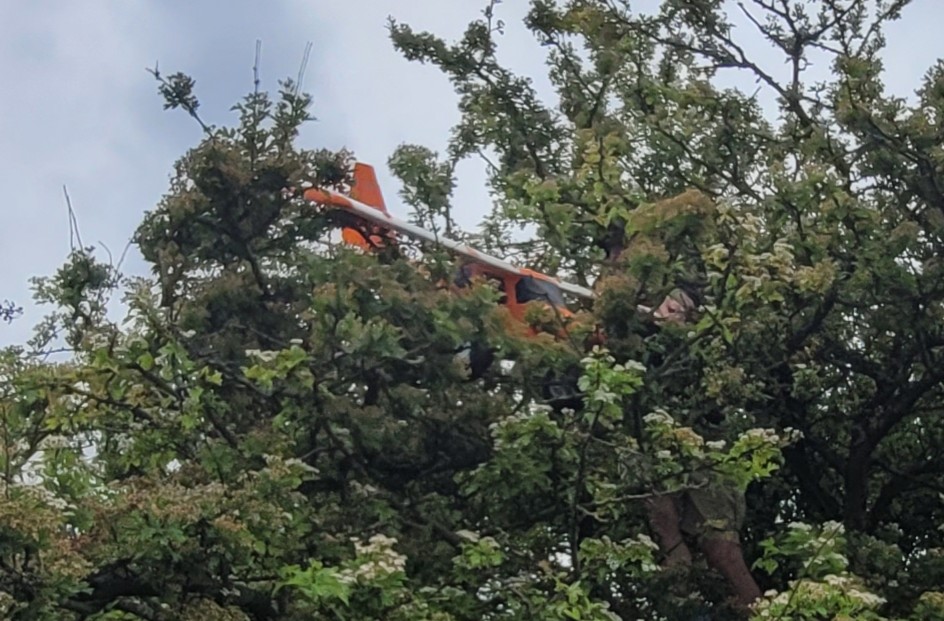 With the use of a fence post the rest of us (me, Woody, 1066, and Norwegian Nick) eventually managed to get the Tasman back on the ground, although by then the tail was damaged, nothing that can’t be repaired fairly easily though. I think Windshy deserves a nicer nickname after his excellent tree climbing efforts, and he’s got more used to flying on windier days now anyway. How about Terrytree? Suggestions please but keep them clean!
STOP PRESS: On the last day of the month John Warren performed a copycat landing in Dougal’s Dogwood with his XFLY Tasman, maybe it needs to be renamed Tasman Tree! This time Windshy wasn’t around but newbie Dom sprang into action, climbed the tree, and successfully retrieved the Tasman. Maybe he should become Dogwood Dom!
It turns out that not only is young Tom a promising flier, he also takes excellent photos and videos. So, this month all the action shots were taken by Tom, thank you young man:

Video time now, this month with footage by me, MacFly, Dougal, Captain Slow and Tom:
Please watch the video full-screen, it’s so much better with small models flying around.
If the video won’t play for you please click HERE
The Final Funny:
Two aliens are flying a fact- finding mission around the Earth. The first one says
“The dominant life form here have developed satellite based nuclear weapons.”
The second one says, “Ah, so they are an emerging intelligence then?”
The first one replies, “Apparently not, they’ve aimed them all at themselves.”
Colin Cowplain
Patch News – April 2026
Welcome to springtime, April actually had mostly good weather! It was often quite windy but there was very little rain and club members were able to gets lots of flying time in.
We had some unfortunate mower problems in April which I won’t go into here but, following a WhatsApp request for help from 1066, there was a good turnout of helpers on Tuesday 21st and after a couple of hours work the patch is in great condition once again.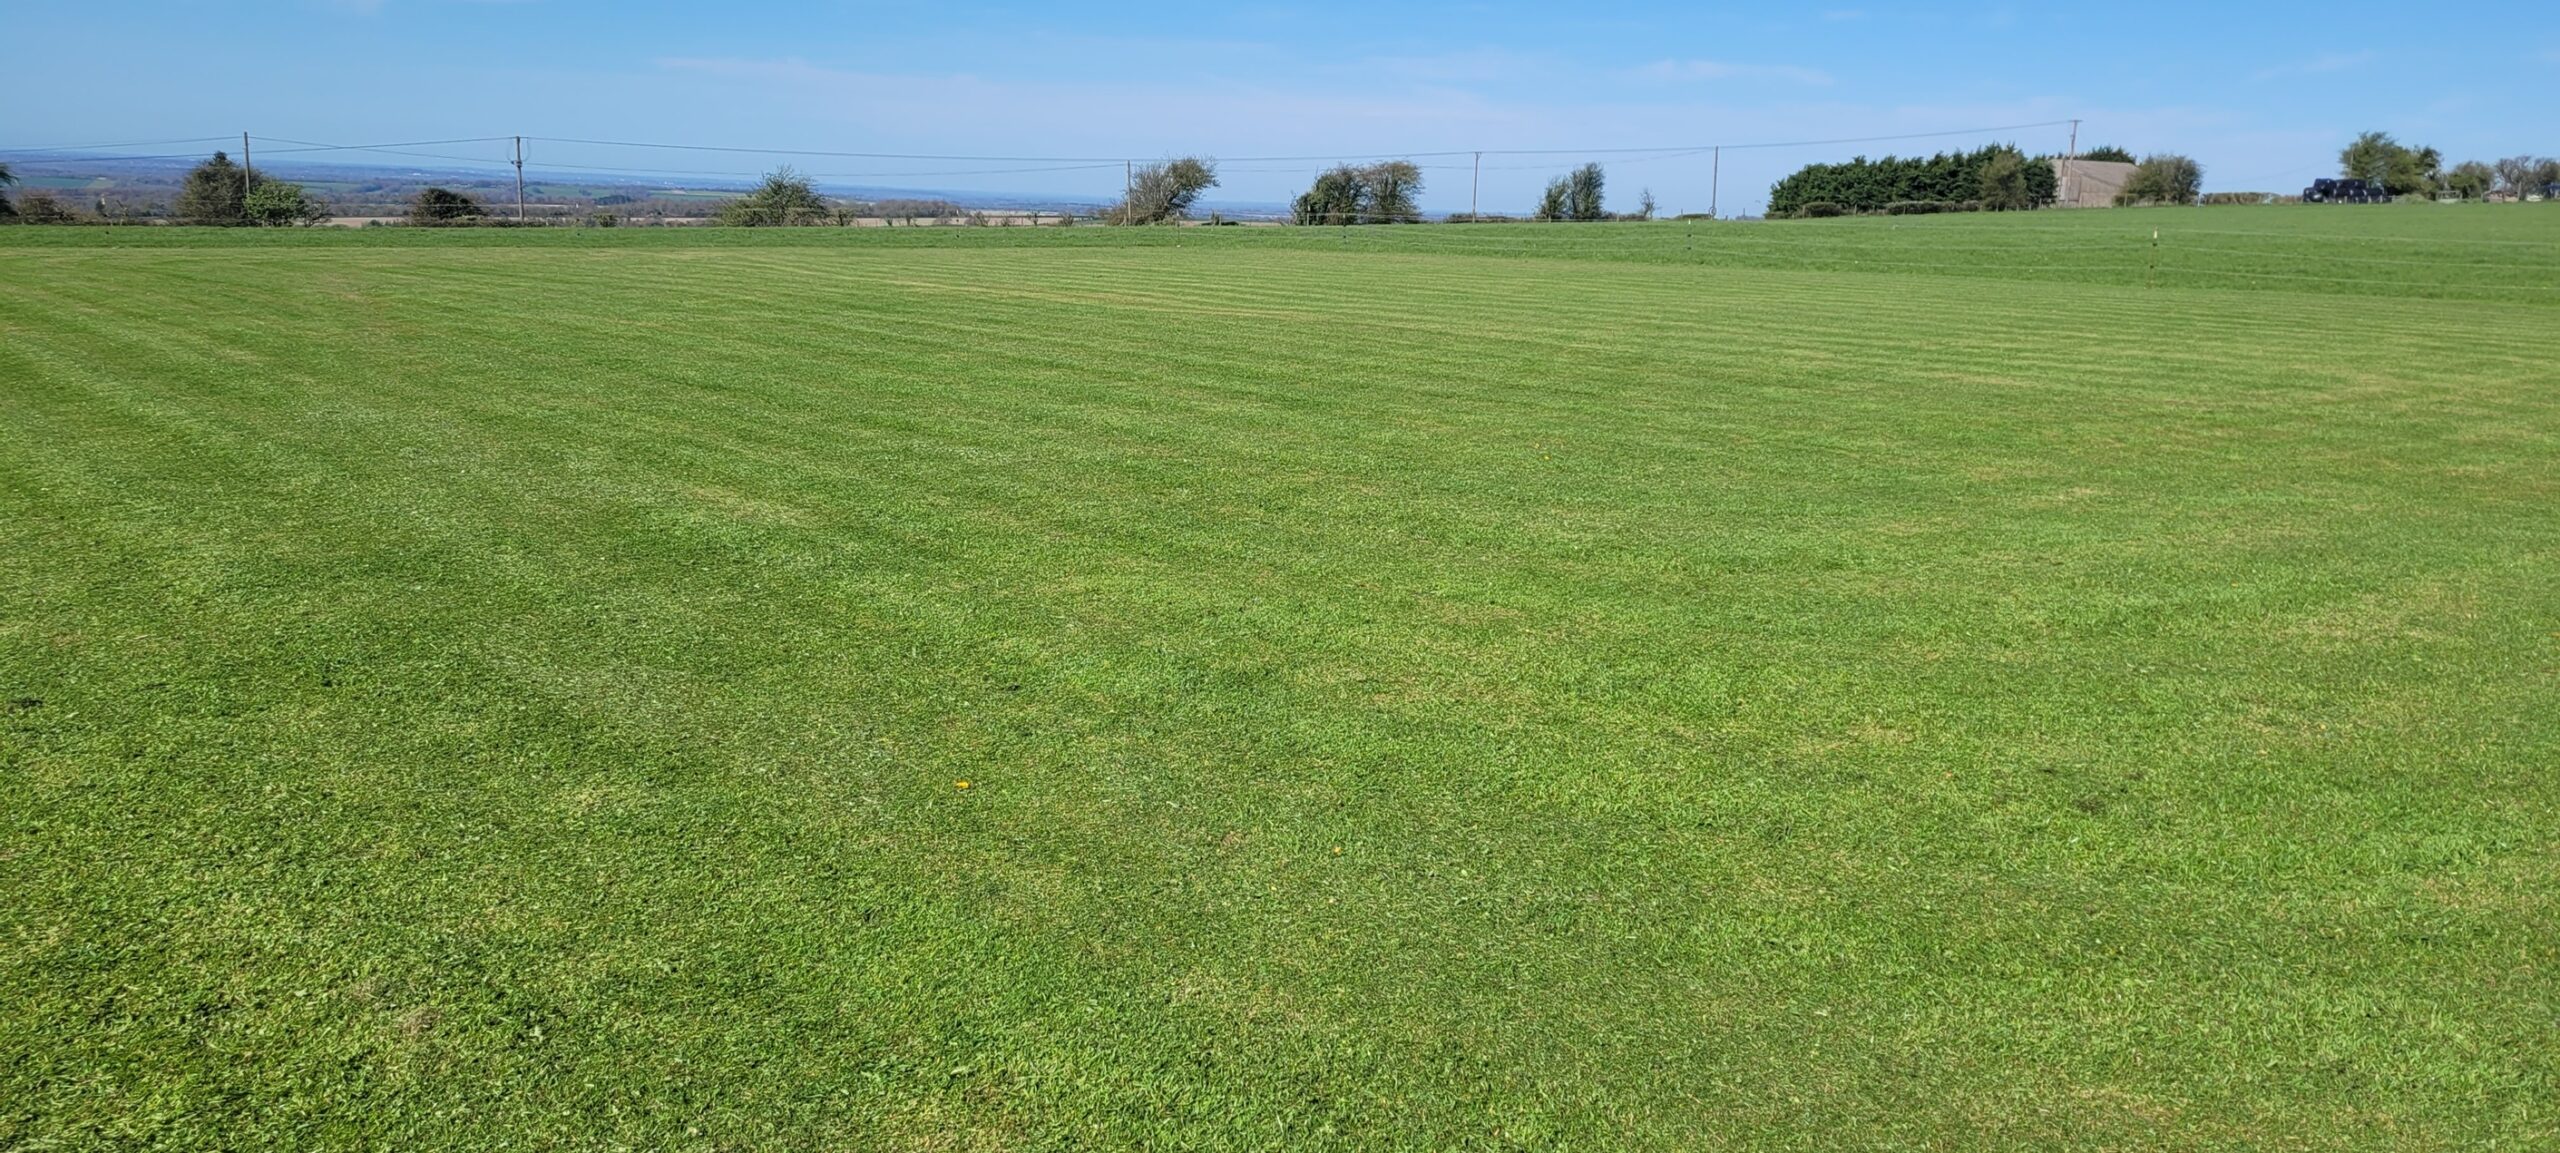

It’s amazing how quickly dandelions appear on the patch, the first photo was taken after cutting the grass on 7th April and second one on 24h April following two more cuts.
The farmers put about fifty young bullocks in the field early on Friday 24th and they seemed rather pleased to see us when we arrived to fly just a few hours later.
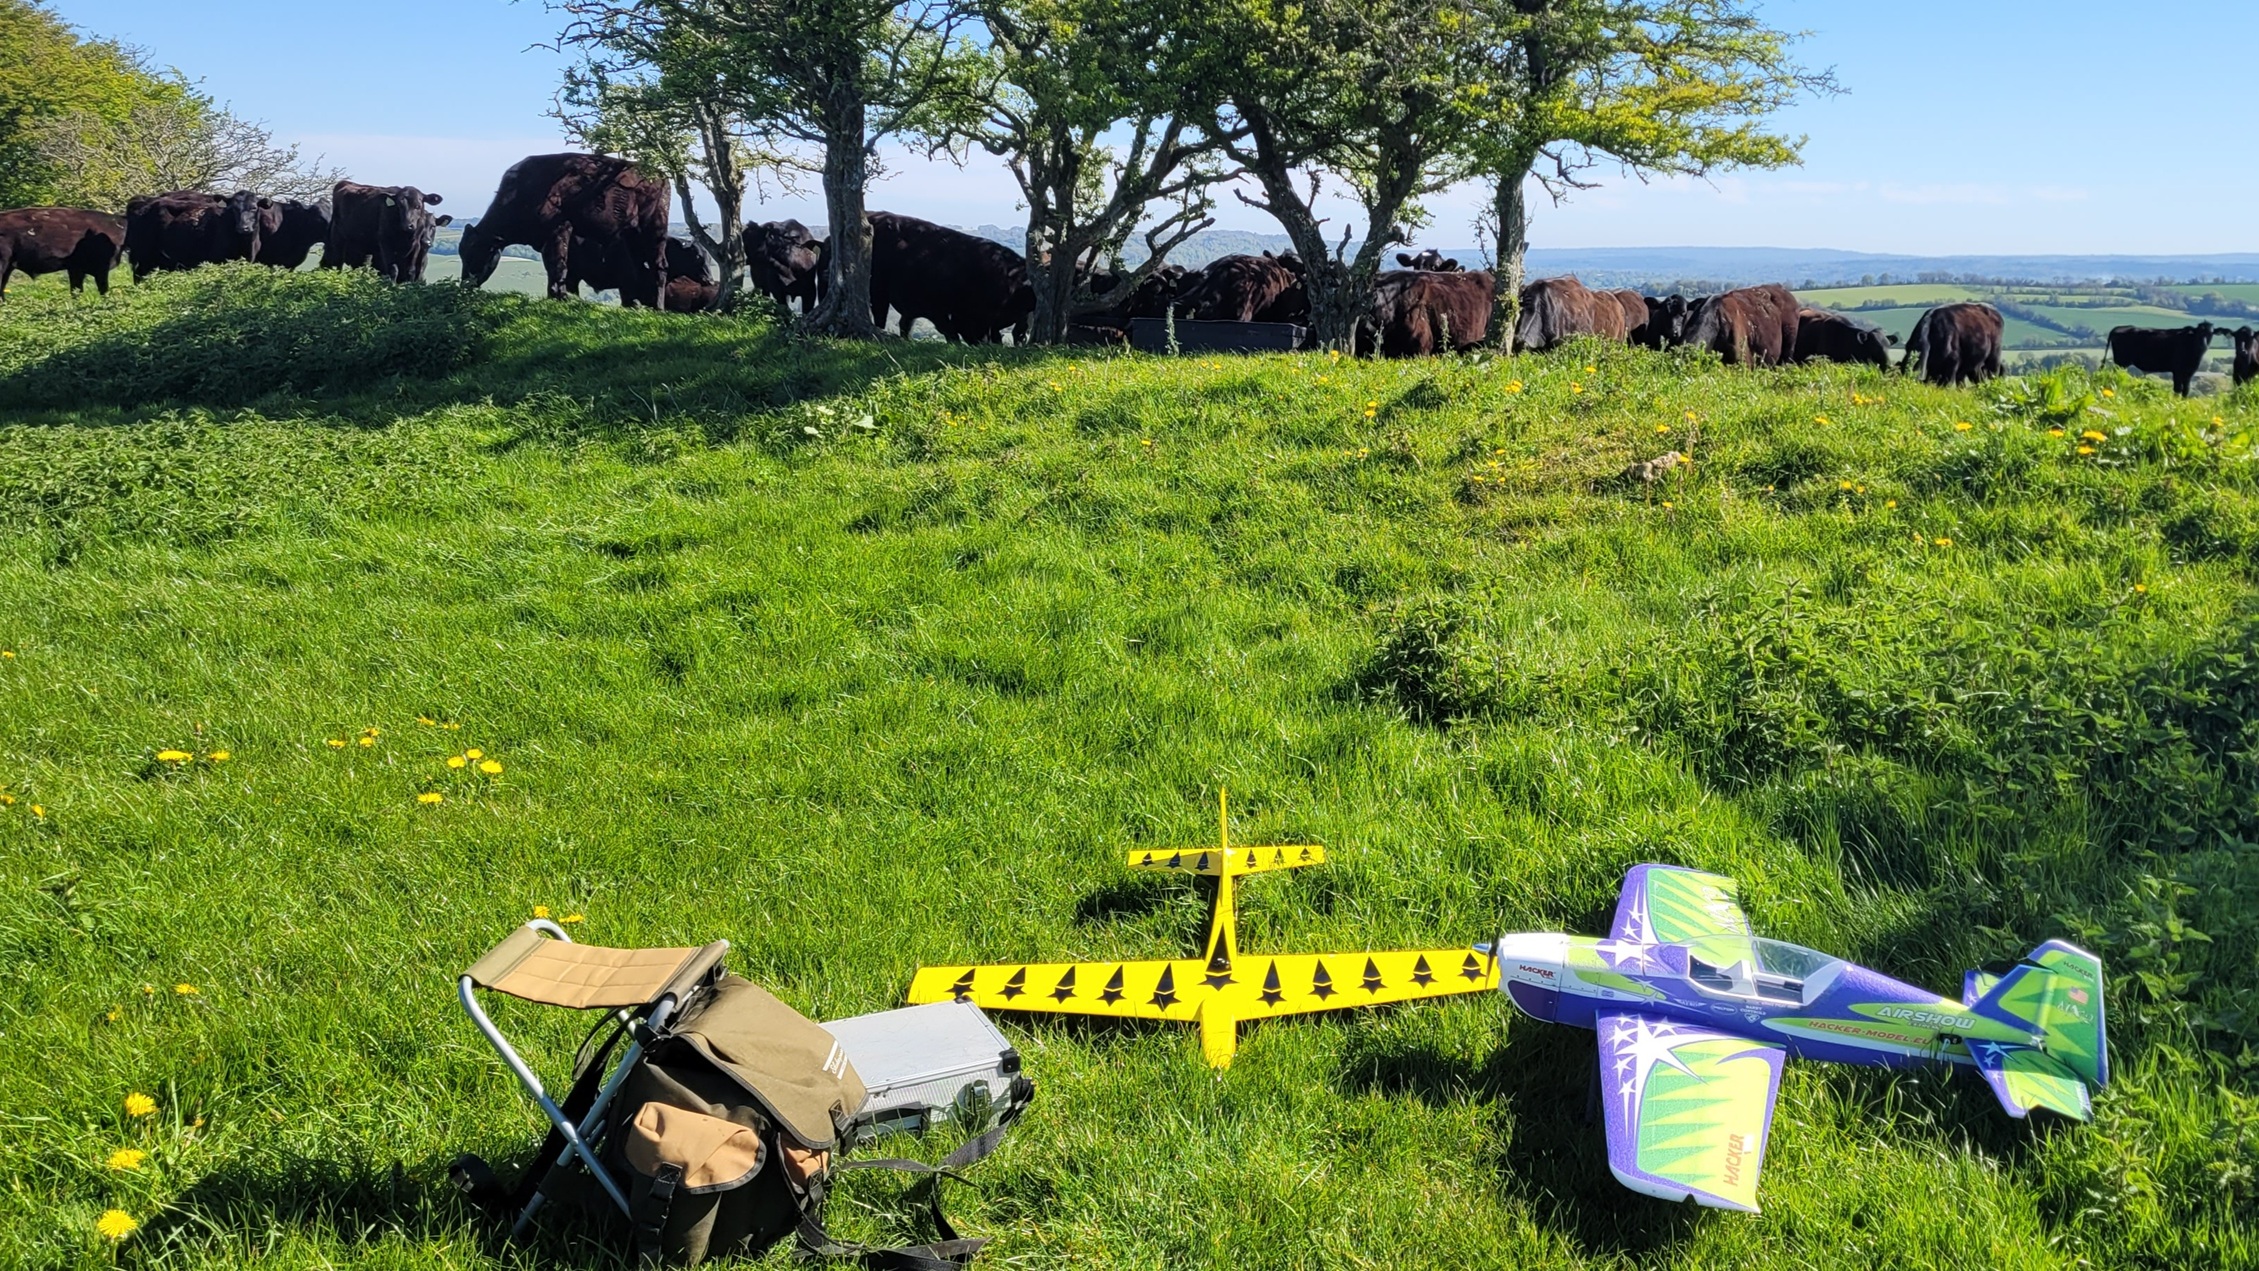 The young ones are usually the most trouble as they tend to be rather inquisitive, maybe they think we have food for them. But these weren’t much of a problem and we only had to herd them away when we arrived and then once again shortly before we packed up.
The club Competition Secretary, Dwayne Pipe, has asked me to remind everybody that the fun fly competitions run throughout the year and he encourages us all to take part. Dwayne has made a posh new aluminium spot for the spot landing task which is just one of seven tasks to try. Pilots can have a go at any or all of the tasks, whatever they fancy, as often as they like through the year. No need to stop the general flying, just ask someone to time/count/measure whatever they choose to try and let Dwayne know the score. There are two categories, one for BMFA A certificate fliers, the other for B certificate fliers so whatever your skill level you’ll be competing with similarly skilled pilots. Go on, try it!
In April we heard the sad news that ex-PAM member John Bourne had passed away on 15th April at the age of ninety two. Most current PAM members probably won’t have known John but I first met him while working at IBM in Havant about forty-five years ago. He is probably best described as a bit of an eccentric, nutty professor type, he was constantly making odd gadgets and experimenting with anything he could think of! Although he was employed by IBM as an Interior Designer he had his own large well-equipped workshop there and seemed to spend his time doing almost anything he wanted! When he heard I was a modeller he put in a request for me to help him during his busy times. I was in heaven, getting paid to play with stuff such as building mad machines to entertain the kids (and adults) at IBM Family Days etc. One day he told me that he’d built an electric powered Luton Minor but he couldn’t fly RC so wanted me to check it out. I flew it in the IBM car park one lunchtime, my first ever electric flight, and it flew surprisingly well.
 He was a great model builder but I remember thinking that if he could build a successful electric model when he knew little about RC planes, I should be able to do even better.
At John’s invitation I joined the IBM model club where I also met current PAM member John Warren. Shortly afterwards John Bourne joined PAM and gave us several club meeting talks on things such as the series of fully working Stirling engines he had built and his exploits in hang-gliding when in it’s infancy, even flying at Dog Mountain near Seattle!
A couple of years ago John and his wife Kay had to move into a care home and he asked his daughter Rona to contact PAM to dispose of his aero-modelling stuff, and both I and Dougal Entendre went to sort it all out. Many of his planes were sold at a club meeting, along with more of his modelling goods, with all the money going into club funds.
I took the opportunity to buy that very first electric model I had flown, the Luton Minor.
 Several other members also bought some of John’s models including Dougal Entendre who bought a large vintage Sportster that he flew a few times but has since sold on,
Gordon Bennett bought a Fosdyke Flyer, and Dwayne Pipe bought an electric glider.
All these models had been beautifully built by John and fly well, he was a great modeller.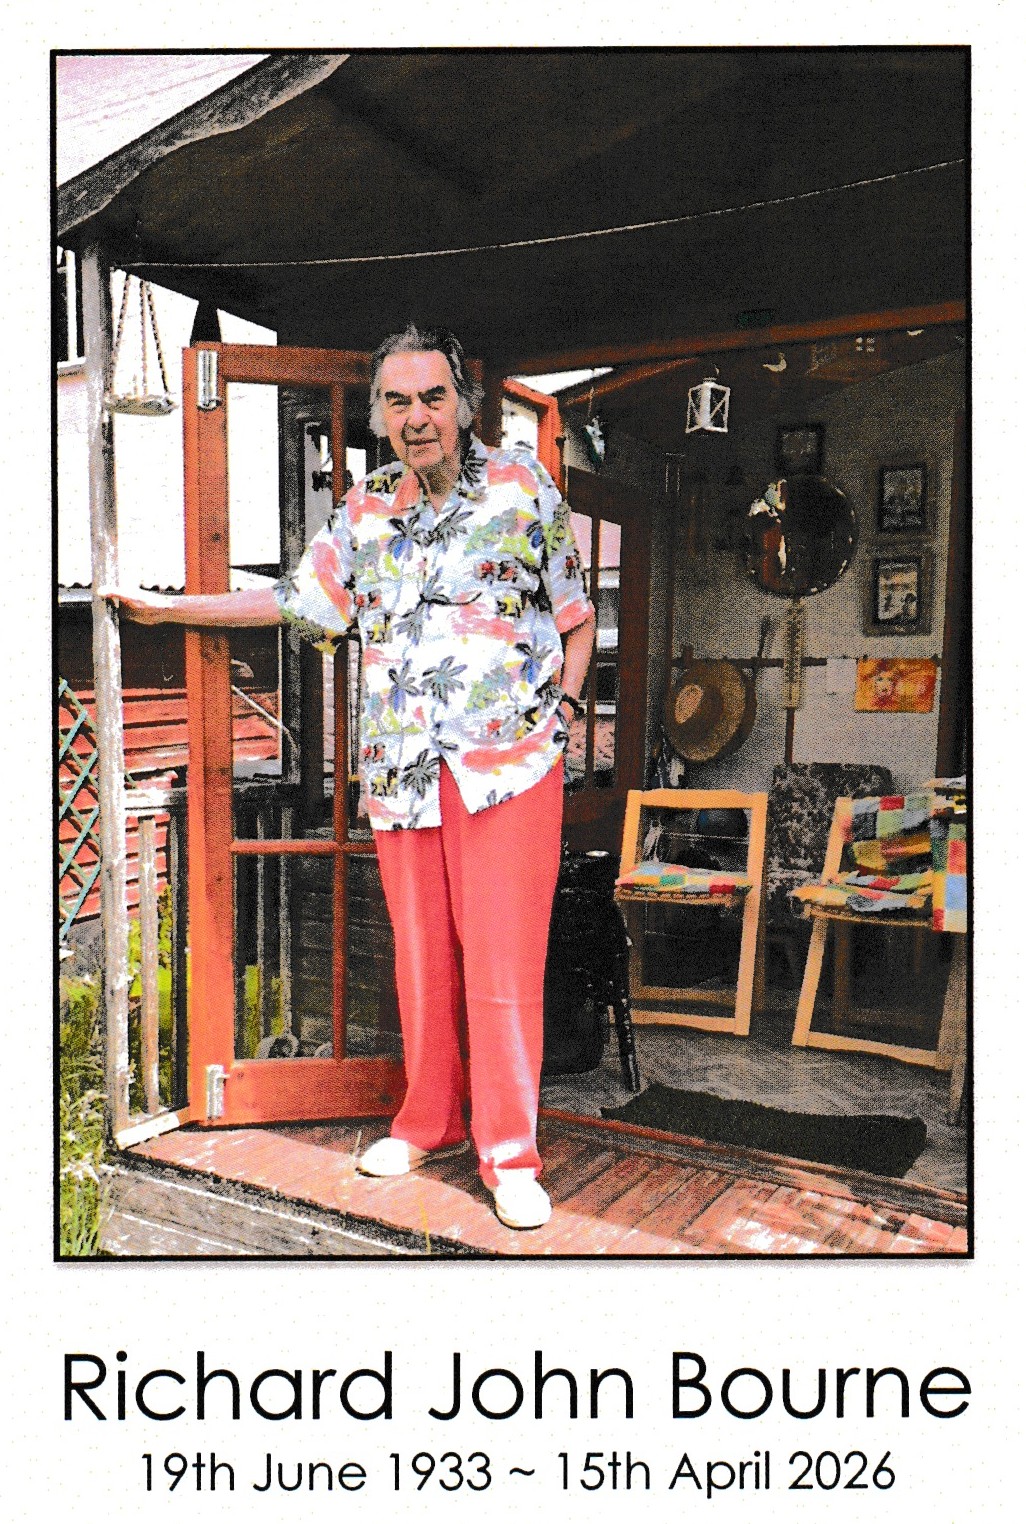 Doreen and I attended John’s funeral on 30th April and met more of his friends and family and heard more of his exploits over a long and well lived life. You’ll be missed John.
Although there was plenty of flying in April there wasn’t a single new model flown. I think that’s a first, I can’t remember a month when there wasn’t at least one to write about.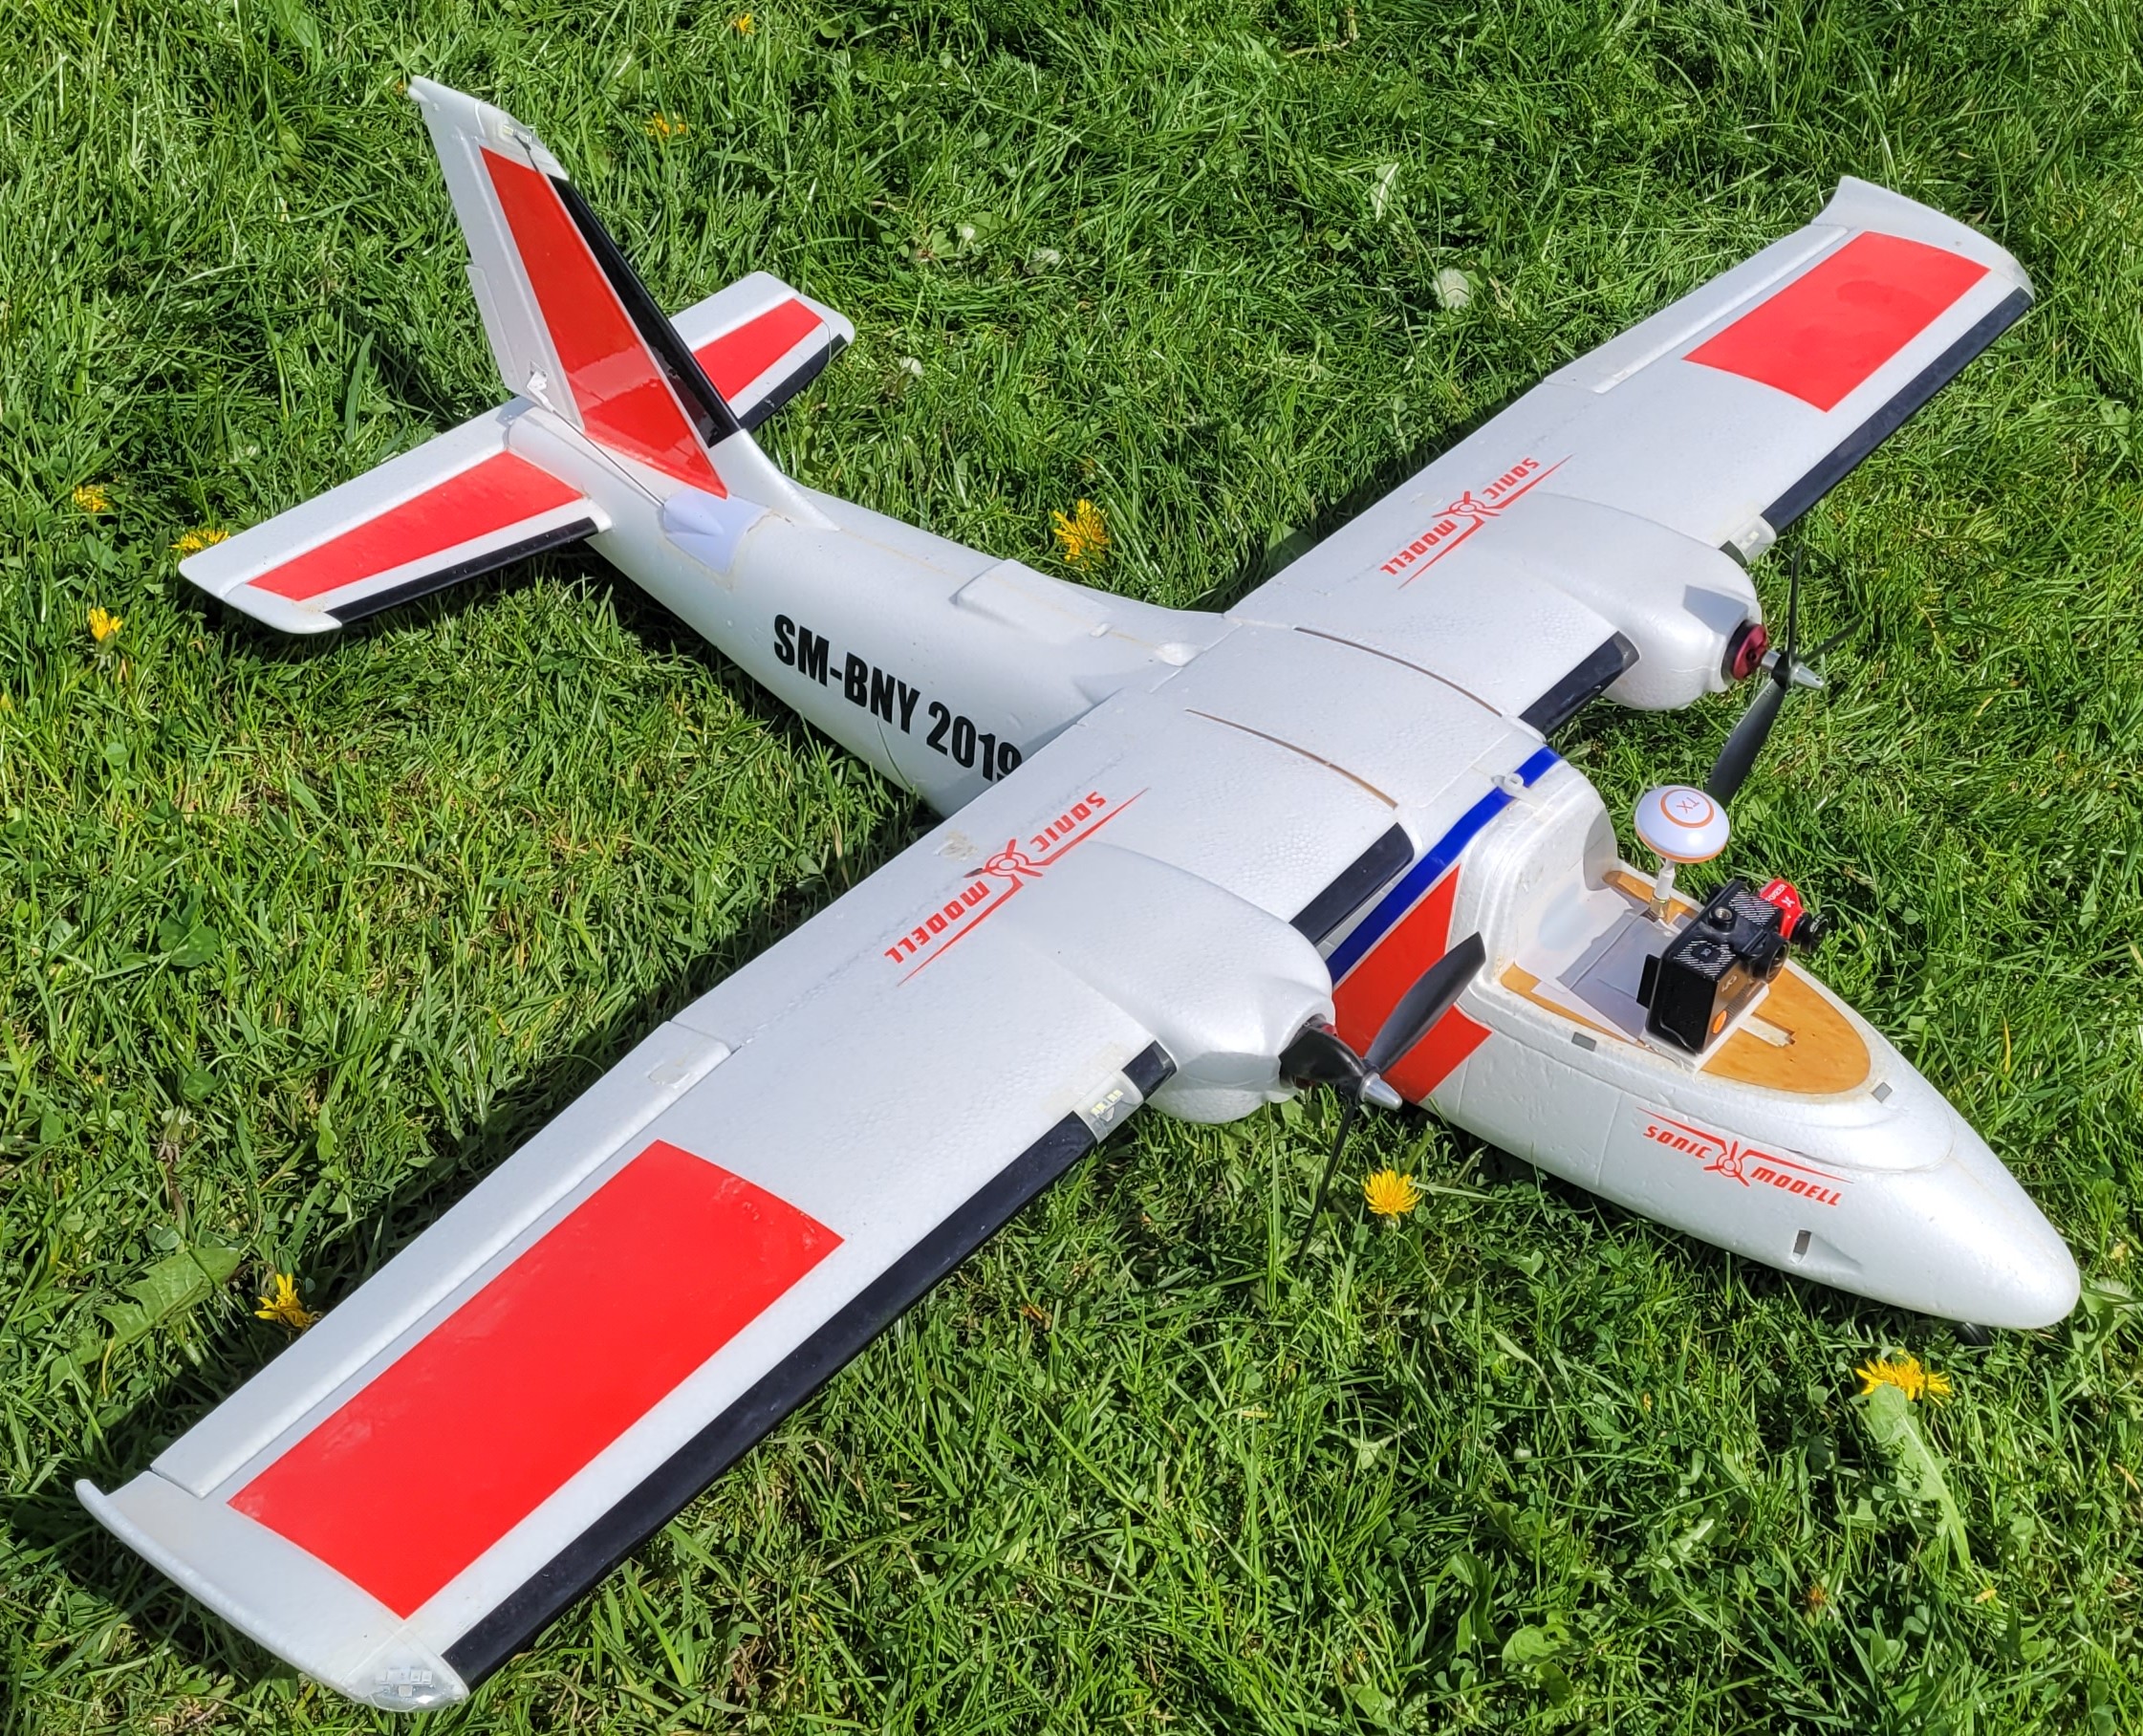
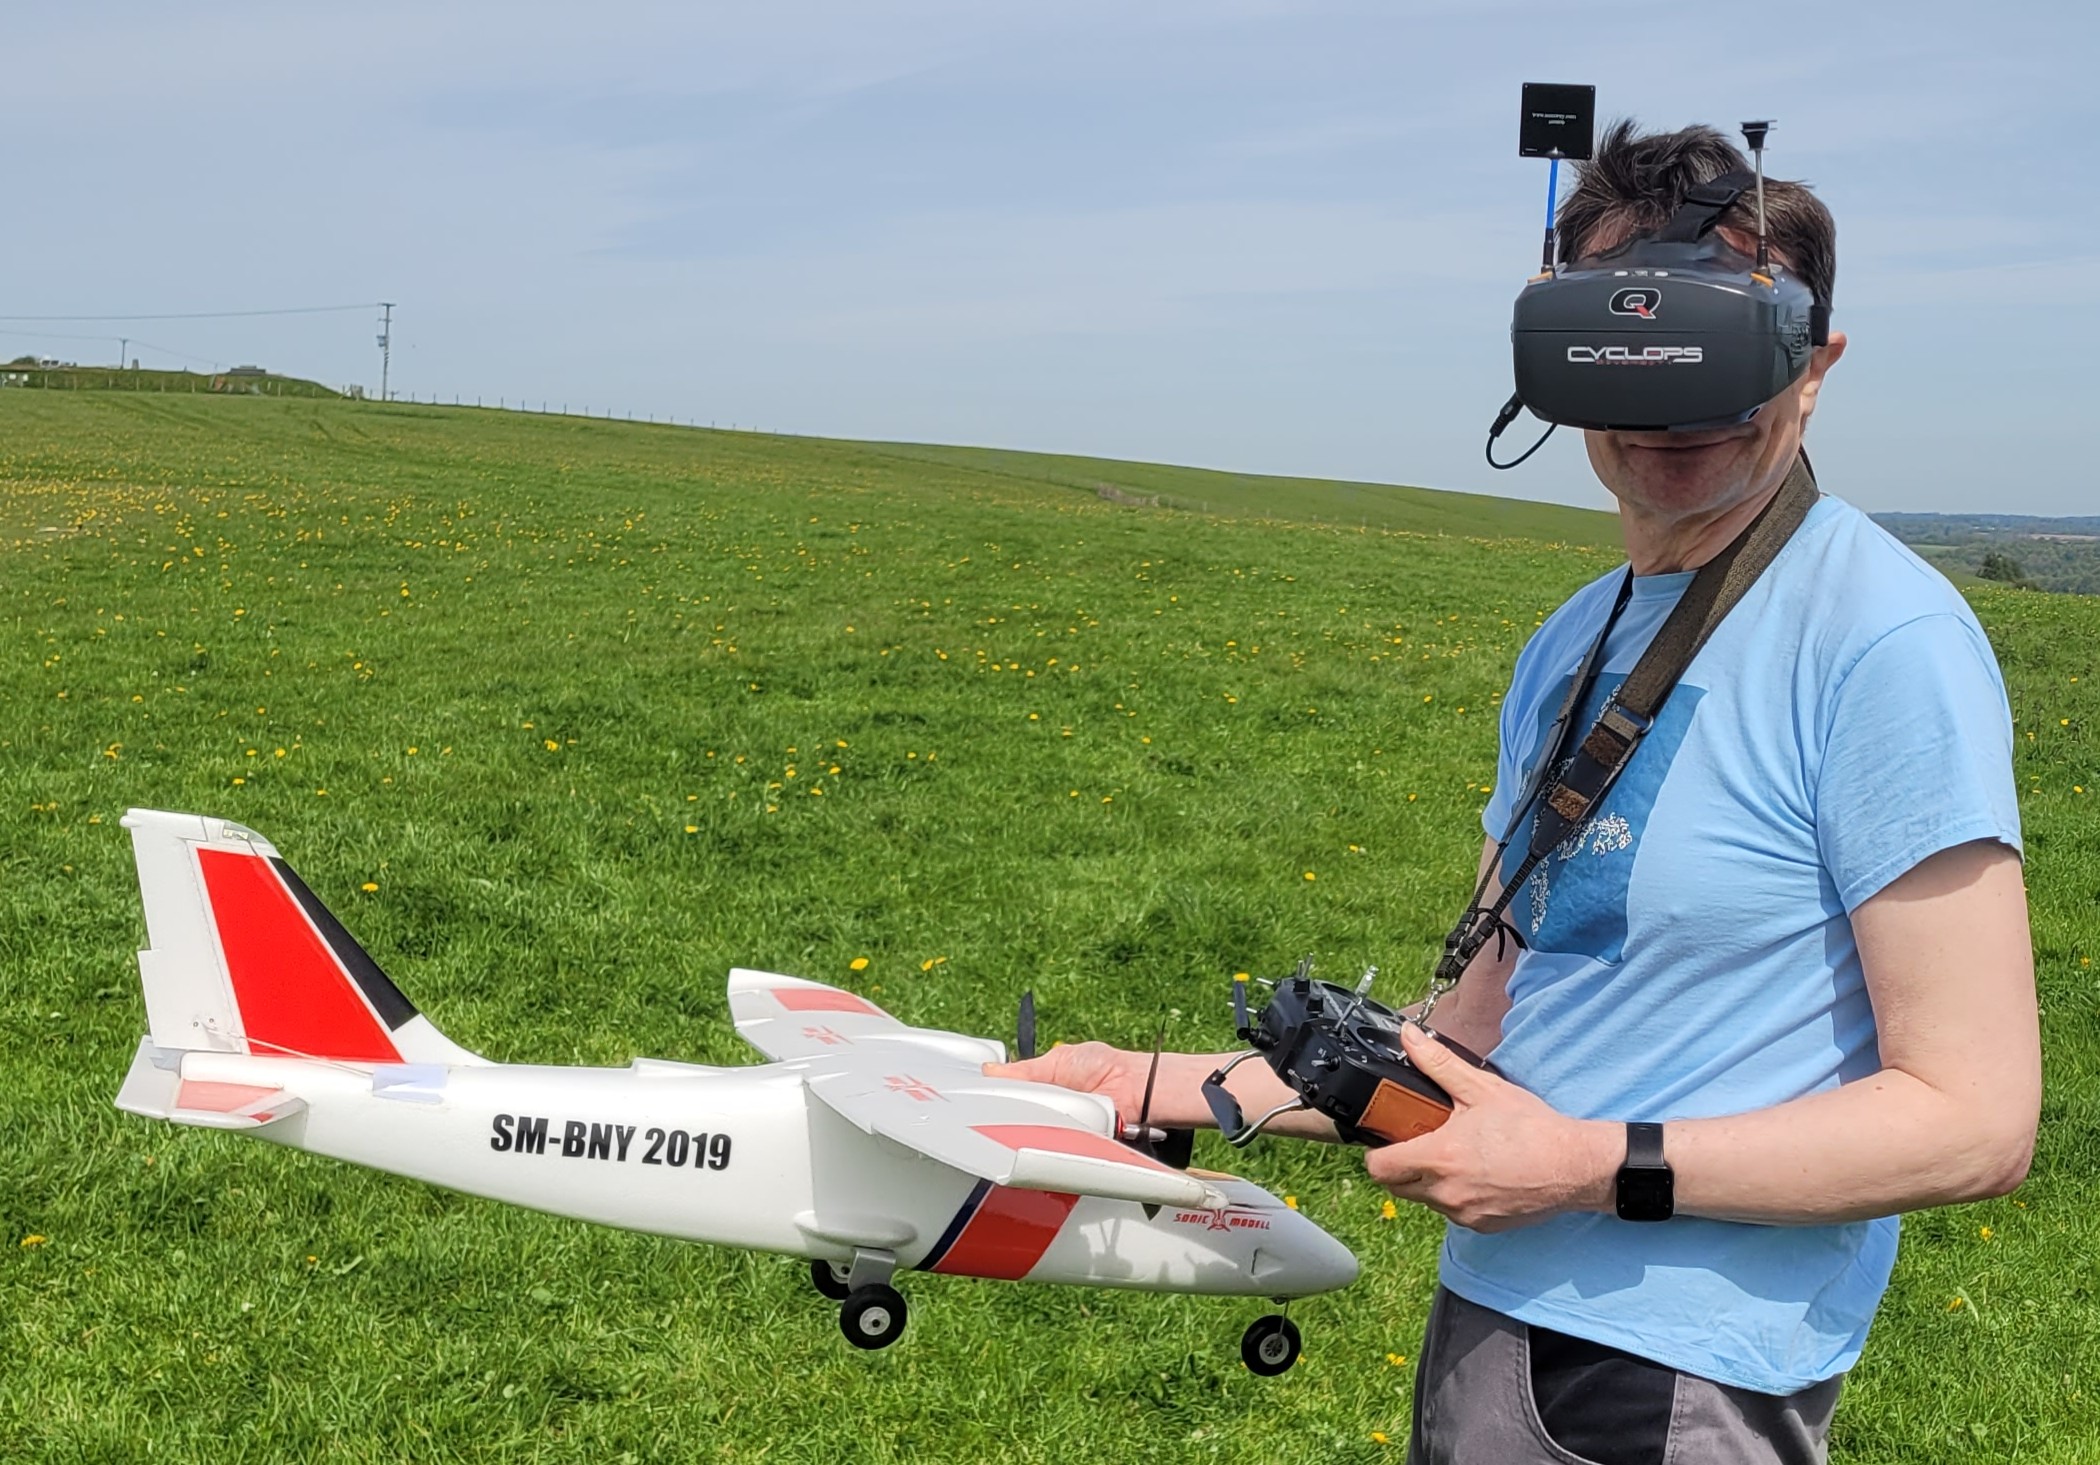
So I’ll concentrate on other things this month, starting with Dougal’s FPV (First Person View) plane, a SonicModell Binary. Both Dougal and I fly FPV occasionally, and Captain Slow tried it for a while but decided it wasn’t for him and sold the equipment.
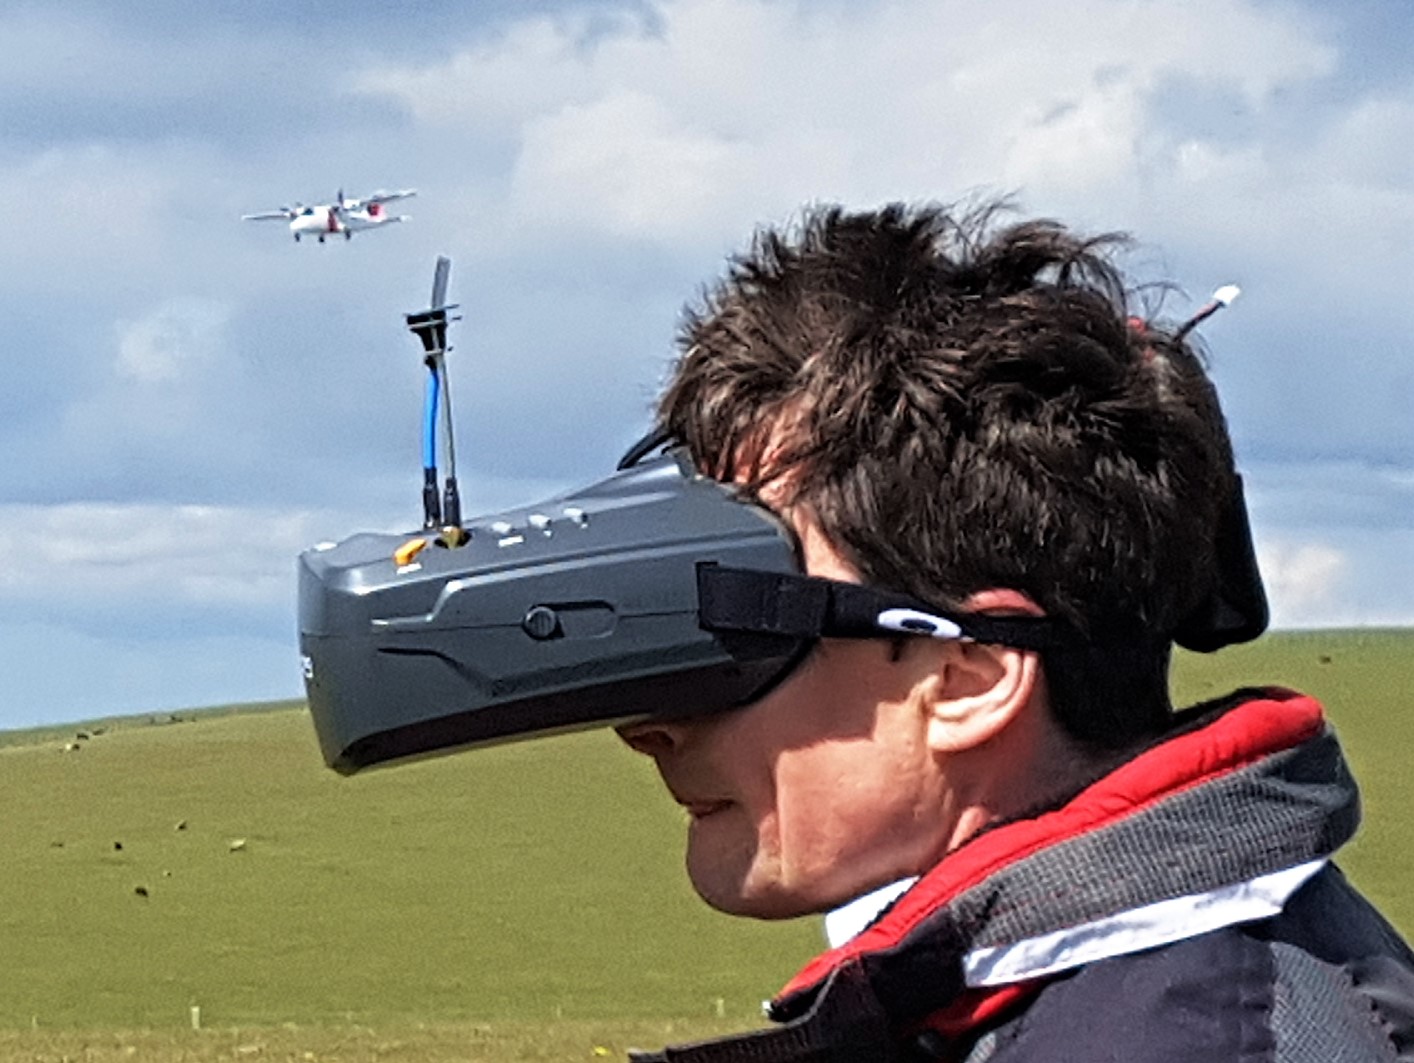 It’s not something we do very regularly, partly because it can be a bit of a faff setting everything up, plus you must always have a willing spotter to stand by the pilot and advise on positioning and, in case of emergencies such as video loss, to take control of the model.
 Also, unless there is another plane to follow, or maybe a bird, it can get a bit boring just flying over the same bit of countryside. FPV is limited to LOS (Line of Sight) so the pilot can only fly over the same area around the field. Having said that, it’s fun to do now and again, and it’s certainly quite a challenge at times. Dougal and I tend to spot for each other when possible as it’s helpful to have a spotter who is familiar with the problems that can occur. !’ve had occasions when I’m unsure where I am and asked the spotter for directions only to be told “Head back towards the patch”, or “Turn left…no right…”. All great fun…!
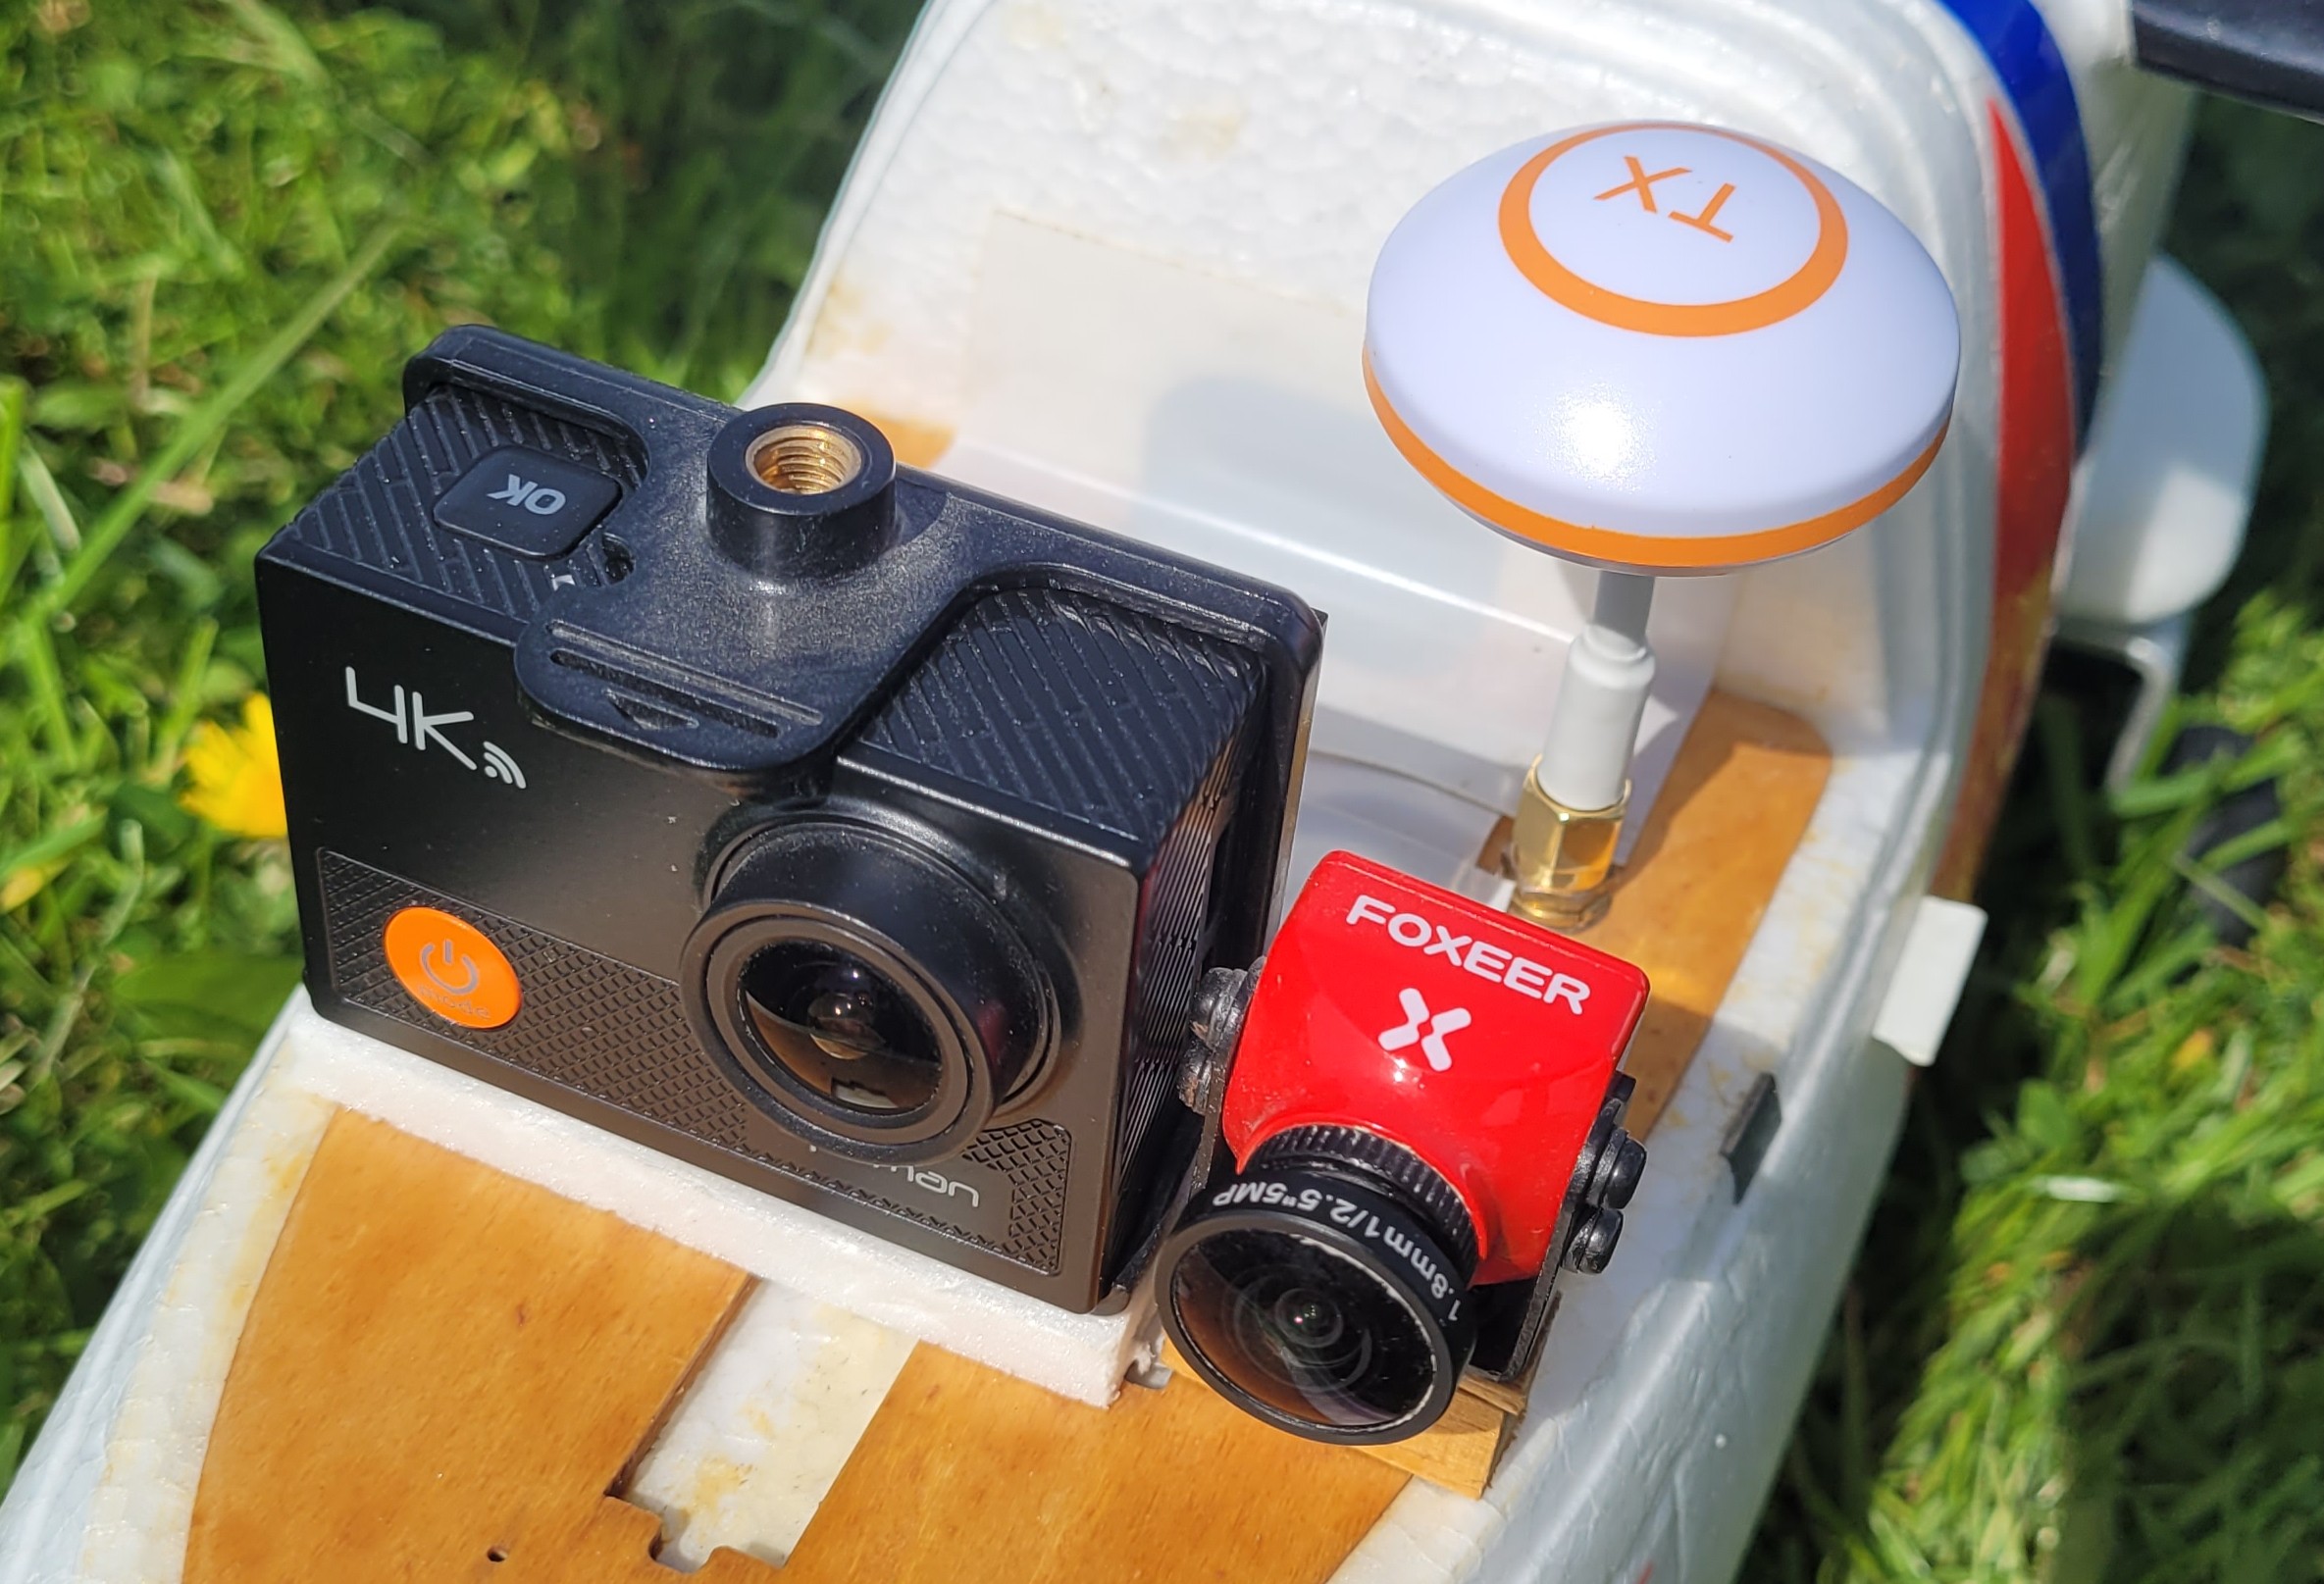 As well as the FPV gear Dougal has added a 4K action camera alongside the Foxeer FPV camera to record better quality in-flight video. Dougal says: The FPV camera is right next to the action camera, and they both seem to get a similar field of view. Although the action camera is 4K, I only run it in 1080p mode (at 60Hz frame rate). This is because 4K video files are huge and unwieldy, and the camera drops the frame rate right down to get 4K, which is no good at all, whereas the 1080p quality seems pretty good. I got comments about how long it took me to prep the plane for each flight. This is because I have to power up about 6 systems. In order, I go: Transmitter, plane (including lights), video Tx (from separate 1000mAh 3s battery), goggles, action cam, then set goggles and action cam recording. When I power up the action cam, it’s very difficult to see the video screen, even if I do remember to take my sunglasses off! I have to listen to the chimes as it powers up, and then different chimes when I press the button to start it recording. The latter nearly always seems to coincide with someone loudly saying “that’s a right faff to set up”, or “why has it got two cameras”, so it’s a miracle we have any video at all.
Well we do have video and very good quality it is too. I’ve included some of the footage in this month’s video, interspersed with footage from the ground recorded by MacFly.
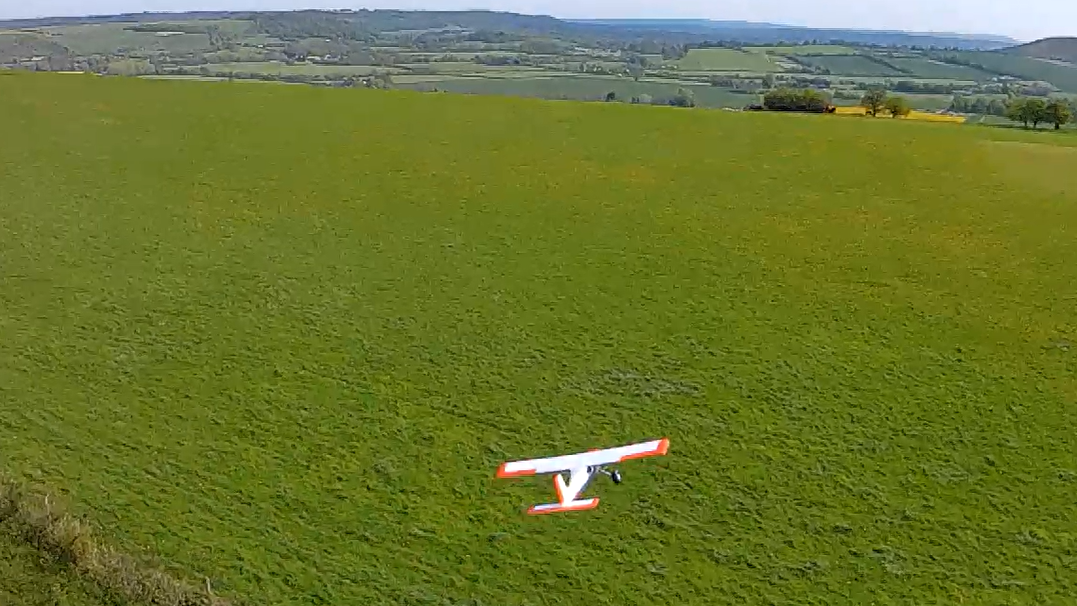
 Here are a couple of stills from the video, I’ll probably use more video in May Patch News.
The other day I mentioned to 1066 that I was very short of material for this month’s Patch News as there had been no new models flown in April. He told me that he was in the process of covering something and he hoped to have it finished by the end of the month, in time for this Patch News. Then he sent me a photo…he’s covering his garage roof!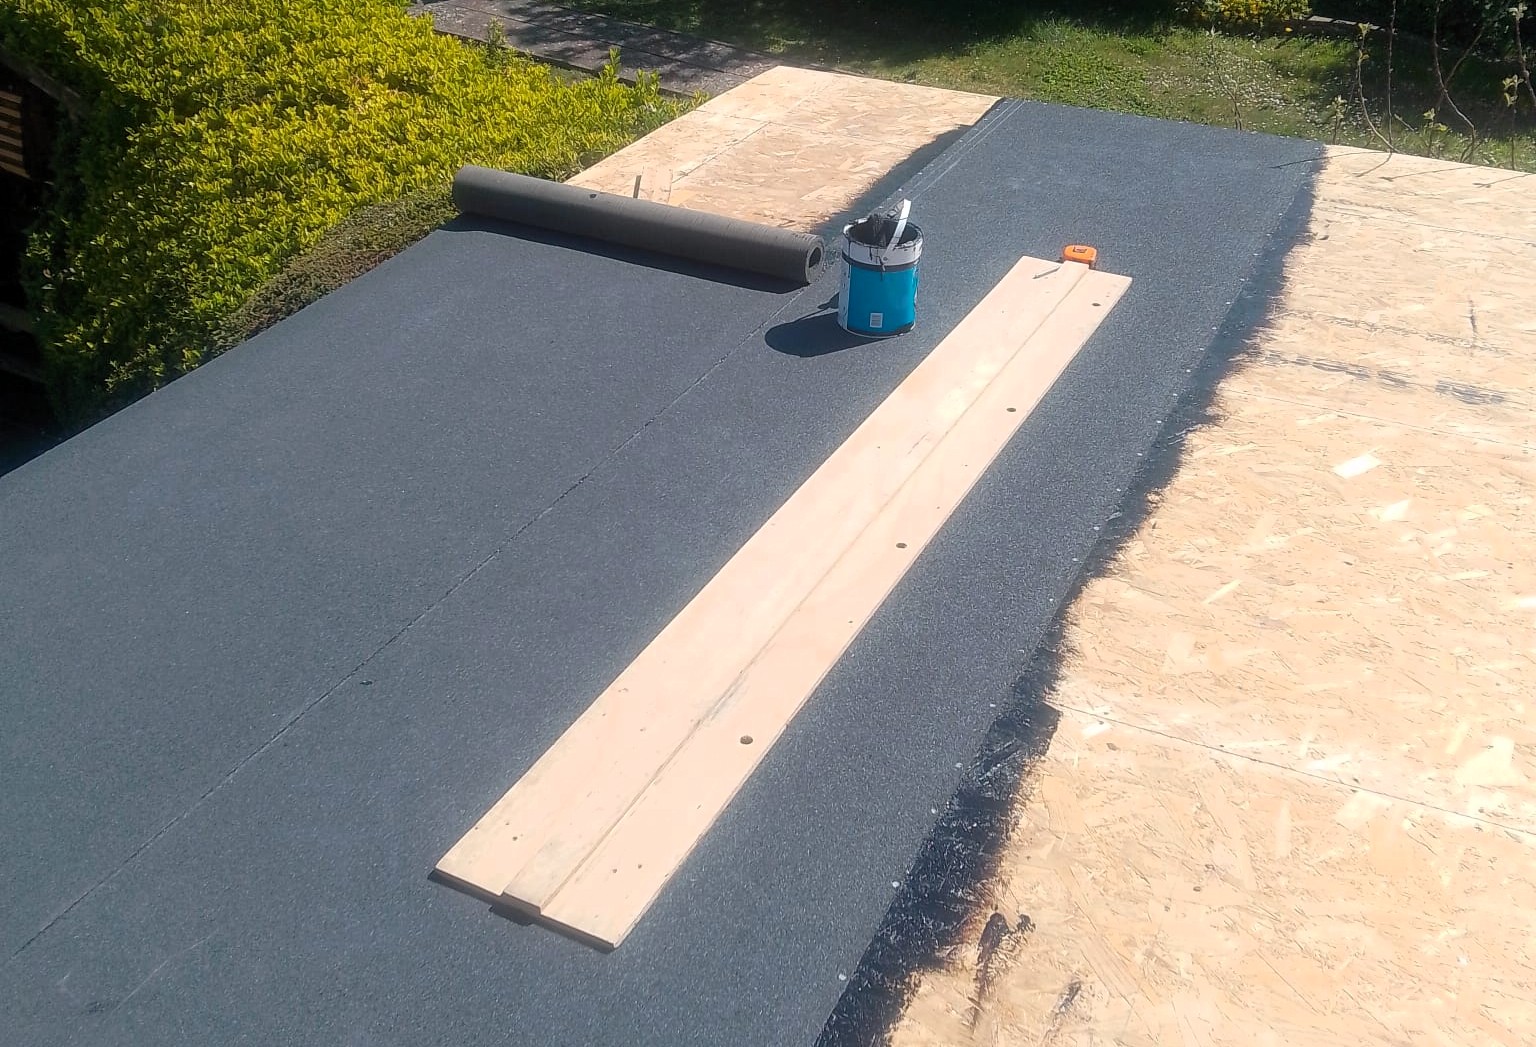
Well, he uses his garage for his modelling so I suppose it sort of qualifies…
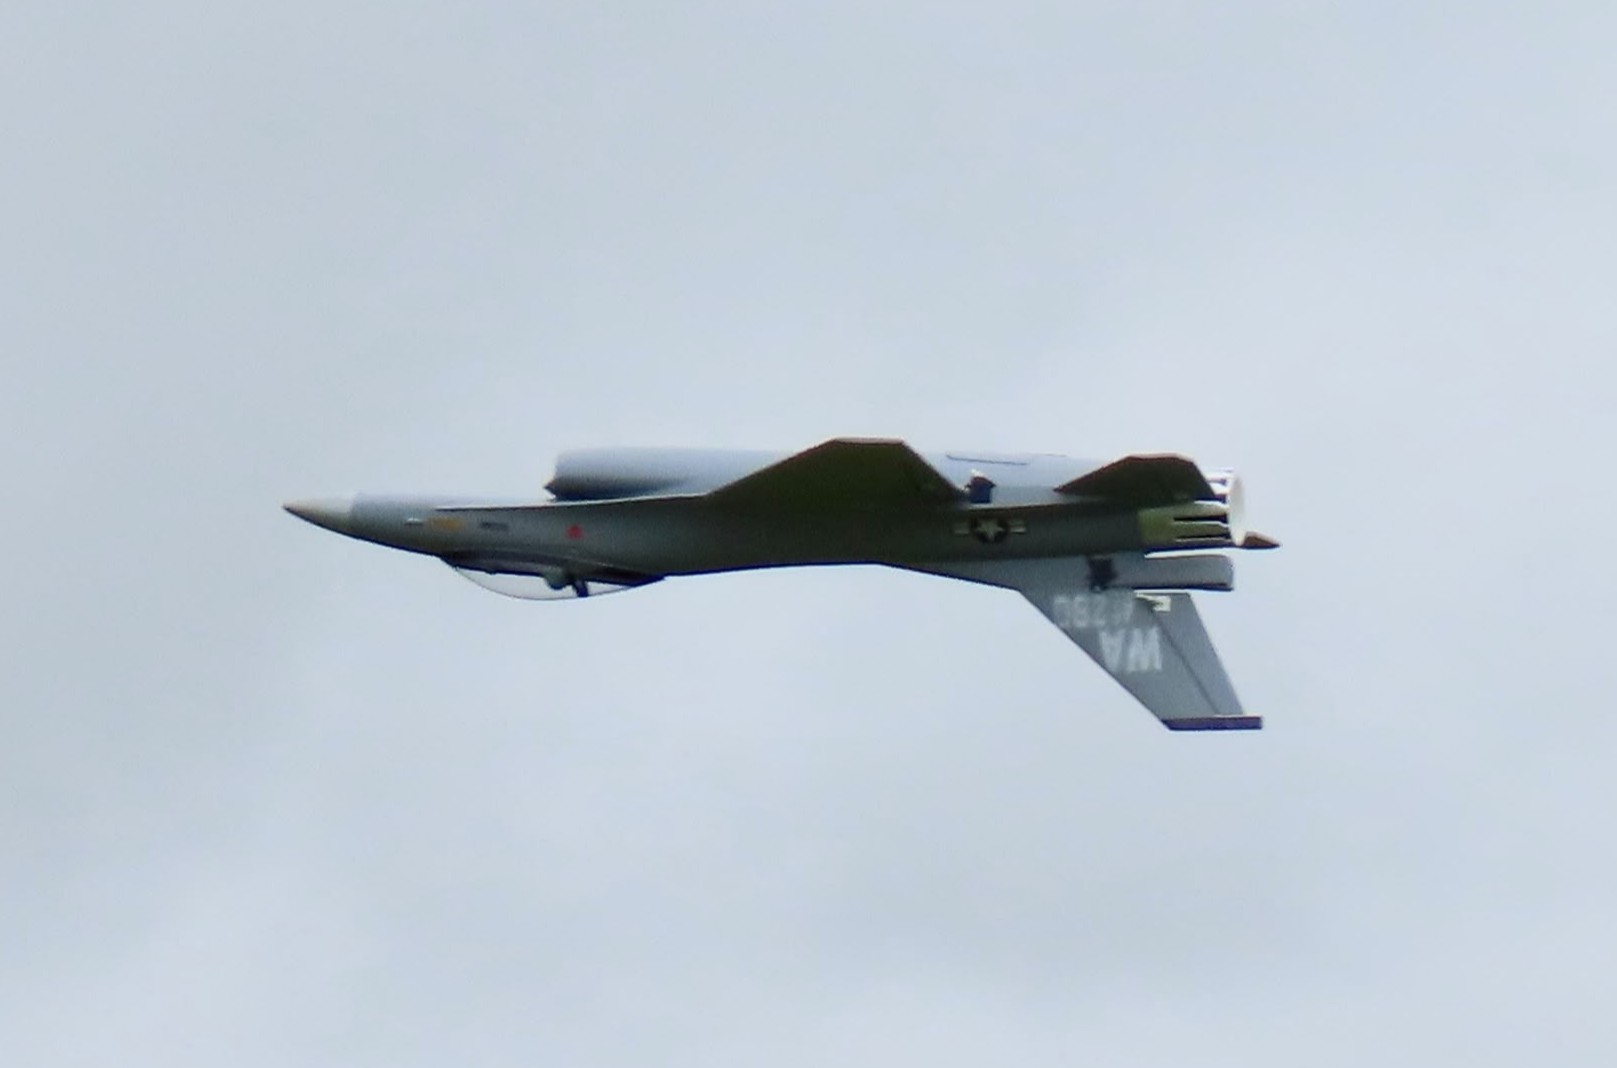
Another non-new model story was something that happened to me at the start of the month. It wasn’t even a new model when I got it, I bought the XFly T-7A Red Hawk EDF jet from Woody when he found it was a bit too much of a handful for him.
 I’ve been flying it a lot recently and very much enjoying it as it flies very nicely, but you do need to keep the speed up unless it is flying more or less straight and level. When the speed drops there is not enough airflow over the surfaces (no propwash of course) and you lose control until the speed builds up again. The same is true of most EDFs but it seems more pronounced on the Red Hawk than with other EDFs that I’ve flown. It sounds great in the air with its 12 blade 64mm fan and, being ex-Woody, it has a throttle linked ‘afterburner’ ring which shows up well when climbing out from a low and slow pass.
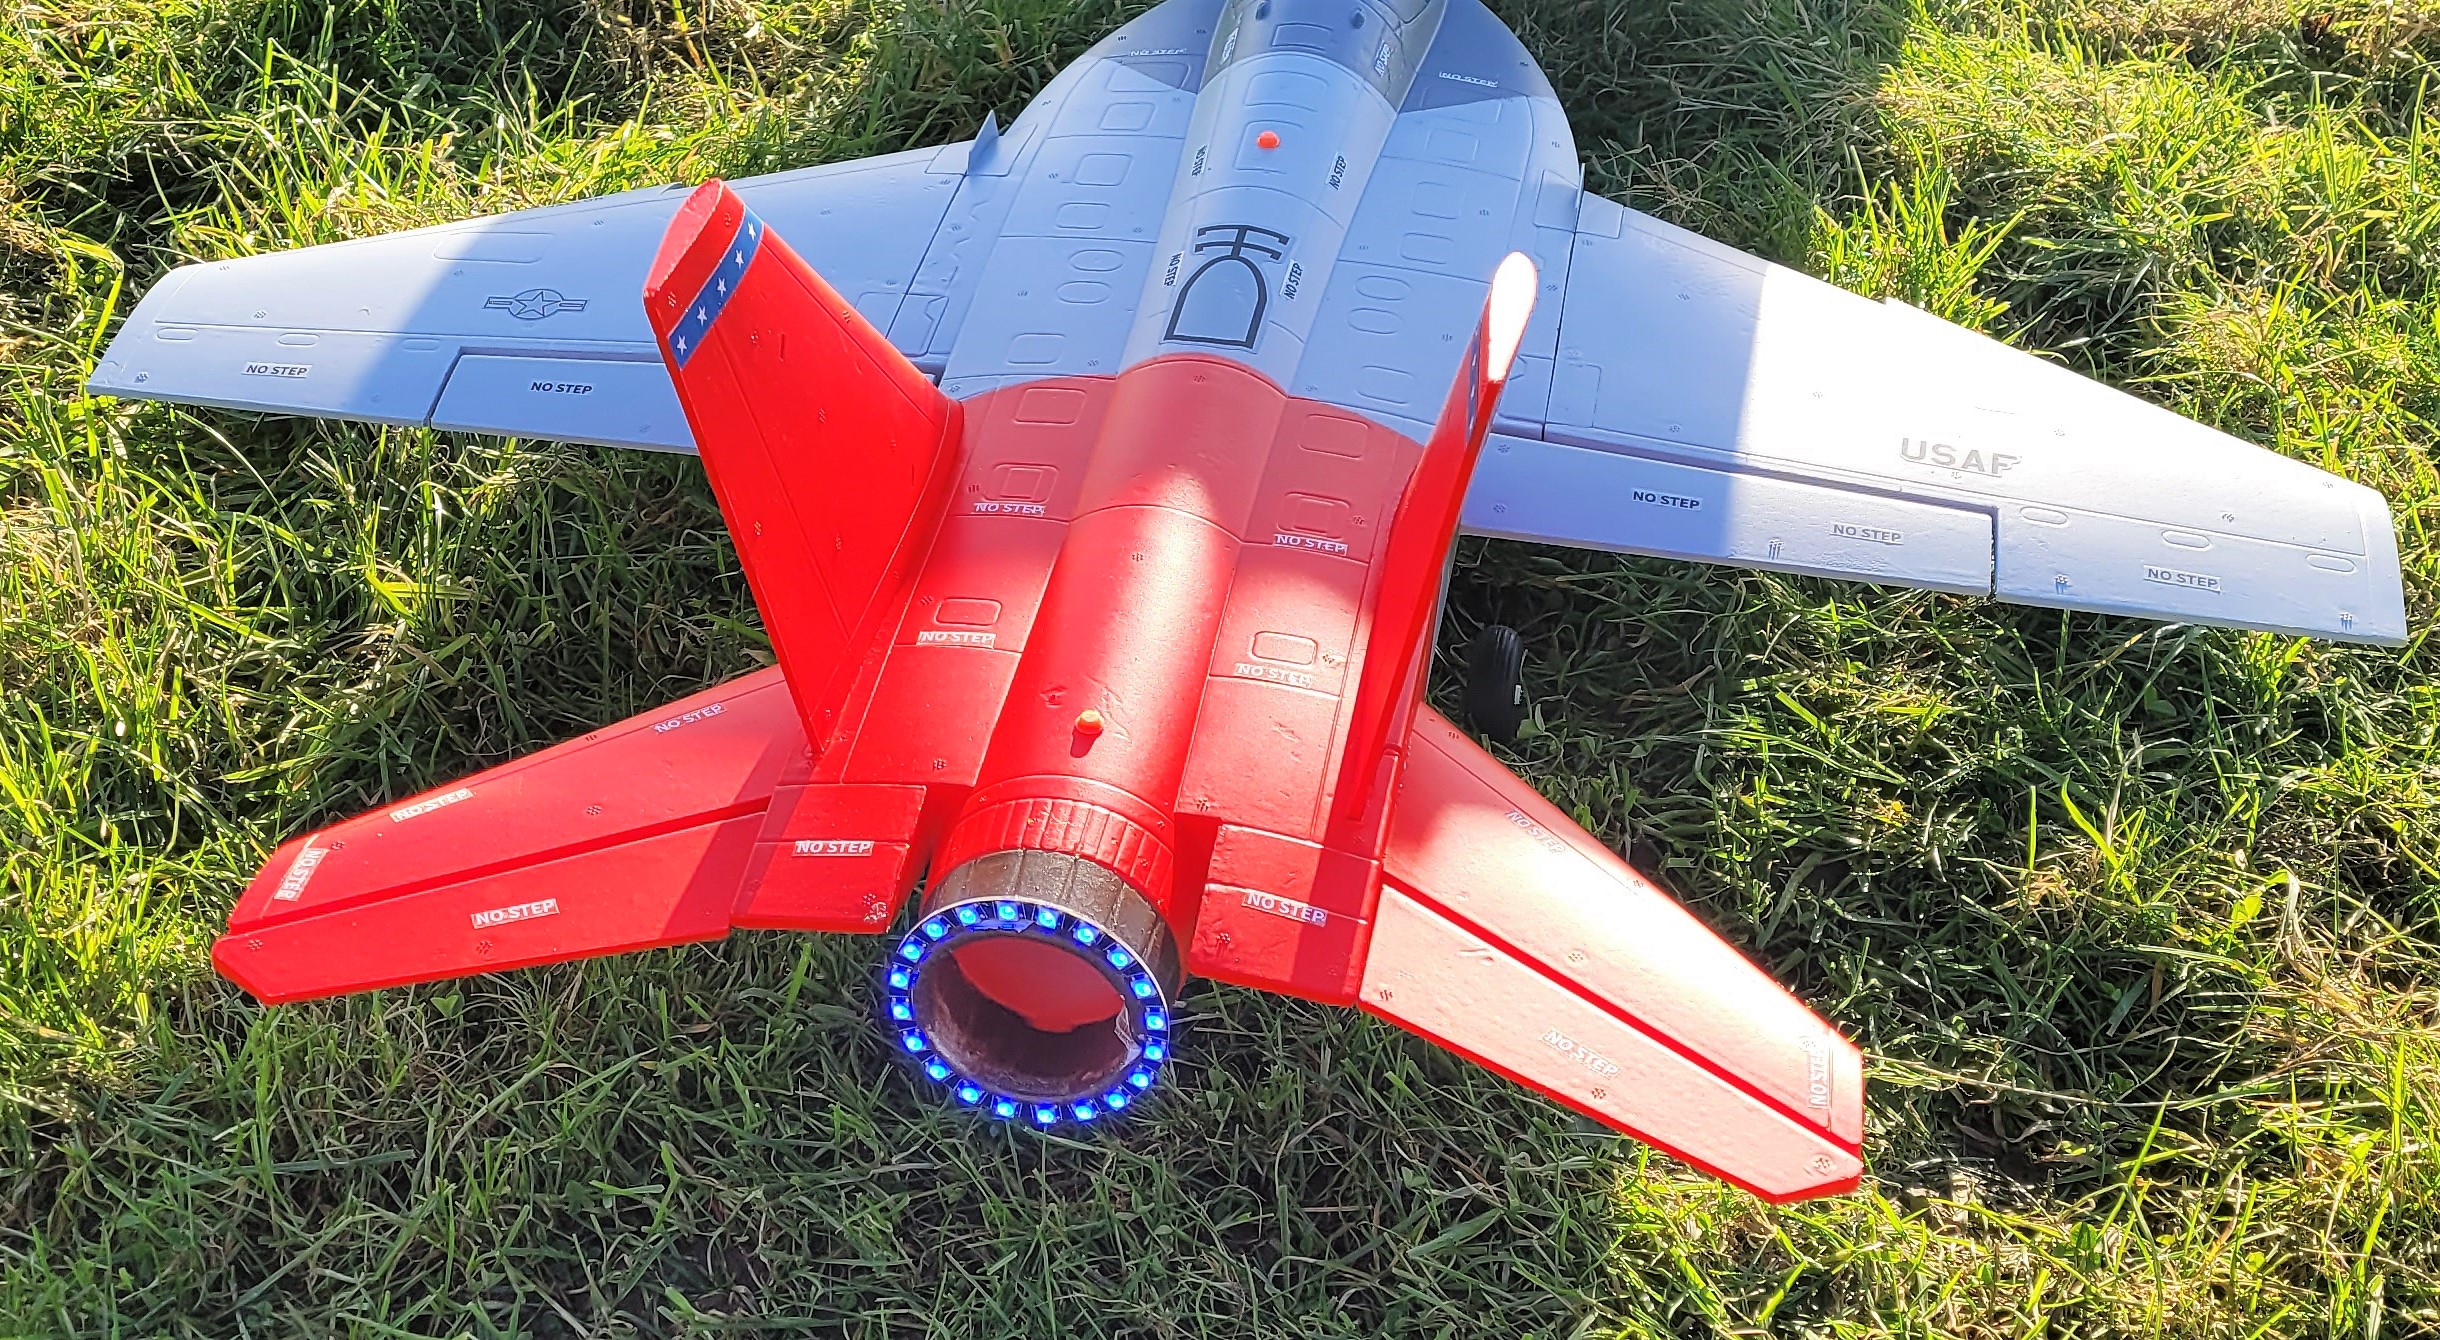 Incidentally, the Boeing-Saab T-7A Red Hawk is one of the aircraft currently being considered as a replacement for the Red Arrows Hawks which are scheduled to be retired in March 2030. So what happened to mine? The short answer is that I ran out of battery. My throttle timer was down to about 30 seconds and I was just turning in on finals when I realised I had no power. Unfortunately the plane was quite a long way downwind, out over the valley to the east, and the Red Hawk dropped out of sight below the field level.
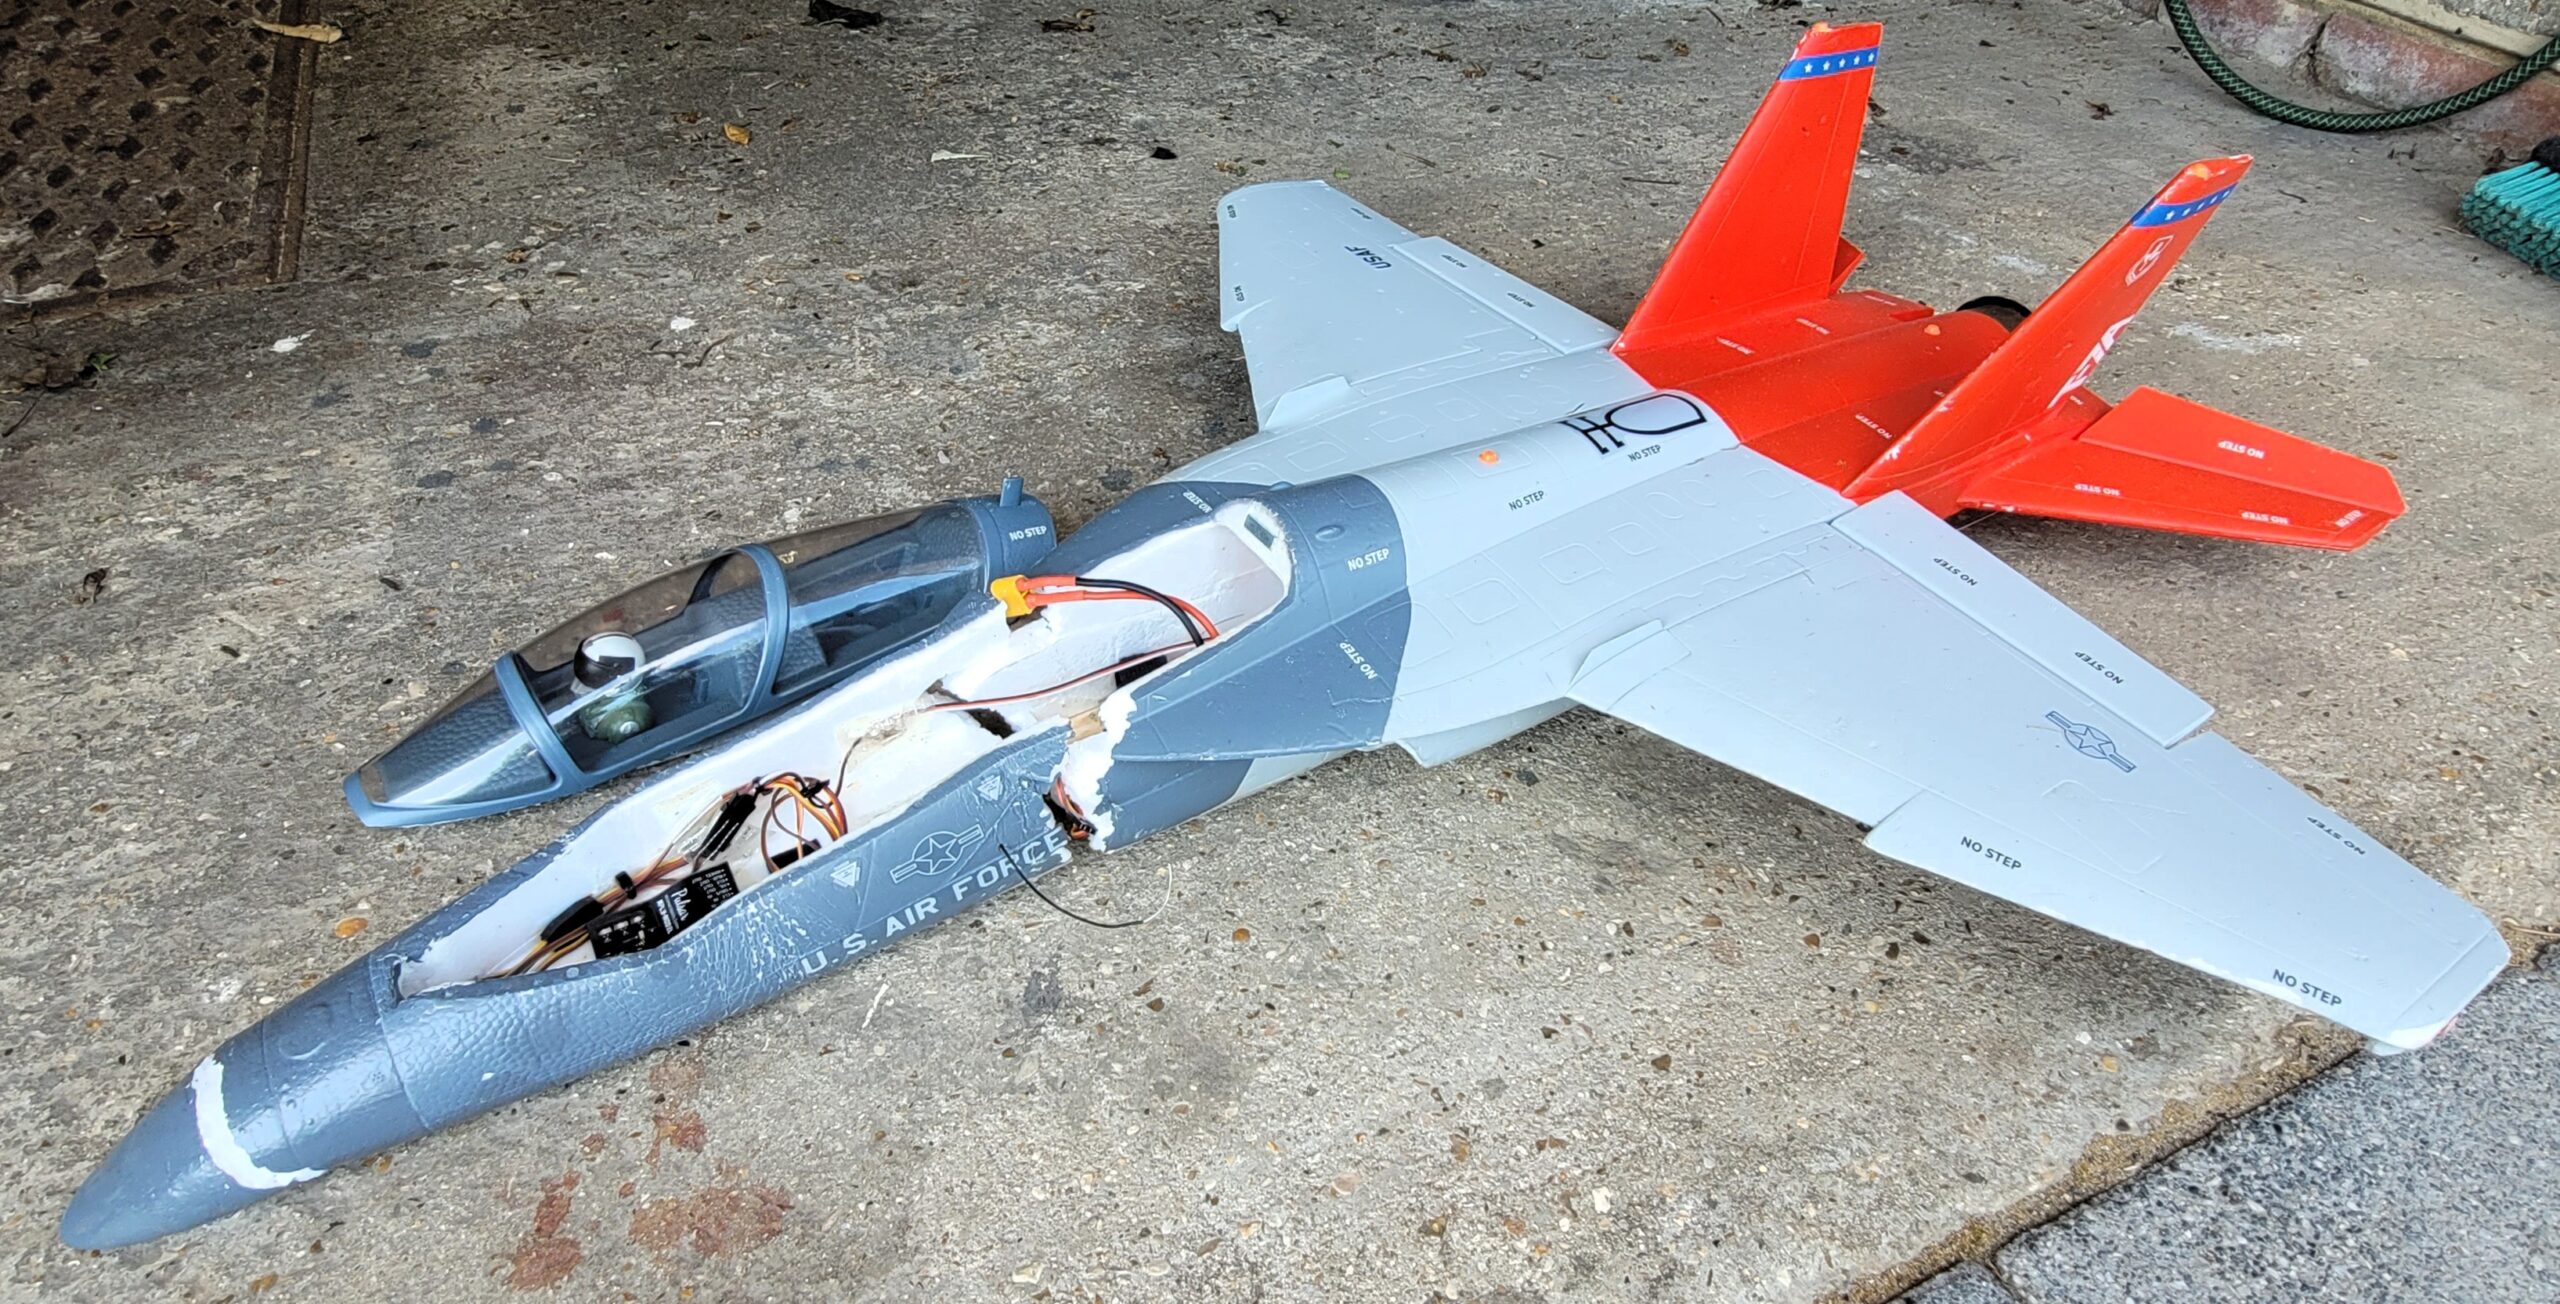
1066 was good enough to retrieve it for me and, although the nose is quite badly damaged, it is certainly repairable. I just need to put this laptop down and get round to doing it!
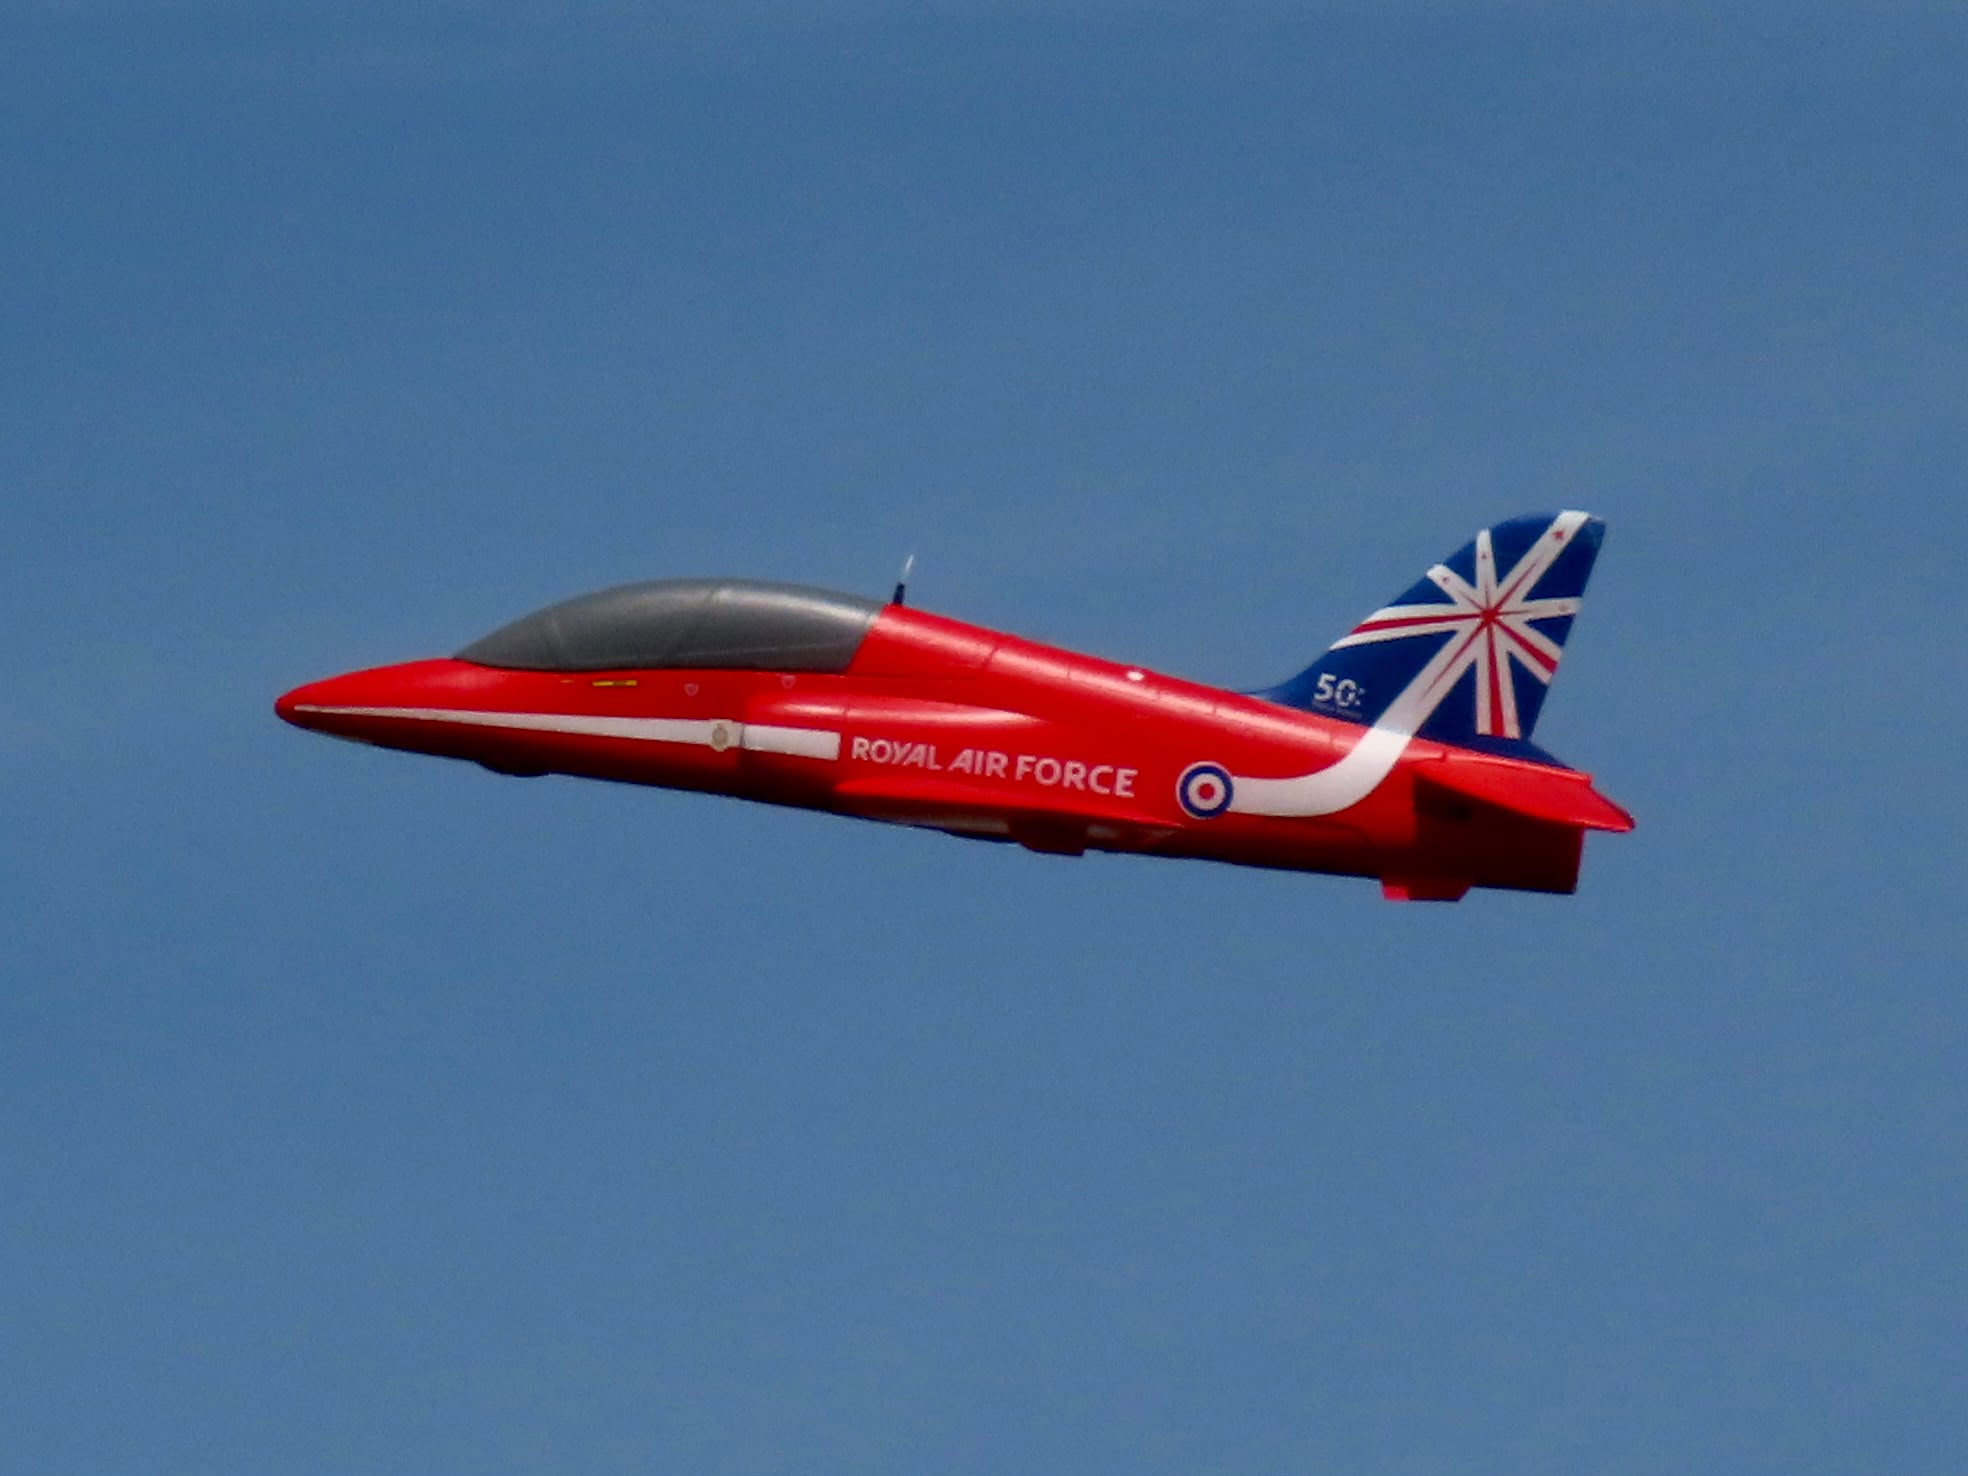
Did you know there is a full-size display team that flies electric powered aircraft? Yes, there really is, the NEBOair Electric Arrows! They aren’t quite in the same league as the Red Arrows, they are a team of just two and they fly a pair of Pipistrel Velis Electros.
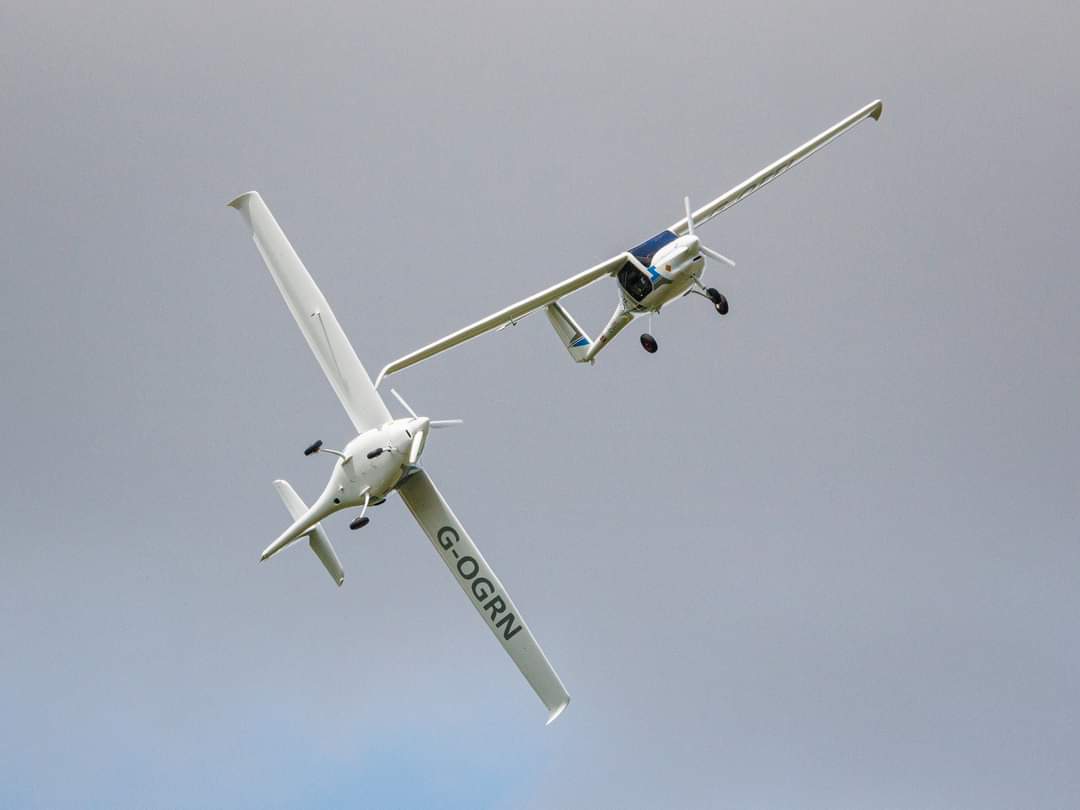
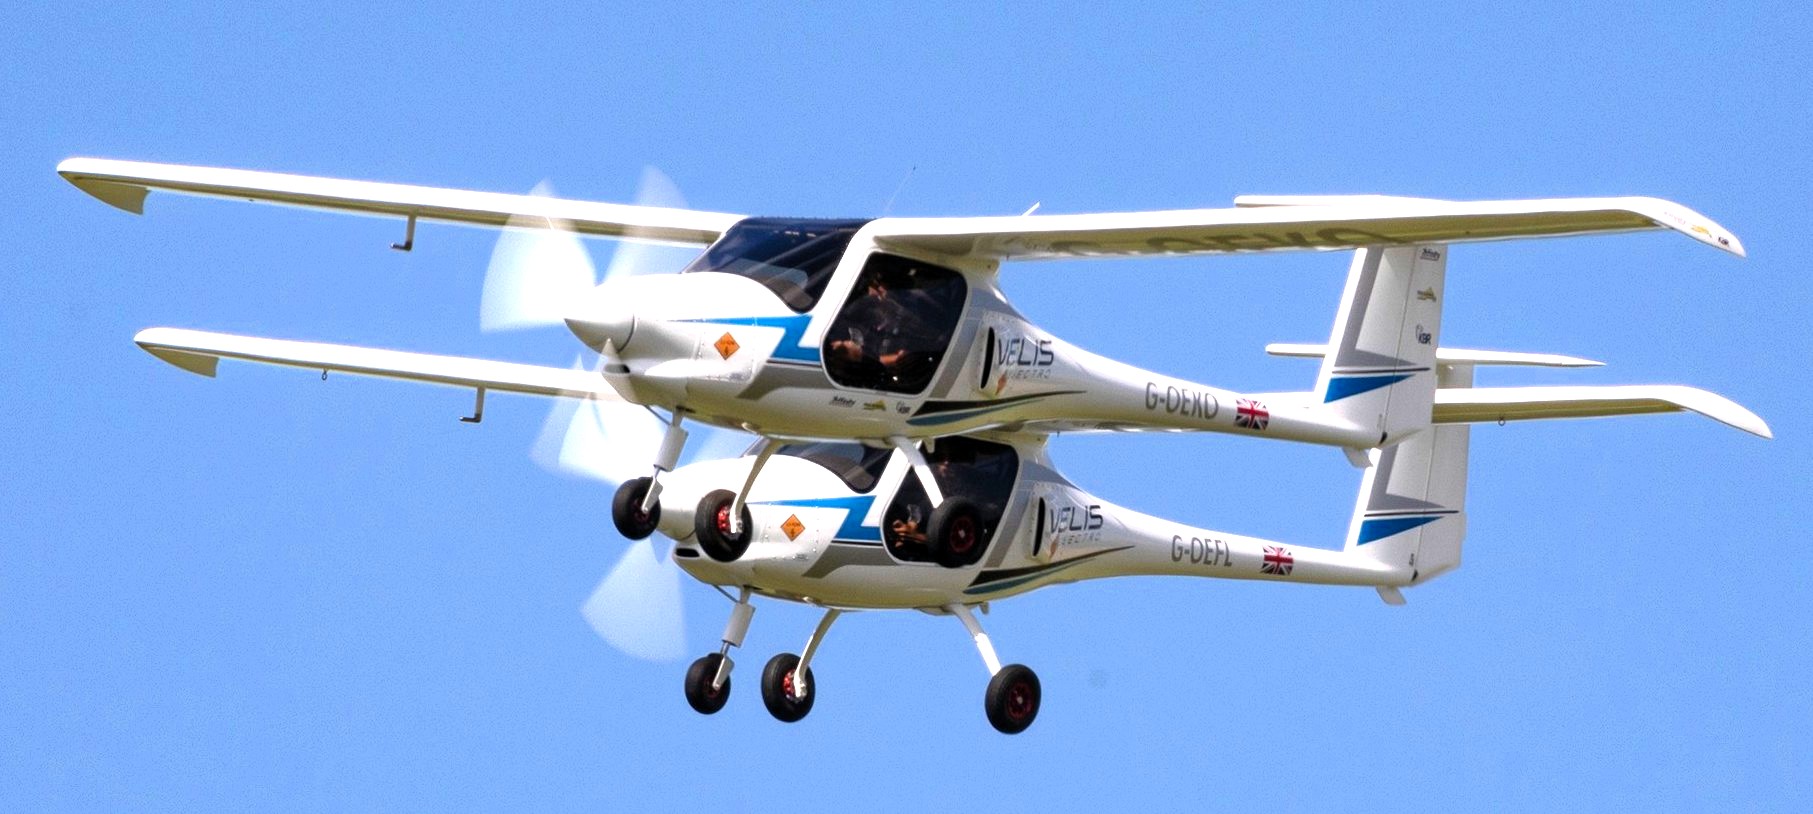 I found this on the Pipistrel website: This aircraft is world’s first electric powered airplane to receive a Type Certificate (EASA.A.573 TCDS). The two-seater, intended primarily for pilot training, is a game-changing aircraft in terms of technological innovations and cost-efficiency. Velis Electro can be operated commercially and is fully approved for pilot training as well as other operations. With its quietness, Velis Electro can bring flight training much closer to urban areas without adversely affecting communities’ quality of life. Unlike a start-up procedure of a conventionally powered airplane, the Velis Electro is powered-up by four switches and requires no warm-up time before take-off. This paradigm shift coupled with unprecedented quietness both inside the cockpit as well as from the outside, the Velis Electro truly is a game-changing aircraft to revolutionize your organization and empower a new generation of aviators.
As the last Patch News was published on 1stApril I felt obliged to include an April Fools story, something I do almost every year. Amazingly 1066 was the only member who definitely spotted it, some even said they looked for an April Fool’s joke but didn’t find it.
Well look, I said I wanted to build an RC model out of recyclable plastic yoghurt pots etc from the fridge that I would call Polar Fly. I explained that it was proving tricky so I’d abandoned the idea and had put it all in the recycling bin (which pleased my wife no end!) I ended the article with the words Adios Polar Fly, an anagram of April Fools Day!
Now come on you lot, you must try harder next year, I expect a whole lot better of you!
Take a look at some of the action shots from this month’s flying, all are from the video: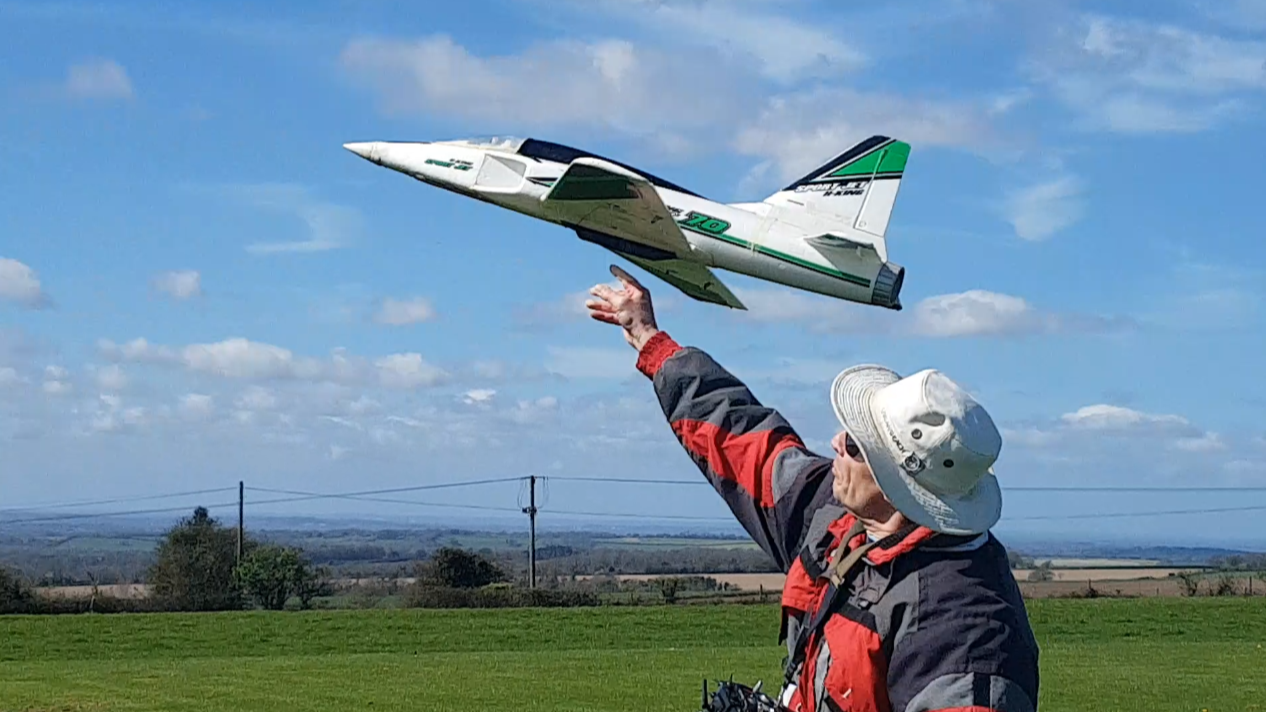
Video time now, with footage shot by me, Dougal Entendre, and MacFly.
Please watch the video full-screen, it’s so much better with small models flying around:
If the video won’t play for you please click HERE
The Final Funny:
The passengers boarded the plane which then took-off for a long flight over the Atlantic Ocean. The public address system came on with an important message for passengers.
“Ladies and Gentlemen, today we are introducing you to the latest and biggest aviation advancement in history. This plane is flying without either a pilot or co-pilot. Everything is controlled from the ground. by way of microwaves Sit back and relax and enjoy your flight. Be assured that absolutely nothing can go wrong…absolutely nothing can go wrong…absolutely can go wrong… nothing wrong, go wrong….wrong…”
Colin Cowplain
Patch News – March 2026
Hoorah, the weather is improving at last! It’s far from perfect but at least March did see lots of rain free days and even several days of sunshine. There were some misty starts early in the month which either prevented flying altogether or delayed flying by an hour or so. 
A couple of times during the month we switched flying from Sunday to Saturday to take advantage of better weather, which suited some more than others. Things went downhill again slightly towards the end of the month but overall March was pretty good.

 The warmer, drier weather meant that the grass started growing quickly again so on 11th March 1066, Woody, and I (the Trimming Trio?) went along and cut the patch. Woody and 1066 did a further cut on the last day of the month so the patch is in tip-top condition,
Several new models made the most of the improved weather and achieved their maiden flights. The first was Woody’s Lockheed SR-71 Blackbird that I featured in last month’s Patch News but at the time the bad weather had prevented Woody from flying it.
 That changed in March and the Blackbird finally flew, and it flew very well indeed. We knew from the Blackbird that Norwegian Nick built a couple of years ago that the Laddie Mikulasko design was good and Woody’s flew just as well as Nick’s, smooth and steady.
 It has loads of power and will climb almost vertically on full power but it’s easy to get disorientated at any sort of distance so it’s much more pleasant to throttle back and fly tightish circuits at low level. Good one Woody, it’s definitely one of your nicer models.
The building bug is still afflicting 1066 and over the past few weeks he’s built a Bitsa.
 A what I hear you ask? I’ll let him explain: If you read my article on the MX2 from last month, you will already have an impression that I have no shame in taking advantage of people’s generosity. This is nothing new, if you have been in the club long enough you will remember Steve Montague, Steve was one of those people who would throw everything at a new hobby. He also liked quality with most of his models being either 3D Hobby Shop, or Precision Aerobatics, and they were always fitted out with high quality electrics. So I’m sure you’re wondering what all this has to do with me?
Well, I think Steve is one of those guys who gets bored easily and is often looking for the next challenge, he is also very generous, just like our Mr Woody, so when he hinted he was thinking of selling anything, I was always the first sniffing around his shed, with the aim of making the most of his generosity, and hopefully separating him from his champagne models at lemonade prices. One of those models was a 48 inch 3DHS Extra.
 The Extra was a fantastic model to fly with no bad habits, as you would expect from this manufacturer, but such models can lead you to believe you are a better flyer than you actually are, so you start pushing things just a bit too much, which always ends in that inevitable crash. In the case of the Extra the fuz was destroyed, but the wings, tail, and rudder hardly had a scratch, so they were salvaged and put in the back of the shed.
After a couple of years I decided to make a profile fuz out of Art Card, I decided to base the outline on the Hobby king foam MX2 I had at the time (the same as Colin is currently flying). Unfortunately, between the time of the original crash and building the new fuz I lost the carbon wing joiner, so the project went on the back burner for another couple of years until I found a wing joiner. Sadly, my shed is just a bit damp in winter, and we all know what happens when paper gets damp! The next fuz I built, once again used Art Card, and the same outline, but this time the batteries, electrics etc would be housed inside. On this occasion I really wasn’t happy with the finished structure and put it to one side, only for history to repeat itself over the next winter. By the start of 2026 I decided the second fuz was only fit for the bin, but I didn’t want to bin the perfectly serviceable wings and tail parts, so fuz number three was born, still using the same outline, but this time it would be a balsa and ply construction, and revert to the original profile design.
 There isn’t a lot to say about the construction, I think the photos are self-explanatory.
 I came across a few problems, like how to make a simple wing retaining system which allowed easy removal of the wings for storage. I also wanted a sturdy undercarriage, none of the flimsy ARTF types we all moan about. As the build progressed I felt it was going to be tail heavy, so I mounted the wing about an inch further back than I had originally intended, which proved to be the correct decision, as it still needed the larger battery to balance. The model was finished with a red iron on film that I had already purchased, and luckily it was a good match for the original covering.
 The electrics were again sourced from AliExpress for under £50.00, this was a 3536 1250 KV motor, 2 x 17g, 2 x 9g metal gear digital servos, and a 60A Esc. The battery slot was made to take a 3 cell 3300mAh battery, mainly to get the CG in the correct position, finally a 10 x 5.5 prop seems to work perfectly keeping the current draw under 60A.
 I have now built and test flown three models this year, and all have been on mornings with poor visibility, but this one was the worst of all. Luckily the first flight was a non-event with almost no trim required, further flights showed some down and right thrust would improve things, and a bit of nose weight for the lighter batteries, but that was all.
 So to summarise, before COVID I broke a great model, I then failed to build two fuselages, but I didn’t give up on those wings and tail feathers, and six years later I have a very practical model that fits in the car fully assembled, has a lot of the doner models characteristics, and cost very little money, win, win, win. I can vouch for the fact that the Bitsa is an excellent flier and you can judge for yourselves in this month’s video.
In March Bob the Builder strapped an old Runcam video camera to the nose of his twin.
 Bob says the camera is an old 4k Runcam2 that has been very troublesome. He was about to chuck it away but decided to take it apart. He put the battery in while it was apart and it seemed to work ok, so he carefully reassembled it and it is still working. When Bob sent me the footage I was surprised by the quality so I’ve included some in this month’s video.
Dougal Entendre splashed out on a new EDF model in March, an F-16 Fighting Falcon.  Here’s what Dougal says about it: My HobbyKing Sportjet is getting old and battered now, so I thought I’d treat myself to a brand new EDF. AliExpress seems like a good place to go for this kind of thing, and I soon found a 70mm F16 for 4 cell 2200 packs.
 It was available as a PNP (just add Rx and battery) for less than £150 delivered but it’s gone up slightly now. It was advertised as having 6 servos, which seemed a bit excessive, but turned out to be 2 for the ailerons, 2 for the elevators, 1 for the rudder and 1 for the steerable fixed gear nosewheel. The undercarriage looked really ugly, so I decided to dispense with it, and removed the nosewheel servo to keep as a spare.
 Colin has the old HK F16 for 3S packs, which looks like it came out of the same mould. His has all-moving tailerons (and no ailerons) where mine has fixed tailplane halves.
 The fuselage on mine has painted plywood alignment plates stuck on at the tail root, to ensure you get the right amount of negative incidence on the tail.
 It seemed like an excessive angle, but I figured it was to counteract the extra weight of the 4S pack up front. The plane failed to get away from the first hand launch due to insufficient up elevator, but came down flat with no damage. Clearly all that tail incidence wasn’t quite enough! After dialling in full up trim it got away successfully, and handled really well once trimmed. The 4S pack gives it quite a turn of speed, but it can take a 2200 pack down to less than 30% in 3 minutes, so I’ve ordered some more packs to make sure I get plenty of airtime! For details on the AliExpress website click here: https://www.aliexpress.com/item/1005009290799312.html?spm=a2g0o.order_list.order_list_main.10.24af1802JFnxYa
The demo video of it is good, but I guess you get less than 2 minutes if you fly it like that! Click on the link above to watch the short demo video, it’s well worth a look, and then see Dougal’s flying in this month’s video. Incidentally the video is almost all maiden flights!
At my house we’re keen on recycling and Havant Council won’t accept many types of plastic in the green recycling bin, basically only plastic bottles. We have to take yoghurt pots, margarine tubs, and plastic trays etc from the fridge to a special bin at Asda in Waterlooville. Every time we have a load to take I think about trying to make a plane out of it, and this month I actually tested a glimmer of an idea, a delta type that I called Polar Fly.
The fuselage would be easy but the delta wing requires more thought, I haven’t yet figured out how to make it rigid enough without using lots of wood to brace it which rather defeats the object of the thing. So now it’s all gone to the bin, maybe next month… Adios Polar Fly!
Following some struggles with the P-51B Mustang that he had constructed from foamboard using the Flite Test plans Dwayne Pipe decided to build a balsa version.
 Here’s what Dwayne has to say about it: Having built and attempted to fly the foamboard P-51B (with not much success), I decided I liked the plane but not the foam design. When the foamboard model had its last flight, I decided to redesign the plane using the traditional balsa and plywood method, recycling the hardware from the previous model.
 I have designed and built a few models now, so it was out with the set square, paper and pencil (not forgetting the eraser). I designed the P-51D bubble canopy version, which I think looks better anyway, basing the shape on the Airfix model I have, but increased the wing area by about 30% to keep the wing loading down.
 The wings also have a small amount of washout, and the air foil section is based on a Tony Nijhuis Spitfire I built years ago with good glide and low speed performance. The design was finished by early January, and the build took from then until March.
 The first flight was better than all the flights of the previous model and apart from some tweaking of the down thrust and side thrust on the motor it needed little trimming out.
Specification
Wingspan 31.6 ins
All up weight 24 oz
30A speed controller pulling a 6×4 prop with max current of 19.8A
Battery 3s 1600mAh
Thanks Keith, it was good to see it flying so well. It is, of course, in the video.
Having recently ‘retired’ his JP F38 Hornet Delta Racer a slightly bruised MacFly bought himself a Durafly Tundra V3 “Inspire” which should suit him very well, a good all-rounder.
There are already a couple of Tundras in the club but MacFly’s is the first of the V3s.
 Here what HobbyKing say about it: After the incredible success of the Tundra V1 and V2, Durafly has decided to produce yet another version with even more improvements to bring the Tundra series bang up to date. The V3 is now a pure 4S set-up so it has power in abundance to make your flying even more fun than it was before (if that is at all possible!). Other changes and improvements include daylight bright LEDs (so bright they are suitable for true dawn-to-dusk flying), a reinforced nylon prop that is more efficient, and better balanced, a return to the classic EPO foam wheels which are lighter, and stronger, pre-installed pushrods, hex-head bolts and screws throughout.
 The V3 is available in the classic Tundra green and white scheme, or a red and silver colour scheme Durafly has called the “Inspire”. The reason is that the original Tundra was “Inspired” by the “Highlander” full-size SuperStol experimental airplane.
 The Tundra V3 also includes the revolutionary Aerostar RVS (reverse function system) G2 ESC, this ESC offers instantaneous reversing, so there is now no need to stop the prop before reversing. This makes it perfect when using the Tundra V3 on the water as a floatplane, but it is also great fun in the air, and really good for short landings, just ensure the prop is on nice and tight!! The tough EPO foam construction is beautifully finished, and being “Plug N Fly” the Tundra V3 is supplied with the powerful, and reliable Aerostar 3636-900KV brushless motor, the Aerostar RVS G2 40A ESC, and 6 high quality 9g servos. Retained from the V2 are the upgraded landing gear and fixings, vortex generators, improved wing connectors, and battery tray.
 MacFly asked me to do the test flight and all went well. The only slightly strange thing I found was that it needs rudder input as well as ailerons to turn nicely, maybe some differential aileron would help. But overall it’s a very nice easy flier and ideal for our field.
Mini Mike brought his new HobbyKing Viper 64 to the field for it’s first flight. Mike bought the model a couple of month’s ago but has been saving it (plucking up courage?).
 He also bought a couple of Turnigy BoltX LiHV 6S 2400mAh 22.8V 80C LiPo batteries to power the Viper. This is from the HobbyKing website: The H-King Viper 64 is affordable, very stable, and has predictable handling qualities, making it the ideal choice for your first venture into flying EDF jets. It has stunning looks, and the performance on its 6S set-up gives it a fantastic turn of speed and the ability to perform big, jet-style manoeuvres, this makes it also the perfect sports jet for the more experienced RC pilot.
  The H-King Viper 64 is based on a small two-seater homebuilt jet airplane designed by the Viper Aircraft Corporation in the States during the late 1990s. The durable, lightweight EPO airframe of the H-King Viper 64 combines strength with durability.
 This plus the powerful 6S set-up allows the Viper 64 to perform nice big loops, rolls, hesitation rolls, Immelmann’s, Cobras, Cuban-eights, and much, much more. At the other end of the scale, the low-speed handling is equally impressive, making the Viper as mentioned before the perfect choice for beginners to EDF flying. The included flaps and stylish winglets provide lift right down to very slow speeds allowing for perfectly controlled high alpha landings. The supplied sprung fixed landing gear is also simple, rugged, and uncomplicated, making it ideal for operating from grass-flying strips.
 This quick-to-assemble “Plug N Fly” version of the H-King Viper 64 EDF jet comes complete with a 6S compatible 2840-2300KV brushless motor, matched to a 64mm 12-blade fan unit, and a 45A LiPo/LiHV compatible brushless ESC, this gives an abundance of speed, thrust, and a realistic turbine-like sound. Then there are 8 x 9g servos pre-installed at the factory, two on ailerons, two on flaps, two on the separate elevators, one for the rudder, and one for the steerable nose-gear. The H-King Viper 64 is a great flying, great sounding, fast EDF jet with incredible stability that gives it that locked-in, rock-solid feel, it is the perfect choice for first-timers at EDF flying, or as a sport jet for the more experienced RC pilots. The Viper 64 also looks great as well, both in the air and on the ground, it’s guaranteed to turn the heads of all the pilots down at your local patch.
 I think I can safely say that everybody who watched the maiden flight was impressed, the Viper went very well, looked and sounded great, and Mini Mike obviously enjoyed flying it.
Take a look at some of the action shots from this month’s flying, all are from the video:


Video time now, with footage shot by me, Dot Cottam, Dougal Entendre, and MacFly. Please watch the video full-screen, it’s so much better with small models flying around:
If the video won’t play for you please click HERE
The final funny:
What’s the difference between a flying pig and a politician?
The letter F…
(Other politicians are available)!
Colin Cowplain